




















ATS518SW-P1183714WW Amana Refrigerator - Instructions
Keep searches simple. Use keywords, e.g. "leaking", "pump", "broken" or "fit".
Ice Maker leaking.
I watched the video regarding the instillation of this ice maker a few times and then followed it exactly. It was incredibly easy. We had ice cubes about two hours later and no longer had a leak making icebergs!
Parts Used:

-
Jeannine from Pontiac, IL
-
Difficulty Level:Really Easy
-
Total Repair Time:30 - 60 mins
-
Tools:Nutdriver
1 person
found this instruction helpful.
Was this instruction helpful to you?
Thank you for voting!
Replace Ice Maker
I have a Maytag Refridgerator with lower freezer and ice maker. Stopped making ice. Noticed the unit would fill up and freeze but the tray wouldn't rotate to drop the cubes into the tray. Cleared the frozen trays to see if it was just stuck but same thing happened. Replaced unit, not difficult with the exception that the top tray is ridiculously hard to get out. Never did do it, just worked around it. Working perfect now.
Parts Used:
-
Dan from LAVISTA, NE
-
Difficulty Level:Really Easy
-
Total Repair Time:30 - 60 mins
-
Tools:Nutdriver
1 person
found this instruction helpful.
Was this instruction helpful to you?
Thank you for voting!
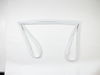
door gasket old and starting to come apart
removed upper freezer door, then removed refrig door,laid door on 2 saw horses, removed screws holding old gasket on,removed old gasket, installed new gasket as instructed by the on-line video,used an electric hair dryer to soften up gasket and work out the kinks,remounted he doors and i was done. door is back to sealing properly. the on-line video was very helpful
Parts Used:
-
james from FRIENDSHIP, NY
-
Difficulty Level:Really Easy
-
Total Repair Time:30 - 60 mins
-
Tools:Socket set
1 person
found this instruction helpful.
Was this instruction helpful to you?
Thank you for voting!
Ice tray was corroded and leaking
Removed top drawer from freezer. Unplugged the ice maker. Uncrewed the bottom screw. Loosened the two top screws. Removed old ice maker. Removed all the parts that didn't come with the new ice maker and installed on new ice maker. Reinstalled the new ice maker. Started making ice with no leaks in about 3 hours.
Parts Used:
-
Scott from SAN DIEGO, CA
-
Difficulty Level:Easy
-
Total Repair Time:30 - 60 mins
-
Tools:Nutdriver
1 person
found this instruction helpful.
Was this instruction helpful to you?
Thank you for voting!
broken hinge bearing on ice maker
Disconncted power, pulled plug on disconnect, loosened 3 ice maker attach screws, removed ice maker. carefully removed old broken part, to understand reasembly. Reinstalled new water fill & bearing part.. hung icemaker and tightened attach screws. Reattached electrical plug.. turned on power, it all worked. .took about 45 min to remove, 15 min to reinstall. Right tools needed re disassembly AND ASSEMBLY
Parts Used:

-
ROBERT from WESTFIELD, IN
-
Difficulty Level:Easy
-
Total Repair Time:30 - 60 mins
-
Tools:Nutdriver, Pliers, Screw drivers
3 of 7 people
found this instruction helpful.
Was this instruction helpful to you?
Thank you for voting!
Ice maker not making ice
Repair done according to video and instructions. What you need to know is myself and my husband are adverse to all kinds of "simple" repairs because they never go well and we are not handyman kind of persons. This, I must say, was a delightful change in our typical experience of attempting to make our own repairs.
Thanks
Sandy
Thanks
Sandy
Parts Used:
-
sandra from Scottsdale, AZ
-
Difficulty Level:Easy
-
Total Repair Time:30 - 60 mins
-
Tools:Wrench set
1 person
found this instruction helpful.
Was this instruction helpful to you?
Thank you for voting!
Fridge was dripping water (condensation), gasket was clearly deteriorated
I did not remove the door from the fridge deciding to replace the gasket while the door was still attached. Next time I will follow their suggestion to remove the door and lay it down. I didn't realize that when you take the screws out (And there are A LOT of screws!) the whole panel comes off the door. It also took a long time to clean the door and panel with years of dirt/mildew to deal with. I had a hard time trying to get the kinks out with a hair dryer, didn't seem to work. Putting the new one on and screwing it back in place was pretty easy (would have been easier if it was laying flat). There are a couple of places where the seal is not perfect because of the kinks, but not going to worry about that.
Parts Used:
-
Kathy from NEWARK, DE
-
Difficulty Level:A Bit Difficult
-
Total Repair Time:30 - 60 mins
-
Tools:Nutdriver
1 person
found this instruction helpful.
Was this instruction helpful to you?
Thank you for voting!
Ice maker broken. Quick fix
The plastic fill cup part is also used to hold one end of the wire “one/off” switch that is manually activated or activated when the ice tray is full. This wire piece fell out because one end, that is part of the plastic fill cup, broke off. The wire switch was fine.
The video demos show you exactly what to do. The repair man showed me a trick to speed up the testing process. The trick is to insert a wire jumper cable to actuate the ice maker and make it rotate. But this isn’t necessary.
Hardest part of this fix is emptying the freezer (bottom with a slide out door) and removing the door.
Why this part is so expensive is beyond me. But I’m happy it was available for a 24yo fridge that still works!!
The video demos show you exactly what to do. The repair man showed me a trick to speed up the testing process. The trick is to insert a wire jumper cable to actuate the ice maker and make it rotate. But this isn’t necessary.
Hardest part of this fix is emptying the freezer (bottom with a slide out door) and removing the door.
Why this part is so expensive is beyond me. But I’m happy it was available for a 24yo fridge that still works!!
Parts Used:
-
Tim from Berkeley, CA
-
Difficulty Level:Easy
-
Total Repair Time:1- 2 hours
-
Tools:Nutdriver, Screw drivers
1 person
found this instruction helpful.
Was this instruction helpful to you?
Thank you for voting!
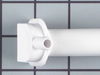
existing fill tube was leaking where the water line connected.
I found the instructions on line which seemed very simple but I soon learned otherwise. The instructions say to remove the water line and then firmly pull the fill tube out as it is a tight fit. I couldn't get the tube out and ended up removing the lower freezer door/tray, the upper tray and the icemaker where I found the water had frozen solid in the end of the tube. I used a hair dryer to melt the ice then I could easily remove the tube. After several attempts to install the new tube I finally inserted a 3/8" OD flex tube thru the passage then I was able to slide the new fill tube over this and get it in place. I then reinstalled the icemaker, upper tray and the door/tray assembly. Turned the water on the check for leaks then plugged the unit back in and all is working well.
Parts Used:
-
Ted from MORIAH, NY
-
Difficulty Level:Difficult
-
Total Repair Time:1- 2 hours
-
Tools:Nutdriver, Pliers
1 person
found this instruction helpful.
Was this instruction helpful to you?
Thank you for voting!
icemaker not working
-
Richard from Lake Wylie, SC
-
Difficulty Level:A Bit Difficult
-
Total Repair Time:30 - 60 mins
-
Tools:Socket set
1 person
found this instruction helpful.
Was this instruction helpful to you?
Thank you for voting!
The old unit had teflon flaking off into the ice
First i used a nut driver to remove the bottom screw, the unclipped the two top clips by leaningthe bottom of the unit outwards. I used a mirror to see the two top clips as i could not see inside. Then i removed the wiring harness from the refrigerator. The unit came right out, i transerred the needed parts, and re-installed. Not too bad - about 45 mins. It works great!
Parts Used:
-
Walter from Hampstead, NH
-
Difficulty Level:A Bit Difficult
-
Total Repair Time:30 - 60 mins
-
Tools:Nutdriver
1 person
found this instruction helpful.
Was this instruction helpful to you?
Thank you for voting!
Wouldn't make ice
unscrewed the 3 nuts, took off the electrical connection. Then put new one on. One problem, the ice maker had a hole on the side for the hose, mine needed one in the back. I used tape to hold it in place going over the part that was in the wrong place.
Parts Used:
-
Jacob from Garland, TX
-
Difficulty Level:A Bit Difficult
-
Total Repair Time:30 - 60 mins
-
Tools:Nutdriver
1 person
found this instruction helpful.
Was this instruction helpful to you?
Thank you for voting!
replace both door gasgets
did not remove the doors. did freezer first ,removed inner door planel install gasget on panel and reinstalled. the aloney problem i had was trying to resape the door gasget on the big door. which is still a little out of shape hopeing it will fall in line over time.
Parts Used:

-
ROBERT from SEEKONK, MA
-
Difficulty Level:Easy
-
Total Repair Time:30 - 60 mins
-
Tools:Nutdriver, Pliers
2 of 4 people
found this instruction helpful.
Was this instruction helpful to you?
Thank you for voting!
ice maker quit working
Since it was an older appliance I decided to replace the whole ice maker assembly. I carefully disassembled the old one and then installed the new one. piece of cake.
Parts Used:
-
Ted from Aurora, NC
-
Difficulty Level:A Bit Difficult
-
Total Repair Time:15 - 30 mins
-
Tools:Nutdriver
1 person
found this instruction helpful.
Was this instruction helpful to you?
Thank you for voting!
Simple to install -
Removed old icemaker by removing two hex screws and one phillip's head screw.
Disconnected power connection to refrigerator.
Removed power connection harness and ice level sensor arm/levor and cover from old ice maker and installed on new ice maker.
Re-installed in refrigerator. It was simple on this model.
Disconnected power connection to refrigerator.
Removed power connection harness and ice level sensor arm/levor and cover from old ice maker and installed on new ice maker.
Re-installed in refrigerator. It was simple on this model.
Parts Used:
-
John from Lake Worth, FL
-
Difficulty Level:Easy
-
Total Repair Time:15 - 30 mins
-
Tools:Nutdriver, Screw drivers
1 person
found this instruction helpful.
Was this instruction helpful to you?
Thank you for voting!