




















ARR600P8587701S Amana Range - Instructions
Keep searches simple. Use keywords, e.g. "leaking", "pump", "broken" or "fit".
The surface burner socket that the burner plugs into melted.
Cut the old wires off, removed the screw holding the clamp, installed the new parts. Problems I encountered were the wire nuts. They were too small for the wire gage of the replacement part and the original oven. I had larger wire nuts in my workshop. Also, why so many extra parts like the shrink wrap tubing, two metal clamps to hold the socket, etc.
Parts Used:

-
Gary from Chesapeake, VA
-
Difficulty Level:Easy
-
Total Repair Time:Less than 15 mins
-
Tools:Screw drivers
Was this instruction helpful to you?
Thank you for voting!
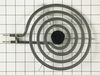
burned out coil
Simply slide out old coil by lifting cooktop pan; position new coil electirc elements in oven slots, slowly push in, then push coil tab into slot in pan for balance. No problems
Parts Used:
-
L from Richardson, TX
-
Difficulty Level:Really Easy
-
Total Repair Time:Less than 15 mins
Was this instruction helpful to you?
Thank you for voting!
burner would not heat up the connection was bad
loosened the screw holding the block pulled it out toget to wire cut it about 4 inches long followed the inst.with block kit and it was a breeze. burner working fine now should have did it sooner.
Parts Used:
-
Earl from Union Mills, NC
-
Difficulty Level:Really Easy
-
Total Repair Time:Less than 15 mins
-
Tools:Screw drivers
Was this instruction helpful to you?
Thank you for voting!
Old burner stopped working right.
Was able to unplug the old burner and plug the new one in. Very easy.
Parts Used:
-
Paulette J. from Connell, WA
-
Difficulty Level:Really Easy
-
Total Repair Time:Less than 15 mins
Was this instruction helpful to you?
Thank you for voting!
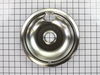
I needed to replace to two 8* drip bowls on the kitchen range
(a) I took out (and threw away) two stained 8* chrome drip bowls on my kitchen range; (b) ti put in two new 8" chrome drip bowls on my kitchen range. I'm pleased that I was equal to the task.
Parts Used:
-
Dallas from Arlington, TX
-
Difficulty Level:Really Easy
-
Total Repair Time:Less than 15 mins
Was this instruction helpful to you?
Thank you for voting!
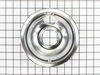
Burner coil was falling apart.
-
Mary Kay from North Charleston, SC
-
Difficulty Level:Really Easy
-
Total Repair Time:Less than 15 mins
Was this instruction helpful to you?
Thank you for voting!
Burner was slow heating at times. Moved back burner to front still same thing.
Unscrewed screw holding bracket. Used side cutters to cut wires. Replaced the bracket, put the shrink wrap on wires, twisted wires together and held with wire caps. Shrunk the wrap with lighter. I'm a 67 year old female.. No problems.
Parts Used:
-
Gail M from Lockport, NY
-
Difficulty Level:Really Easy
-
Total Repair Time:Less than 15 mins
-
Tools:Screw drivers
Was this instruction helpful to you?
Thank you for voting!
Burner not working
I took the burner out of the box and snapped it into the slots on the stove, turned on the stove and made dinner! By the way, I received it in 2 days, which was great. I will recommend your company to others and purchase all of my appliance replacement parts from Parts Select. The Norton Service Guarantee was awesome!! Thank you.
Parts Used:
-
Margaret from North Miami Beach, FL
-
Difficulty Level:Really Easy
-
Total Repair Time:Less than 15 mins
Was this instruction helpful to you?
Thank you for voting!
My burner element had broken.
I ordere the new burner element. It arrived quickly compared to some of the things I order. I removed the broken burner element and plugged in the new one and that was all that was needed. It feels pretty good to have that burner working properly again.
Parts Used:
-
Mary from Hastings, FL
-
Difficulty Level:Really Easy
-
Total Repair Time:Less than 15 mins
Was this instruction helpful to you?
Thank you for voting!
old drip bowl was worn out
-
Richard from Germantown, MD
-
Difficulty Level:Really Easy
-
Total Repair Time:Less than 15 mins
Was this instruction helpful to you?
Thank you for voting!
the old bowls were burned.
-
Rosibel from Houston, TX
-
Difficulty Level:Really Easy
-
Total Repair Time:Less than 15 mins
Was this instruction helpful to you?
Thank you for voting!
Dirty drip bowl
-
Paul from Carnegie, PA
-
Difficulty Level:Really Easy
-
Total Repair Time:Less than 15 mins
Was this instruction helpful to you?
Thank you for voting!
I wanted to purchase new drip pans, since those that I have are a bit grimy
I will begin by saying that not only will I continue to order my parts from PartsSelect, but I also highly recommend this business. If you call Whirlpool be careful that they forward your call for parts to some preferred vendor, which a customer might assume is Whirlpool but it is not. PartsSelect is the same type of business, but with outstanding customer service. With regard to the drip pan, Whirlpool had not updated the part number for these as I found out when i called them. Whirlpool no longer uses the drip pans without the holes which is a serious problem since this could be hazardous to the owners of these ranges if you are forced to purchase the drip pans with the holes in them. That said, I ended up keeping my old drip pans, because if you spill grease under the new ones with the holes in them and since the range design with the fan built in on the top does not allow you to lift the top to clean under the pans, you could end up with a grease fire. This is not the fault of PartsSelect and they handled my order in a manner that I would give them a rating of exceptional for customer service.
Parts Used:
-
Hedy from Richmond, VA
-
Difficulty Level:Really Easy
-
Total Repair Time:Less than 15 mins
Was this instruction helpful to you?
Thank you for voting!
Original Burner always loose from support
For YEARS we put up with the old burner coming loose from support after cleaning. When one burner began to be intermittant, we purchased a replacement from Parts Select. Perfect fit AND much better made as the support and burner are held together in more places. We quickly purchased another to replace the other 8 in burner that had same problem but was working fine. New burners work and fit great.
Parts Used:
-
William from Mint Hill, NC
-
Difficulty Level:Really Easy
-
Total Repair Time:Less than 15 mins
Was this instruction helpful to you?
Thank you for voting!
Oven lower element
Description of the element indicated that it would work for the oven burner. However, it obviously was meant for the broiler element. I had to remove the thin metal piece with the attachment holes in it (the holes didn't match the holes in the back of the oven). To install I had to drill two holes in the remaining attachment flange to match the holes on the back of the oven. Then I made three metal supports out of sheet metal to hold the element up approximately 1 1/2" off of the bottom of the oven. Just thankful to find one that I could make work. Oven works fine now. LF
Parts Used:

-
Lawrence from South Fork, CO
-
Difficulty Level:Really Easy
-
Total Repair Time:15 - 30 mins
-
Tools:Pliers, Screw drivers
Was this instruction helpful to you?
Thank you for voting!