




















ARR101W (P8545001S) Amana Range - Instructions
Keep searches simple. Use keywords, e.g. "leaking", "pump", "broken" or "fit".
Screw hard to get off
Drilled a pilot hole with a 1/16 th drill bit and tapped off screw head.
Parts Used:

-
Lawrence from BROOKSVILLE, FL
-
Difficulty Level:A Bit Difficult
-
Total Repair Time:30 - 60 mins
-
Tools:Screw drivers
2 of 2 people
found this instruction helpful.
Was this instruction helpful to you?
Thank you for voting!
Used part
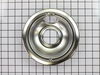
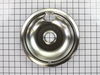
Lift burners out of plug discard old drip pans replace new drip pans into plugs and done .
Parts Used:
-
Sabrina from FREMONT, CA
-
Difficulty Level:Very Easy
-
Total Repair Time:Less than 15 mins
2 of 3 people
found this instruction helpful.
Was this instruction helpful to you?
Thank you for voting!
burner inop
removed the plug that had burned up on one of the top burners, replaced it with a new plug purchased from parts select., it was quite easy ,I unpluged stove and raise the top exposing wiring for the burners cut the old plug wiring and connected the wires for the new plug with connectors and shrink tubing supplied in the repair kit easy and quick repair
Parts Used:
-
Donald from Milford, MI
-
Difficulty Level:Easy
-
Total Repair Time:Less than 15 mins
-
Tools:Screw drivers
2 of 3 people
found this instruction helpful.
Was this instruction helpful to you?
Thank you for voting!
Broiler Replacement
Oven was missing the broiler element when I moved in so the connector/wires to plug the broiler were no longer visable in the main part of the oven (otherwise the repair would take 2 minutes). Moved oven away from wall and unplugged. Unscrewed sheet metal on the back of oven and found the broiler wires (the only two NOT connected to something). Fed the wires back into the oven and plugged in the broiler. Attached the broilers to the top hooks. Put sheet metal back on. Everything worked fine. I wouldn't say I know much about fixing things, but this was a very straight-forward job.
Parts Used:

-
Nick from Cottonwood Heights, UT
-
Difficulty Level:Easy
-
Total Repair Time:15 - 30 mins
-
Tools:Pliers, Screw drivers
2 of 3 people
found this instruction helpful.
Was this instruction helpful to you?
Thank you for voting!
Couldn't find correct drip bowls that fit.
Removed old drip bowls, removed burners installed new drip bowls,installed burners. They fit perfect and I received them two days after ordering.
Parts Used:
-
Lowell from Hardin, KY
-
Difficulty Level:Really Easy
-
Total Repair Time:Less than 15 mins
2 of 4 people
found this instruction helpful.
Was this instruction helpful to you?
Thank you for voting!
The old drip bowls were rusting, no chrome left
Took the old ones out and put in the new ones! What I am so pleased about it that I just went online and at Parts Select website it was easy to find what I needed, a fair price and the 4 bowls arrived within 2 days!
Parts Used:
-
kathryn from piqua, OH
-
Difficulty Level:Really Easy
-
Total Repair Time:Less than 15 mins
3 of 7 people
found this instruction helpful.
Was this instruction helpful to you?
Thank you for voting!
Drip pans were old and with burnt on food that I couldn't get off. Disgusting!!
-
Nicki from ELSIE, NE
-
Difficulty Level:Very Easy
-
Total Repair Time:Less than 15 mins
1 person
found this instruction helpful.
Was this instruction helpful to you?
Thank you for voting!
None
Unplugged the stove, unscrewed the two screws, unplugged the element....plugged in the new element, screwed to top of stove, plugged stove back in and tested. Pizza was great!
Parts Used:
-
Bradley from Neillsville, WI
-
Difficulty Level:Very Easy
-
Total Repair Time:Less than 15 mins
-
Tools:Screw drivers
1 person
found this instruction helpful.
Was this instruction helpful to you?
Thank you for voting!
N/A
-
Gerry from Mackay, ID
-
Difficulty Level:Really Easy
-
Total Repair Time:15 - 30 mins
-
Tools:Screw drivers
1 person
found this instruction helpful.
Was this instruction helpful to you?
Thank you for voting!
Drip Pans were stained and burned on.
Replaced drip pan. Notch did not want to match the burner notch. Was a close fit bit with a little pressure made it work.
Parts Used:
-
Sandra Collignon from SANTA CLAUS, IN
-
Difficulty Level:Really Easy
-
Total Repair Time:30 - 60 mins
1 person
found this instruction helpful.
Was this instruction helpful to you?
Thank you for voting!
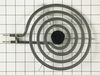
element burned out shortly after purchase of range, one was purchased locally and did not fit properly, causing element to burn out
-
Sue from INDIANOLA, MS
-
Difficulty Level:Really Easy
-
Total Repair Time:30 - 60 mins
1 person
found this instruction helpful.
Was this instruction helpful to you?
Thank you for voting!
Stove burner burned out
Very helpful customer service Lady.
Helped me select the corect burner replacement.
And helped me get it ordered.
Repair went very well.
I recomend Parts Select if you need parts for.
Helped me select the corect burner replacement.
And helped me get it ordered.
Repair went very well.
I recomend Parts Select if you need parts for.
Parts Used:
-
Ben from MONTICELLO, UT
-
Difficulty Level:Very Easy
-
Total Repair Time:Less than 15 mins
1 person
found this instruction helpful.
Was this instruction helpful to you?
Thank you for voting!
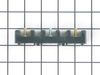
I snapped a bolt on the main power terminal block when connecting the pigtail.
Removed the small metal panel covering the main power terminal in back of the electric range. Removed the nuts holding the red, white and black electrical wires from the range using the appropriate socket (there will be two nuts on each bolt end). Removed the two screws holding the main power terminal block with appropriate screw driver. Connect the new main power terminal block to the range using the two screws. Reconnect the red, black and white electrical wires coming from the range using one nut for each wire. IMPORTANT: do no over tighten the nuts because the bolts could snap. Reconnect the pigtail and secure the small metal panel covering the main power panel.
Parts Used:
-
Frank from Palm Coast, FL
-
Difficulty Level:Easy
-
Total Repair Time:15 - 30 mins
-
Tools:Screw drivers, Socket set
3 of 8 people
found this instruction helpful.
Was this instruction helpful to you?
Thank you for voting!
The Problem Was That The Plug Was Gone It Fell Down Out Of The Bracket
I took the old wires and plug off and replaced it with the new block it works fine
Parts Used:
-
Elnora from Brundidge, AL
-
Difficulty Level:Easy
-
Total Repair Time:15 - 30 mins
-
Tools:Screw drivers
1 of 2 people
found this instruction helpful.
Was this instruction helpful to you?
Thank you for voting!
Sockets burnt out.
Repair was very east. The suppliers package had all of the necessary parts ceramic wire nuts wire Ect. Excellent.
Will buy from Part Select Appliance again.
Will buy from Part Select Appliance again.
Parts Used:
-
James from Bear, DE
-
Difficulty Level:Really Easy
-
Total Repair Time:15 - 30 mins
-
Tools:Screw drivers
1 of 2 people
found this instruction helpful.
Was this instruction helpful to you?
Thank you for voting!