




















ALY2280ADQ Amana Range - Instructions
Keep searches simple. Use keywords, e.g. "leaking", "pump", "broken" or "fit".
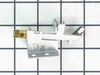
owen would not light because the coupler was not mounted right
-
ray from azle, TX
-
Difficulty Level:Really Easy
-
Total Repair Time:Less than 15 mins
-
Tools:Screw drivers, Wrench set
1 of 4 people
found this instruction helpful.
Was this instruction helpful to you?
Thank you for voting!
The burner would not lite. There was an intermittent spark from that burner.
Your site was easy to navigate, which made determining the problem from other customers easy, and choosing the correct part to replace the malfunctioning burner.
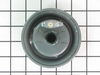
The malfunctioning burner was easy to remove by twisting it a quarter turn counter clockwise, removing the two wires and replacing it with the new burner cap with electrode.
The malfunctioning burner was easy to remove by twisting it a quarter turn counter clockwise, removing the two wires and replacing it with the new burner cap with electrode.
Parts Used:
-
Dennis from Wheaton, IL
-
Difficulty Level:Really Easy
-
Total Repair Time:Less than 15 mins
1 of 4 people
found this instruction helpful.
Was this instruction helpful to you?
Thank you for voting!
the old had rust out and gas was sipping from the side
I removed the old burner with pliers took off the electrodes. Replace the new burner attach the electrodes placed it back in the burner slot and now it works.
Parts Used:
-
Corliss from Oakland, CA
-
Difficulty Level:Really Easy
-
Total Repair Time:Less than 15 mins
-
Tools:Pliers
Was this instruction helpful to you?
Thank you for voting!
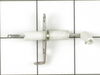
broken insulator for top burner igniter
I have a Magic Chef gas stove, The top burner came off with ease, just a quarter turn then pull up to expose igniter. Only two wires to remove and two phillips head screws to remove to release igniter. I was done in 5 minutes.
Parts Used:
-
Paul from Block Island, RI
-
Difficulty Level:Really Easy
-
Total Repair Time:Less than 15 mins
-
Tools:Screw drivers
Was this instruction helpful to you?
Thank you for voting!
power boost burner went up and all my burners got very rusty on the underneathe side
We were at a loss for a long time without my boost burner and then while checking all the rest of the burners my husband discovered that all of them had a massive amount of rust on the underneathe side of the burners and that worried me. Well as usual my husband took care of my worries when he discovered Parts Select. We both were pleasantly surprised when we found out that you had what we needed. And the installation was less than 5 minutes, WOW, THAT WAS GREAT! Thanx a million!
Parts Used:
-
Michael from Aberdeen, MD
-
Difficulty Level:Really Easy
-
Total Repair Time:Less than 15 mins
Was this instruction helpful to you?
Thank you for voting!
Lost on of the Rubber Grommet holding the stove grate
So simple would be embarrassed to give any instructions; it is so self evident.
Parts Used:

-
Martin from Millersburg, MI
-
Difficulty Level:Really Easy
-
Total Repair Time:Less than 15 mins
Was this instruction helpful to you?
Thank you for voting!
the top broke away it was corroded
use the pliers. to get. the remaining half off and the screwdriver to cleen the rest of the rust off
Parts Used:
-
Thomas from Floral park, NY
-
Difficulty Level:Easy
-
Total Repair Time:Less than 15 mins
-
Tools:Pliers, Screw drivers
Was this instruction helpful to you?
Thank you for voting!
Burner flame was poor and yellow flames left sute marks on pots and pans
twist old burner and lift out disconnect two wires throw away gasket (if there is one left) connect two wires to new burner set in and twist till tight total time 45 seconds
Parts Used:
-
Jeff from Oconto Falls, WI
-
Difficulty Level:Really Easy
-
Total Repair Time:Less than 15 mins
Was this instruction helpful to you?
Thank you for voting!
Wore out burner and igniter
-
Bruce from Vashon, WA
-
Difficulty Level:Really Easy
-
Total Repair Time:Less than 15 mins
-
Tools:Screw drivers
Was this instruction helpful to you?
Thank you for voting!
Old burner's flame was coming out below the burner.
1/4 turn counter clockwise to remove the old burner, removed wires. Placed wires on new burner tightened them with pliers,dropped it in, 1/4 turn clockwise--done!
Parts Used:
-
Wayne from Midwest City, OK
-
Difficulty Level:Really Easy
-
Total Repair Time:Less than 15 mins
-
Tools:Pliers
Was this instruction helpful to you?
Thank you for voting!
Replacement of top burner igniter
Twisted and lifted off the burner, loosened in a previous repair; removed electrical wires from igniter; undid two screws holding igniter in place; rotated igniter 90 degrees and lifted it out; reversed process with new igniter.3
Parts Used:
-
Godfrey from Las Cruces, NM
-
Difficulty Level:Really Easy
-
Total Repair Time:Less than 15 mins
-
Tools:Screw drivers
Was this instruction helpful to you?
Thank you for voting!
burner rusted flames coming out the side of the burner
turned the old burner to the left and lifted it out. unpluged the wires with a screwdriver pluged the wires into the new burner and putit back on the stove and turned it to the right
Parts Used:
-
Lewis from Tomahawk, KY
-
Difficulty Level:Really Easy
-
Total Repair Time:Less than 15 mins
-
Tools:Screw drivers
Was this instruction helpful to you?
Thank you for voting!
Bottm Of Burner Rusted Out
Took my right hand twisted burner off unplug wires pluged them back into new burner and put burner back on done 3 mins tops.
Parts Used:
-
Paul from Oxford, MA
-
Difficulty Level:Really Easy
-
Total Repair Time:Less than 15 mins
Was this instruction helpful to you?
Thank you for voting!
Igniter not working
Removed old igniter. Porcelain was broken. Replaced with new igniters. Really simple to do. Took 10 minutes to replace all 4
Parts Used:
-
Casey from Soledad, CA
-
Difficulty Level:Really Easy
-
Total Repair Time:Less than 15 mins
-
Tools:Screw drivers
Was this instruction helpful to you?
Thank you for voting!
Flame coming from under burner cap
Unplug power, put strap wrench around burner cap and turn counter clockwise 1/4 turn, remove 2 wires, installed in reverse.took less than 5 minutes.
Parts Used:
-
Tom from Fenton, MI
-
Difficulty Level:Really Easy
-
Total Repair Time:Less than 15 mins
Was this instruction helpful to you?
Thank you for voting!