




















ALY1680ADQ Amana Range - Instructions
Keep searches simple. Use keywords, e.g. "leaking", "pump", "broken" or "fit".
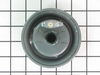
Old burner's flame was coming out below the burner.
1/4 turn counter clockwise to remove the old burner, removed wires. Placed wires on new burner tightened them with pliers,dropped it in, 1/4 turn clockwise--done!
Parts Used:
-
Wayne from Midwest City, OK
-
Difficulty Level:Really Easy
-
Total Repair Time:Less than 15 mins
-
Tools:Pliers
Was this instruction helpful to you?
Thank you for voting!
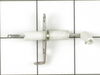
Replacement of top burner igniter
Twisted and lifted off the burner, loosened in a previous repair; removed electrical wires from igniter; undid two screws holding igniter in place; rotated igniter 90 degrees and lifted it out; reversed process with new igniter.3
Parts Used:
-
Godfrey from Las Cruces, NM
-
Difficulty Level:Really Easy
-
Total Repair Time:Less than 15 mins
-
Tools:Screw drivers
Was this instruction helpful to you?
Thank you for voting!
burner rusted flames coming out the side of the burner
turned the old burner to the left and lifted it out. unpluged the wires with a screwdriver pluged the wires into the new burner and putit back on the stove and turned it to the right
Parts Used:
-
Lewis from Tomahawk, KY
-
Difficulty Level:Really Easy
-
Total Repair Time:Less than 15 mins
-
Tools:Screw drivers
Was this instruction helpful to you?
Thank you for voting!
Broke the insulator on the ignitor while cleaning the cooktop.
Unscrew the bottom cover, remove the old ignitor. Reverse the process to install. Hardest part was getting the bottom cover screws out because of rust. Otherwise, very simple.
Parts Used:
-
David from Shelley, ID
-
Difficulty Level:Really Easy
-
Total Repair Time:30 - 60 mins
-
Tools:Screw drivers
Was this instruction helpful to you?
Thank you for voting!
2 burners rusted apart, 1 gas valve frozen up.
Removed burner pan screws,igniters, gas tubes & burners. Changed 2 igniters, removed rust & repainted ends of 2 of the tubes (heatproof paint). New burners were made a hair smaller than original but locked in O.K...Now, the hard part...disconnected all four tubes from gas valve assembly. (Had to shut off gas to house in order to remove main gas line to stovetop.) Had to remove valve box in order to remove/replace frozen valve. Unit is 25 years old, works as and looks new...Rust was caused by boil-overs.
Parts Used:
-
robin from saint marys, GA
-
Difficulty Level:A Bit Difficult
-
Total Repair Time:1- 2 hours
-
Tools:Nutdriver, Screw drivers, Wrench (Adjustable)
Was this instruction helpful to you?
Thank you for voting!
Burner igniter was not lighting the pilot. Needed replacement.
We replaced 3 of 4 igniters on the stove top according to the previously submitted recommendations. Easy to do butt after putting one of the modules back together, we found one igniter still didn't function. We discovered the solution was to run the connecting wire under the gas tubing. Apparently it was compressed when it was over the top of the tube and not under it.
Parts Used:
-
Arthur from South Burlington, VT
-
Difficulty Level:Easy
-
Total Repair Time:30 - 60 mins
-
Tools:Screw drivers
Was this instruction helpful to you?
Thank you for voting!
repair range burner
-
ZHENG from PINOLE, CA
-
Difficulty Level:Really Easy
-
Total Repair Time:15 - 30 mins
-
Tools:Pliers
Was this instruction helpful to you?
Thank you for voting!
Wore out burner and igniter
-
Bruce from Vashon, WA
-
Difficulty Level:Really Easy
-
Total Repair Time:Less than 15 mins
-
Tools:Screw drivers
Was this instruction helpful to you?
Thank you for voting!
Gas blowing out from under burners
As the video said, twist burner to the counterclockwise 1/8 turn. Lift the burner straight up. Disconnect the two wires. Remove the burner and reconnect the wires ( they only go one way so they cannot be connected backwards.) Place the burner over the gas fitting and turn the burner clockwise until snug. I turned the power off at the circuit breaker box. The video was extremely helpful.
Parts Used:
-
Dean from Mobile, AL
-
Difficulty Level:Really Easy
-
Total Repair Time:Less than 15 mins
-
Tools:Pliers
Was this instruction helpful to you?
Thank you for voting!
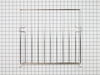
second oven rack
I was very impressed with the ease in ordering the part, and the speed of delivery. All I needed was a second oven rack so that when I bake cookies, I can bake two trays instead of one, I get done in half the time now. Thank you Part Select!!!
Parts Used:
-
Donna from Bushnell, FL
-
Difficulty Level:Really Easy
-
Total Repair Time:Less than 15 mins
Was this instruction helpful to you?
Thank you for voting!
Burners won't light up
We received the burners we ordered in timely manner, and it was very easy to install. Just unhook the old burners and drop the new ones in and connect.
Parts Used:
-
Bhavni from Richmond, TX
-
Difficulty Level:Really Easy
-
Total Repair Time:Less than 15 mins
-
Tools:Pliers
Was this instruction helpful to you?
Thank you for voting!
Rubber grommet for stove top cover
I ordered the grommet... Didn't match the others ... But it fit on , and will do the job
Parts Used:
-
Lisa from Plymouth, MA
-
Difficulty Level:Really Easy
-
Total Repair Time:Less than 15 mins
Was this instruction helpful to you?
Thank you for voting!
Burner flame was poor and yellow flames left sute marks on pots and pans
twist old burner and lift out disconnect two wires throw away gasket (if there is one left) connect two wires to new burner set in and twist till tight total time 45 seconds
Parts Used:
-
Jeff from Oconto Falls, WI
-
Difficulty Level:Really Easy
-
Total Repair Time:Less than 15 mins
Was this instruction helpful to you?
Thank you for voting!
the top broke away it was corroded
use the pliers. to get. the remaining half off and the screwdriver to cleen the rest of the rust off
Parts Used:
-
Thomas from Floral park, NY
-
Difficulty Level:Easy
-
Total Repair Time:Less than 15 mins
-
Tools:Pliers, Screw drivers
Was this instruction helpful to you?
Thank you for voting!
original grommets broken
The new grommets were NOT the correct parts, too big, so there was no repair.
Parts Used:
-
William from Richwood, OH
-
Difficulty Level:Very Difficult
-
Total Repair Time:More than 2 hours
Was this instruction helpful to you?
Thank you for voting!