




















AFB2534DEW Amana Refrigerator - Instructions
Keep searches simple. Use keywords, e.g. "leaking", "pump", "broken" or "fit".
Ice Maker was leaking water and causing the ice to freeze into a block
First I removed the Ice bin, I then loosened the ice bin rail under the ice maker and removed the screw that attached the bottom of the ice maker to the side of the fridge. I unplugged the power to Ice Maker from the back of the fridge and unscreewed the two screws that secured the ice maker to the fridge. This allowed the Ice Maker to be removed from the fridge. To replace the new ice maker I simply repeated the steps in reverse.
Parts Used:

-
Shelley from Katy, TX
-
Difficulty Level:Really Easy
-
Total Repair Time:15 - 30 mins
-
Tools:Pliers, Screw drivers
30 of 47 people
found this instruction helpful.
Was this instruction helpful to you?
Thank you for voting!
Periodic loud buzzing noise from frig damper unit
Unsnap damper louver cover using only your fingernails at bottom. Remove two phillips screws from damper cover. Remove styrofoam molded insulation. Squeeze electrical connector to release latch; unplug connector. Release latches on both sides of damper control while gently pulling on damper control unit to remove it. Install new unit by doing above steps in reverse. Damper door may move when electrics connected; keep fingers clear.
Amana would not honor our extended warranty that we paid $65 for, saying that noises are not covered. Im glad that Partselect supplied the part quick and and a great price. The frig is quiet for the first time in 2 years!
Amana would not honor our extended warranty that we paid $65 for, saying that noises are not covered. Im glad that Partselect supplied the part quick and and a great price. The frig is quiet for the first time in 2 years!
Parts Used:

-
James from Oconomowoc, WI
-
Difficulty Level:Really Easy
-
Total Repair Time:Less than 15 mins
-
Tools:Screw drivers
24 of 31 people
found this instruction helpful.
Was this instruction helpful to you?
Thank you for voting!
Icemaker leaked water into ice bin causing a glob of ice
Philips head screwdriver and ten minutes was all it took! I removed the two screws that hold the icemaker assembly in place, then pulled it out a little and disconnected the electrical plug freeing the icemaker assembly. Then I snapped the external parts off my old icemaker assembly and snapped them on the new icemaker assembly. Installing the new icemaker assembly was just as fast and easy. I snapped the electrical plug into the new icemaker assembly, then screwed in the two screws. It was making ice shortly thereafter. Glob free ice! I'm glad I didn't call a repairman. I probably saved a hundred bucks. A ten year old could accomplish this simple and easy task. No wonder the Maytag repairman has time on his hands.
Parts Used:
-
Kevin from Tyler, TX
-
Difficulty Level:Really Easy
-
Total Repair Time:Less than 15 mins
-
Tools:Screw drivers
22 of 25 people
found this instruction helpful.
Was this instruction helpful to you?
Thank you for voting!
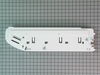
Deli cover panel hinge pin broke off
Removed all of the bottom drawers and shelvs, then removed the end panel that contained the broken Deli cover hinge pin. Replaced with new panel, cleaned all of the existing parts and ten re-assembled.
Parts Used:
-
Scot from Tijeras, NM
-
Difficulty Level:Really Easy
-
Total Repair Time:15 - 30 mins
-
Tools:Nutdriver
22 of 29 people
found this instruction helpful.
Was this instruction helpful to you?
Thank you for voting!
Noisy Control
Remove cover inside frig at rearwall top with screw driver. Remove phillips screws holding unit in place. Unclip connectors ,and replace in reverse order.
Parts Used:
-
Nicholas from Agawam, MA
-
Difficulty Level:Easy
-
Total Repair Time:15 - 30 mins
-
Tools:Screw drivers
20 of 23 people
found this instruction helpful.
Was this instruction helpful to you?
Thank you for voting!
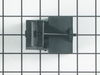
The compressor would try to start,but would not.
I pulled the whole unit(condenser&overload relay)
with my hand & disconnected the wire connected
to it & Replaced it with the new one.Peace of cake.
with my hand & disconnected the wire connected
to it & Replaced it with the new one.Peace of cake.
Parts Used:
-
Alfred from Port Charlotte, FL
-
Difficulty Level:Really Easy
-
Total Repair Time:Less than 15 mins
20 of 24 people
found this instruction helpful.
Was this instruction helpful to you?
Thank you for voting!
Ice Maker broke at the begining of summer !!!!!!
The new Ice Maker Assembly arived in less than 24 hours. I was amazed that it came so fast.
I had already removed the old ice maker in order to get the modle number.
I just took two parts off of the old ice maker and quickly snapped them into place on the new ice maker. Then attached it to the refrigerator in less than 10 minutes. With in a few hours I had ice again !!!!!
I would definatly use partselect.com again.
I had already removed the old ice maker in order to get the modle number.
I just took two parts off of the old ice maker and quickly snapped them into place on the new ice maker. Then attached it to the refrigerator in less than 10 minutes. With in a few hours I had ice again !!!!!
I would definatly use partselect.com again.
Parts Used:
-
Darrell from Pepperell, MA
-
Difficulty Level:Really Easy
-
Total Repair Time:Less than 15 mins
-
Tools:Nutdriver
20 of 24 people
found this instruction helpful.
Was this instruction helpful to you?
Thank you for voting!
Lid to chef pantry would not work.
First I removed the drawers and shelf above the pantry drawer and then removed the pantry drawer. The end cap came off very simply by removing two screws. I removed the slide attachment to the old end cap and attached it two the new end cap. I then installed the new end cap and replaced the drawers and shelf. The lid to the chef pantry popped right in place. Job complete.
Parts Used:
-
Rodger from Marion, IL
-
Difficulty Level:Easy
-
Total Repair Time:30 - 60 mins
-
Tools:Nutdriver
19 of 21 people
found this instruction helpful.
Was this instruction helpful to you?
Thank you for voting!
Crisper Glass Shattered While Cleaning
Since it was apparent the crisper glass is fragile I was very careful to not stress it. I opened the box then took a large board almost as big and slid it on. I carried both items to the fridge and with both doors open slid the glass into place. I am 65 yrs. Old and have owned many refrigerators but this is a first. They don't build them like they use to. .
Parts Used:

-
Thomas from San Diego, CA
-
Difficulty Level:Really Easy
-
Total Repair Time:Less than 15 mins
19 of 22 people
found this instruction helpful.
Was this instruction helpful to you?
Thank you for voting!
very noisy intermittently
Inside the food section above the top shelf behind the light in the back, remove the lid from the cover in lifting from the lower edge no tools necessary here. Remove two screws with Phillips screw driver remove entire housing inclusive Styrofoam insert. Unplug damper Control Unit. Remove two screws and remove damper control unit and replace in reverse order. Finally that refrigerator is quiet, I should have done this long time ago. Unbelievable this is the second part I have to replace on this expensive refrigerator.
Parts Used:
-
klaus from san diego, CA
-
Difficulty Level:Really Easy
-
Total Repair Time:Less than 15 mins
-
Tools:Screw drivers
20 of 25 people
found this instruction helpful.
Was this instruction helpful to you?
Thank you for voting!
Refrigerator wouldn't get cold enough.
Freezer would get cold at bottom and some of the refrigerator. Took of freezer back panel and located freezer fan. Took a meter and saw power was getting to it, but not working. Removed fan and replaced with new on, working like a charm. Cold air was not circulating enough throughout the unit because fan was not working. It was not the thermostat or adapter control.
Parts Used:

-
Ty from Wentzville, MO
-
Difficulty Level:Easy
-
Total Repair Time:15 - 30 mins
-
Tools:Screw drivers
20 of 26 people
found this instruction helpful.
Was this instruction helpful to you?
Thank you for voting!
End cap pin broken
The end cap is a very easy job to remove. Removed the three screws that hold the end cap in place using a 1/4 drive socket. Removed sliding rail which is affix to end cap to be reused with new end cap. Installed new end cap with the three screws and your done very easy. What made the job possible was the ability to identify the part from the PartsSelect.com web site which has excellent parts identification catalog.
Parts Used:
-
Emilio from Clinton, MD
-
Difficulty Level:Really Easy
-
Total Repair Time:15 - 30 mins
-
Tools:Socket set
17 of 18 people
found this instruction helpful.
Was this instruction helpful to you?
Thank you for voting!
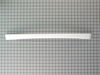
Freezer handle bracket keeps loosening
Replacement of freezer door handle.
1. Removed freezer door handle. First I read the freezer door handle removal instructions in the Amana refrigerator user guide. Removing the handle requires inserting a plastic card at least 1.5 inches under the left end of the right side of the handle so it releases the butterfly clip latch on the freezer door. Next I pulled the right side of the handle to lift it away from the freezer door. Then still holding the handle away from the door, at the spot that is 1.5 inches from the inside of the right side of the handle, I held the plastic card vertically and slid one corner of it between the handle and the freezer door and worked the card down until it released the butterfly clip latch. Keeping the card at the same space under the handle so the latch was released, I then turned the card to the left until it was horizontal and was lifting the left end of the right door handle away from the freezer door. I then slid the handle across the card to the left until it cleared both door butterfly clip latches and it lifted off the door.
2. Installed freezer door handle. First I read the freezer door handle installation instructions in the Amana refrigerator user guide. The handle is curved on one edge and must be installed the curved side down. Correctly installed, the outside ends of the handle curve upward and the handle curve is down so it looks like a frowning mouth. Next holding the handle curved edge down, I turned it up so I could see the brackets and held it against the door. I lined up the handle brackets slightly to the left of the butterfly clips on the freezer door. Next I turned the handle with the brackets against the freezer door and slid it slightly to the right until the left side of the handle held onto the door butterfly clip by itself but was not latched. Then I lined up the right handle bracket with the right freezer door butterfly clip and carefully slid the whole handle to the right until I heard the left butterfly clip latch click. Next I slid the handle back slightly left once more and then slid it back to the right until I heard the right butterfly clip latch click.
1. Removed freezer door handle. First I read the freezer door handle removal instructions in the Amana refrigerator user guide. Removing the handle requires inserting a plastic card at least 1.5 inches under the left end of the right side of the handle so it releases the butterfly clip latch on the freezer door. Next I pulled the right side of the handle to lift it away from the freezer door. Then still holding the handle away from the door, at the spot that is 1.5 inches from the inside of the right side of the handle, I held the plastic card vertically and slid one corner of it between the handle and the freezer door and worked the card down until it released the butterfly clip latch. Keeping the card at the same space under the handle so the latch was released, I then turned the card to the left until it was horizontal and was lifting the left end of the right door handle away from the freezer door. I then slid the handle across the card to the left until it cleared both door butterfly clip latches and it lifted off the door.
2. Installed freezer door handle. First I read the freezer door handle installation instructions in the Amana refrigerator user guide. The handle is curved on one edge and must be installed the curved side down. Correctly installed, the outside ends of the handle curve upward and the handle curve is down so it looks like a frowning mouth. Next holding the handle curved edge down, I turned it up so I could see the brackets and held it against the door. I lined up the handle brackets slightly to the left of the butterfly clips on the freezer door. Next I turned the handle with the brackets against the freezer door and slid it slightly to the right until the left side of the handle held onto the door butterfly clip by itself but was not latched. Then I lined up the right handle bracket with the right freezer door butterfly clip and carefully slid the whole handle to the right until I heard the left butterfly clip latch click. Next I slid the handle back slightly left once more and then slid it back to the right until I heard the right butterfly clip latch click.
Parts Used:
-
Leslie from Shirley, MA
-
Difficulty Level:Difficult
-
Total Repair Time:30 - 60 mins
23 of 37 people
found this instruction helpful.
Was this instruction helpful to you?
Thank you for voting!
Hing on Deli Door broke off
Lifted out the glass shelf and then removed two screws to get the right side end cap off. This side has a mechanical slide to adjust the amount of cold air into the Deli area.
You will need to carefully remove the plastic slide linkage from it's guides so that you can turn it sideways and it will then come off the end cap.
If it wasn't for that minor slowdown it would be a five minute job.
Thanks to this web site for QUICKLY getting me the part and providing info on how to do the job.
You will need to carefully remove the plastic slide linkage from it's guides so that you can turn it sideways and it will then come off the end cap.
If it wasn't for that minor slowdown it would be a five minute job.
Thanks to this web site for QUICKLY getting me the part and providing info on how to do the job.
Parts Used:
-
Floyd from Jacksonville, FL
-
Difficulty Level:Easy
-
Total Repair Time:15 - 30 mins
-
Tools:Nutdriver
15 of 15 people
found this instruction helpful.
Was this instruction helpful to you?
Thank you for voting!
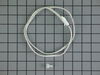
Our refrigerator was too cold as the thermistor seems to have gone
It was great. We replaced the thermistor A little difficult to get to the thermistor but once we found it five minutes. My refrigerator seems happy but we will monitor it and see.
Parts Used:
-
Ellen from SUN CITY WEST, AZ
-
Difficulty Level:Really Easy
-
Total Repair Time:15 - 30 mins
-
Tools:Screw drivers
19 of 29 people
found this instruction helpful.
Was this instruction helpful to you?
Thank you for voting!