




















AER6303MMS1 Amana Range - Instructions
Keep searches simple. Use keywords, e.g. "leaking", "pump", "broken" or "fit".
Purchased home but stove had no broiler pan.
-
Raymond from BLOOMINGTON, MN
-
Difficulty Level:Very Easy
-
Total Repair Time:Less than 15 mins
16 of 33 people
found this instruction helpful.
Was this instruction helpful to you?
Thank you for voting!
The oven and ranges would not heat up and an F9 error was displaying on the Oven Screen.
So, the F9 error indicates a electrical power issue. First I pulled the oven out and verified I had 240 volts at my outlet.
Then I removed the fire panel over the terminal block and the issue was apparent. The nuts on the terminal block were corroded. This had cause the resistance in the connection to raise and burn up the wire to my oven plug at the terminal block.
I removed the whole back panel and everything else seemed OK visually.
1. I go new connectors for the oven plug, stripped the wires, and crimped on the new connectors.
2. The terminal block DOES NOT come with the nuts to connect the wire to the terminal block. Mine were so corroded they had to be replaced. So I went and purchased the correct ones and installed the terminal block and reconnected all the wires.
3. I applied some dielectric grease to the connections through out the process of reinstalling to prevent it from happening in the future.
Then I removed the fire panel over the terminal block and the issue was apparent. The nuts on the terminal block were corroded. This had cause the resistance in the connection to raise and burn up the wire to my oven plug at the terminal block.
I removed the whole back panel and everything else seemed OK visually.
1. I go new connectors for the oven plug, stripped the wires, and crimped on the new connectors.
2. The terminal block DOES NOT come with the nuts to connect the wire to the terminal block. Mine were so corroded they had to be replaced. So I went and purchased the correct ones and installed the terminal block and reconnected all the wires.
3. I applied some dielectric grease to the connections through out the process of reinstalling to prevent it from happening in the future.
Parts Used:

-
Jared from UNION GROVE, AL
-
Difficulty Level:Really Easy
-
Total Repair Time:30 - 60 mins
-
Tools:Pliers, Screw drivers, Socket set
7 of 7 people
found this instruction helpful.
Was this instruction helpful to you?
Thank you for voting!
Oven wasn't preheating to temperature
Repair of oven sensor easy to install; however, product did not resolve the problem. Returned new sensor and awaiting refund (2 weeks passed so far).
Parts Used:
-
Margaret from WALDORF, MD
-
Difficulty Level:Really Easy
-
Total Repair Time:30 - 60 mins
-
Tools:Screw drivers
8 of 11 people
found this instruction helpful.
Was this instruction helpful to you?
Thank you for voting!
Stove top wouldn't come on. Oven couldn't go higher than low heat
Had a technician from Home Advisor to check the problem out with my Whirlpool Double oven(1 1/2 old). Paid $60 to find the problem. According to the technician problem was control board and cost of labor and parts $465.00
Jumped on Part Select website, placed a question with my stove problem through the chat. Immediately they answered my question and told me the problem was the Terminal Block. Cost of part and shipping $25.00. Replaced it myself and everything works fine.
Thank you, Thank you Part Select for your help and honesty.
Sincerely
Peter from Maryland
Jumped on Part Select website, placed a question with my stove problem through the chat. Immediately they answered my question and told me the problem was the Terminal Block. Cost of part and shipping $25.00. Replaced it myself and everything works fine.
Thank you, Thank you Part Select for your help and honesty.
Sincerely
Peter from Maryland
Parts Used:
-
Peter from FREDERICK, MD
-
Difficulty Level:Really Easy
-
Total Repair Time:Less than 15 mins
-
Tools:Screw drivers, Socket set
7 of 9 people
found this instruction helpful.
Was this instruction helpful to you?
Thank you for voting!
The 8-inch burner only heated on high regardless of the temperature setting dialed in.
Unplugged stove from electrical outlet. Pulled temperature control dial off by hand. Remove screws to top back stove panel with Phillips screwdriver. Removed top stove back panel. Unscrewed broken infinity switch from stove. Unclipped wiring harness to broken switch by prying loose with flat head screw driver. Reclipped wiring harness to new switch. Screwed replacement switch back onto stove. Reattached back panel with screws.
Parts Used:
-
Reginald from PLAINFIELD, IN
-
Difficulty Level:Very Easy
-
Total Repair Time:15 - 30 mins
-
Tools:Screw drivers
6 of 7 people
found this instruction helpful.
Was this instruction helpful to you?
Thank you for voting!
The burner would not shut off.
Pulled the dial off, unscrew two screws. Pull the switch out from the back. Disconnect the wires from the old switch and connect to the new switch one by one. Set the new switch in place. Sctew the two screws in to hold the switch in place. Push on the dial.
Parts Used:
-
Richard from CONCORD, NH
-
Difficulty Level:Really Easy
-
Total Repair Time:15 - 30 mins
-
Tools:Pliers, Screw drivers
6 of 8 people
found this instruction helpful.
Was this instruction helpful to you?
Thank you for voting!
Bad element replacement
Took off top and pulled out old element and plugged in the new one
Parts Used:

-
Thomas from Warren, CT
-
Difficulty Level:Easy
-
Total Repair Time:30 - 60 mins
-
Tools:Pliers, Screw drivers, Socket set
9 of 17 people
found this instruction helpful.
Was this instruction helpful to you?
Thank you for voting!
Oven sensor was not regulating heat set for oven
Following your installation, the old part came out easily, with new part installing easily., oven heat is being regulated properly..with range pulled out for part replacement, got that area cleaned too
Parts Used:
-
Linda from SAINT CLOUD, MN
-
Difficulty Level:Really Easy
-
Total Repair Time:30 - 60 mins
-
Tools:Screw drivers
4 of 4 people
found this instruction helpful.
Was this instruction helpful to you?
Thank you for voting!
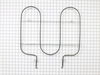
Broiler element not working
It went great. I am not very handy, but with a little help from your website reviews, I was able to easily remove the old broiler element and replace it with the new one in less than an hour. I immediately tested it and found that it worked great.
Parts Used:
-
Normand from Lincoln, RI
-
Difficulty Level:Easy
-
Total Repair Time:30 - 60 mins
-
Tools:Screw drivers
6 of 11 people
found this instruction helpful.
Was this instruction helpful to you?
Thank you for voting!
My drawer did not line up
Putting the drawer glides on was easy. My range drawer did not have any glides on so my drawer would fall out. The drawer glides popped right on the drawer. The glides for the track were easy to screw into the body of the range. I had to bend the tracks up a little on each side with a pair of pliers. One glide would go onto the track and the other one would go on top of the track. After bending them a little I was able to push them onto the track.at the same time.
Parts Used:
-
Angel from SN BERNRDNO, CA
-
Difficulty Level:A Bit Difficult
-
Total Repair Time:15 - 30 mins
-
Tools:Pliers, Screw drivers
4 of 5 people
found this instruction helpful.
Was this instruction helpful to you?
Thank you for voting!
temp sensor went oven not heating
-
patrick from HUGHESTOWN, PA
-
Difficulty Level:Very Easy
-
Total Repair Time:Less than 15 mins
-
Tools:Screw drivers
4 of 5 people
found this instruction helpful.
Was this instruction helpful to you?
Thank you for voting!
The oven light shorted out causing the safety thermostat to blow.
Replaced the safety thermostat and disconnected the oven light.
Works great again...without the light
Works great again...without the light
Parts Used:

-
Joseph K from PAHRUMP, NV
-
Difficulty Level:Very Easy
-
Total Repair Time:15 - 30 mins
-
Tools:Pliers, Screw drivers
4 of 6 people
found this instruction helpful.
Was this instruction helpful to you?
Thank you for voting!
Burned out heating element.
I watched the video you provide and it answered all my questions. You estimate repair at 10 minutes. My wife said I waz done in under 10 minutes Watch the video, it explained every step and all the little tricks to the snap connections.
Parts Used:
-
Kenneth from AUBURNDALE, FL
-
Difficulty Level:Very Easy
-
Total Repair Time:Less than 15 mins
-
Tools:Pliers, Screw drivers
3 of 3 people
found this instruction helpful.
Was this instruction helpful to you?
Thank you for voting!
Oven stopped heating, error message stated heating element
Very easy. Pulled the stove away from the wall. Used a screw driver to remove the two nuts to release the heat sensor, disconnected the wire, removed the sensor. Inserted the new sensor, plugged back into the circuit. put the two nuts back.
Beware, if the first time you put the oven on, if the error message comes back up (mine did) push the cancel/off button, wait a few minutes, put oven back on. System probably needed to reset. Mine worked perfectly after.
Beware, if the first time you put the oven on, if the error message comes back up (mine did) push the cancel/off button, wait a few minutes, put oven back on. System probably needed to reset. Mine worked perfectly after.
Parts Used:
-
Lana from WATERVILLE, ME
-
Difficulty Level:Really Easy
-
Total Repair Time:Less than 15 mins
-
Tools:Screw drivers
3 of 3 people
found this instruction helpful.
Was this instruction helpful to you?
Thank you for voting!
Oven Temp inaccurate
I watched the repair video on this site and another on YouTube before I started. The rear panel has a different shape and two additional screws on the bottom edge. The power clip was easy to manipulate.
This was an easy fix for a seventy year-old like me!
This was an easy fix for a seventy year-old like me!
Parts Used:
-
David from BURNSVILLE, MN
-
Difficulty Level:Really Easy
-
Total Repair Time:15 - 30 mins
-
Tools:Screw drivers
3 of 3 people
found this instruction helpful.
Was this instruction helpful to you?
Thank you for voting!