




















AER6303MFS1 Whirlpool Range - Instructions
Keep searches simple. Use keywords, e.g. "leaking", "pump", "broken" or "fit".
light bulb went out in my oven
My husband took the plastic cover off and took out old bulb and screwed in the new one. Then put the cover back on.
Parts Used:

-
Janet from Ada, MI
-
Difficulty Level:Really Easy
-
Total Repair Time:Less than 15 mins
2 of 7 people
found this instruction helpful.
Was this instruction helpful to you?
Thank you for voting!
oven light burnt out
1. Unscrewed glass cover on bulb
2. Removed old bulb
3. Screwed in new bulb
4. Replaced glass cover
5. Mixed drink & baked cupcakes
2. Removed old bulb
3. Screwed in new bulb
4. Replaced glass cover
5. Mixed drink & baked cupcakes
Parts Used:
-
William from Schwenksville, PA
-
Difficulty Level:Easy
-
Total Repair Time:Less than 15 mins
3 of 10 people
found this instruction helpful.
Was this instruction helpful to you?
Thank you for voting!
Oven gets too hot,if set at 350 it heats to 550. Changed the sensor and was not the problem.
Took off the screws on the back of the stove and took out the sensor, and put in the new one.
Parts Used:
-
Joanne from Negaunee, MI
-
Difficulty Level:Really Easy
-
Total Repair Time:Less than 15 mins
-
Tools:Screw drivers
0 of 2 people
found this instruction helpful.
Was this instruction helpful to you?
Thank you for voting!
Bulb Replacement
I pulled down the wire around the glass cover. . . Released on end of the wire from its holder being careful to not let the glass cover drop. Unscrewed the bulb and replaced with replacement. Easy, easy.
Parts Used:
-
Judith from Phoenix, AZ
-
Difficulty Level:Really Easy
-
Total Repair Time:Less than 15 mins
0 of 2 people
found this instruction helpful.
Was this instruction helpful to you?
Thank you for voting!
Both outside door handles turned very beige
Everything worked perfectly---thanks to the suggestion of your call center agent. She suggested that since the replacement door handles were no longer available, I should consider repainting them--it worked like a charm. Please tell her she was a life saver. We rent that house in Fl and my returning tenants had complained about the discoloring refer handles. Thank you
Parts Used:
-
Howard from Boynton Beach, FL
-
Difficulty Level:Easy
-
Total Repair Time:30 - 60 mins
-
Tools:Nutdriver
23 of 74 people
found this instruction helpful.
Was this instruction helpful to you?
Thank you for voting!
water pump went out
it was very easy i took the pump off only two clips and two hoses holding it type in the model number at parts select it came right up soi new it right one from the picture got with in 3 days put it back on less then 10 mins
Parts Used:
-
paul from windsor, VA
-
Difficulty Level:Really Easy
-
Total Repair Time:Less than 15 mins
-
Tools:Pliers
2 of 12 people
found this instruction helpful.
Was this instruction helpful to you?
Thank you for voting!
Light bulb failure
Received the part the day after ordering. Appreciated the quick service and repair took less than a minute.
Parts Used:
-
Grant from Alexandria, VA
-
Difficulty Level:Really Easy
-
Total Repair Time:Less than 15 mins
Was this instruction helpful to you?
Thank you for voting!
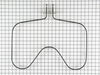
bottom element was burned out
I was 100% happy with the whole process! The part arrived on schedule, it was exactly what I wanted! The best part of the story is I am a 77 year old lady whose husband was out of town and had never done this before. I could not have been happier with the process! Thanks again and I will use PartSelect again!!!
Parts Used:
-
Bobbye from Ethelsviolle, AL
-
Difficulty Level:Easy
-
Total Repair Time:Less than 15 mins
-
Tools:Screw drivers
Was this instruction helpful to you?
Thank you for voting!
Bottom element burnt into two pieces
Unplugged stove, opened door and removed two bolts with a phillips screwdriver. Pulled out old element and pulled off the two wire leads. Replaced with new element and reversed all steps...wallaaaaa.
Parts Used:
-
Maxwell from Springdale, AR
-
Difficulty Level:Easy
-
Total Repair Time:Less than 15 mins
-
Tools:Screw drivers
Was this instruction helpful to you?
Thank you for voting!
Oven Was Not Heating As It Should
Removed lower oven rack. Unplugged stove,removed 2 screws holding element in place,pulled element forward unplugged 2 wires. Reversed proc. To reinstall . Very simple. Parts were here in less than 24 hrs using standard shipping. Very good service
Parts Used:
-
larry from springville, AL
-
Difficulty Level:Really Easy
-
Total Repair Time:Less than 15 mins
-
Tools:Screw drivers
Was this instruction helpful to you?
Thank you for voting!
Stove kept turning off
Looked up on-line the error problem and what part I needed to fix it. Part arrived very quickly and everything was going fine until I realized the stove had two sensors. Replaced the top sensor now I am getting an error on the bottom sensor. Maybe I replaced the wrong one. I will replace the bottom sensor with the one I took out and see if that does the trick. Very very satisfied with PartsSelect. Good Price, Quick Shipping, Would do business with them again. They are now in my favorites so I can find them again if I need parts.
Parts Used:
-
Richard from Wooster, OH
-
Difficulty Level:Really Easy
-
Total Repair Time:Less than 15 mins
-
Tools:Screw drivers
Was this instruction helpful to you?
Thank you for voting!
Oven shutting off after temp reached 350
Remove the plug from outlet then shutoff gas. Remove the 10 screws hold the back panel of the oven. Unclip the connector of the temperature sensor from the main line. Pull the sensor straightout. Reverse the process install the new sensor. Couldn't be any easier. Oven working great. Calling in a reapairman would have cost $200 for parts and labor.
Parts Used:
-
Ken from Las Cruces, NM
-
Difficulty Level:Really Easy
-
Total Repair Time:Less than 15 mins
-
Tools:Screw drivers
Was this instruction helpful to you?
Thank you for voting!
Baking element needed replacing.
It was as simple as using a screwdrivers and replacing in existing slot. Thank you. It works great!
Parts Used:
-
LINDA from BOLIVAR, TN
-
Difficulty Level:Really Easy
-
Total Repair Time:Less than 15 mins
-
Tools:Screw drivers
Was this instruction helpful to you?
Thank you for voting!
An Insect got in between the element coil & shorted it out
unplugged the range, removed the cooktop left & right front screws, unplugged left & right plug & unscrewed ground wire. Parts arrived fast & reassembled. . Happy, Happy, Happy! Happy Wife...Happy Life!
Parts Used:

-
Howard from Land O' Lakes, FL
-
Difficulty Level:Really Easy
-
Total Repair Time:Less than 15 mins
-
Tools:Screw drivers
Was this instruction helpful to you?
Thank you for voting!
Bake element not working
Turn power off at breaker box, remove back cover inserted wires into element, done and ready to be use
Parts Used:
-
Eloy from Andrews, TX
-
Difficulty Level:Really Easy
-
Total Repair Time:Less than 15 mins
-
Tools:Screw drivers
Was this instruction helpful to you?
Thank you for voting!