




















AER5515QAW Amana Range - Instructions
Keep searches simple. Use keywords, e.g. "leaking", "pump", "broken" or "fit".
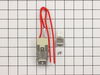
Burner wouldn't heat (wiring failure)
1. Shut the breaker off; Jenn-Air's design will have you working around hot leads if you don't.
2. Raise the control panel
3. Remove burner and unscrew the burner connector; trace the wires back to the control panel bottom and remove them
4. On the replacement connector, add the electrical for the control panel. These are not included and can be found at any hardware store; they are a standard size.
5. Connect the new wires and put everything back together.
6. Reset the break and test.
2. Raise the control panel
3. Remove burner and unscrew the burner connector; trace the wires back to the control panel bottom and remove them
4. On the replacement connector, add the electrical for the control panel. These are not included and can be found at any hardware store; they are a standard size.
5. Connect the new wires and put everything back together.
6. Reset the break and test.
Parts Used:
-
Eugene from San Antonio, TX
-
Difficulty Level:A Bit Difficult
-
Total Repair Time:15 - 30 mins
-
Tools:Pliers, Screw drivers, Wrench set
3 of 4 people
found this instruction helpful.
Was this instruction helpful to you?
Thank you for voting!
one electric burner does not get hot
swap a known good coil around and still did not work. then measured voltage across the switch terminals and found out one leg was opened. Ordered a new switch which looked alike. The new switch could handle more current than the old one. Turned out that all terminals of the new switch were same size while the old one had 1 smaller size. Used the dremer tool to file it to fit the wire terminal. Also the burner knob had different grove type . Just forced it in.
Parts Used:

-
dinh from austin, TX
-
Difficulty Level:Easy
-
Total Repair Time:15 - 30 mins
-
Tools:Screw drivers
5 of 10 people
found this instruction helpful.
Was this instruction helpful to you?
Thank you for voting!
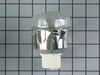
needed new oven light assembly/part #PS1864256
Removed old assembly, attached wires to new and inserted into space for same. Of course you must turn off the range circuit breaker. The part that took the most time was removing the old assembly. Once that was done, the rest took only a few minutes.
Parts Used:
-
Sara from Harwich Port, MA
-
Difficulty Level:A Bit Difficult
-
Total Repair Time:15 - 30 mins
-
Tools:Pliers, Screw drivers
25 of 70 people
found this instruction helpful.
Was this instruction helpful to you?
Thank you for voting!
Oven would not heat over 190 degrees.
Went to this site and read what a few others had done to fix their problem. Found the model number and ordered part. It was on our steps in less than 3 days. It took less than half an hour to replace and put back together. Just had my first meal from "NEW" oven. Great site, great price and great service!
Thanks!
Thanks!
Parts Used:

-
Timothy from Hamilton, OH
-
Difficulty Level:Really Easy
-
Total Repair Time:15 - 30 mins
-
Tools:Pliers, Screw drivers
3 of 4 people
found this instruction helpful.
Was this instruction helpful to you?
Thank you for voting!
replace inner glass Jenn air range
Hired a pro. Parts are difficult to get on a timely basis today , if at all. Screw up this repair by damaging the outer " black glass " and you buy a new stove. It took three weeks to get my replacement glass even though PS said the part was being sent within a day of the order. Even so , I am am happy to have gotten it , and will continue to use the company.
Parts Used:
-
gerald from MICKLETON, NJ
-
Difficulty Level:A Bit Difficult
-
Total Repair Time:15 - 30 mins
-
Tools:Nutdriver, Screw drivers
2 of 2 people
found this instruction helpful.
Was this instruction helpful to you?
Thank you for voting!
After cleaning, F1-1 error flashed and neither oven worked
First I called a repairman and left a message. That was 3 weeks ago. So, I 'googled' the error message and determined what part I thought I needed. Ordered the part on Wednesday evening and it was there when I got home from work on Friday. I unpacked the part, got a phillips screwdriver and then watched the repair video on your website. About 20 minutes later I pushed my stove back in place and the flashing said 'set time'. Then I checked both ovens, and have since used both, and everything works!!
Parts Used:

-
Georgene from Rock City, IL
-
Difficulty Level:Easy
-
Total Repair Time:15 - 30 mins
-
Tools:Screw drivers
3 of 5 people
found this instruction helpful.
Was this instruction helpful to you?
Thank you for voting!
Oven would over heat and produce a F2 error code on the display. It would not turn off or cool down until I switched the circuit breaker off.
I switched the oven sensor easily enough, but it did not remedy the problem, so we are in the process of replacing the oven since it's about 20 yrs. old.
Parts Used:
-
richard from SAINT MARYS, KS
-
Difficulty Level:Very Easy
-
Total Repair Time:Less than 15 mins
-
Tools:Screw drivers
2 of 2 people
found this instruction helpful.
Was this instruction helpful to you?
Thank you for voting!
Burner control knob/switch shaft had broken off.
Removed front panel of range, removed switch (2 screws), unclipped wires from back of existing switch. Installed new switch - reverse order of above.
Parts Used:

-
Steve from San Luis Obispo, CA
-
Difficulty Level:Easy
-
Total Repair Time:15 - 30 mins
-
Tools:Screw drivers
4 of 8 people
found this instruction helpful.
Was this instruction helpful to you?
Thank you for voting!
left cover for the oven light broke when trying to replace the bulb
Ordered the part. when it arrived-quite speedily, I just unpacked it and put the cotton gasket around the glass and screwed it to the proper place in the oven. Very easy.
Parts Used:

-
Mark from SHOREVIEW, MN
-
Difficulty Level:Very Easy
-
Total Repair Time:Less than 15 mins
2 of 2 people
found this instruction helpful.
Was this instruction helpful to you?
Thank you for voting!
Replacing the bulb in the freezer side
Removed the ice brucket,
Removed the light shield by releasing one screw using a nutdriver.
Replacing the bulb and reinstalled the light shield.
Your web site is one of the best and most helpfull service sites I ever used. Just wish that in the future you will ship parts overseas.
Removed the light shield by releasing one screw using a nutdriver.
Replacing the bulb and reinstalled the light shield.
Your web site is one of the best and most helpfull service sites I ever used. Just wish that in the future you will ship parts overseas.
Parts Used:

-
Yafa (and David) from Bothell, WA
-
Difficulty Level:Easy
-
Total Repair Time:Less than 15 mins
-
Tools:Nutdriver
5 of 11 people
found this instruction helpful.
Was this instruction helpful to you?
Thank you for voting!
Oven would not heat
Spoke to your very helpful staff, who advised me that a likely problem was the oven sensor. I took a chance and ordered the part, which came promptly. Your service video for the part was most helpful in my decision to try the part. Installation was a breeze, but it was the oven controller board that had failed and not the oven sensor. That called for a service professional, who ultimately fixed the problem. Your service though, was excellent and I would highly recommend you to others.
Parts Used:
-
francis from mount holley, VA
-
Difficulty Level:Really Easy
-
Total Repair Time:Less than 15 mins
-
Tools:Screw drivers
2 of 2 people
found this instruction helpful.
Was this instruction helpful to you?
Thank you for voting!
Cooling fan runs fault code displayed
Removed the two screws holding the sensor to the rear oven wall. pulled out sensor wire. It was caught on other wires behind the oven. removed the three screws holding the 8" inspection plate in the center of the rear panel. Carefully move the insulation and reach in to grasp the back end of the sensor wire. Once free from the snag it easily pulls out with the sensor just as stated in the video. using the appropriate adaptor it was easy to re-asseble and and attach to the oven wall. Replace the rear panel with the three screws and it was done
Parts Used:
-
FRANK from CLARENCE CTR, NY
-
Difficulty Level:Easy
-
Total Repair Time:30 - 60 mins
-
Tools:Screw drivers
2 of 2 people
found this instruction helpful.
Was this instruction helpful to you?
Thank you for voting!
Broken inner glass window.
Remove the door.
Remove screws
Clear out broken glass. Vacuum out small glass shards.
Clean all glass.
Reattach all parts.
Replace the door.
Smile!
Remove screws
Clear out broken glass. Vacuum out small glass shards.
Clean all glass.
Reattach all parts.
Replace the door.
Smile!
Parts Used:
-
Jerome from RICHFIELD, MN
-
Difficulty Level:Really Easy
-
Total Repair Time:30 - 60 mins
-
Tools:Screw drivers, Socket set
2 of 2 people
found this instruction helpful.
Was this instruction helpful to you?
Thank you for voting!
oven light glass cover was broken
took out the old dome cover and replaced it with a new one by unscrewing and replaced the new one and a fiberglass gasket. simple.
Parts Used:
-
wayne from LIMINGTON, ME
-
Difficulty Level:Really Easy
-
Total Repair Time:15 - 30 mins
2 of 2 people
found this instruction helpful.
Was this instruction helpful to you?
Thank you for voting!
broken bake element
removed bottom pan cover. removed broken element. replaced with new one.. simple. would buy from this place again. shipped super fast
Parts Used:
-
sandra from ROCHESTER, MN
-
Difficulty Level:Very Easy
-
Total Repair Time:15 - 30 mins
-
Tools:Pliers, Screw drivers
2 of 2 people
found this instruction helpful.
Was this instruction helpful to you?
Thank you for voting!