




















ABS200P2WW General Electric Range - Instructions
Keep searches simple. Use keywords, e.g. "leaking", "pump", "broken" or "fit".
Bake element buned and broken
The repair was somewhat easy. The replacement elements are pushon type. The only thing is that the G.E. Hotpoint wire on the right side of the bake element is short. Be extra careful to not have it go back into the back oven wall or you will have to take the back cover plate (Pull out the range, remove the back cover using a nut driver or a magnetic tip srewdriver with the bit removed works[Wires are right there]. This is as easy a job as can be.
Parts Used:


-
Charles from Pittsburgh, PA
-
Difficulty Level:Easy
-
Total Repair Time:15 - 30 mins
-
Tools:Nutdriver, Pliers, Screw drivers
Was this instruction helpful to you?
Thank you for voting!
Getting the right stove model number and part number
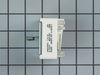
Difficulty was in determining the right model number and part number of a switch. Noted that the left front burner came on when the switch for the left back burner was turned on. By inspection I found the left front burner switch had become faulty by actually hearing an electric arc in the switch and smelling the oder in the switch. With help from the person I called I was able to determine that the Model Number on the actual stove was wrong. It had an extra 0 between the W and F which she said was a common error in the GE model number. I then gave the switch number I found on the switch to the contact person and she was able to verify the right part number. It was relatively easy to replace the switch by taking off the back upper plate then taking off two screws that held the switch to the stove. The part came quite quickly once ordered. Sears repair wanted $75 just to diagnose then the cost of the part. I got the switch for $69.
Parts Used:
-
Gerald from San Diego, CA
-
Difficulty Level:Difficult
-
Total Repair Time:15 - 30 mins
-
Tools:Nutdriver, Screw drivers
Was this instruction helpful to you?
Thank you for voting!
mouse urinine and feces saturated oven insulation
After not using our oven all summer a mouse had been hiding out in the oven insulation and apparenting was starting to make a home. We caught the mouse, but when we turned on the oven recently we noticed a horrific smell and immediately turned it off. It was evident that the smell was not burnt food. We jumped on the internet to see where and how to access the insulation in our oven and found Parts Select. That is when we saw that this is actually a common problem when an oven is not used for a prolonged period. Ordered the new insulation part for our oven and paid extra to have it delivered more quickly. Pulled out the oven from the wall and unplugged it. Took off the top of oven and removed old insulation. Yuck, that was disgusting. Cleaned the inside surface with disinfectant before putting in the new insulation. Took about 20 minutes from beginning to finish.
Parts Used:
-
debanee from eagle point, OR
-
Difficulty Level:Easy
-
Total Repair Time:15 - 30 mins
-
Tools:Socket set
Was this instruction helpful to you?
Thank you for voting!
Element was burned out
Disconnected the plug from the receptacle; removed the 2 screws holding the element in place at the rear of the oven; removed the support bracket at the front (also 2 screws); removed the panel on the back of the range; pulled the wire clips off the element (had to replace one of them); slid the new element in place; reconnected the wires and fastened the element in place; reattached the support bracket and rear panel ... With the assistance of my wife (extra hands) this was an easy job!
Parts Used:
-
William from Franklin, TN
-
Difficulty Level:Really Easy
-
Total Repair Time:15 - 30 mins
-
Tools:Nutdriver, Pliers
Was this instruction helpful to you?
Thank you for voting!
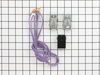
plastic adapter was broken on end of the block kit
unplugged old block from both sides, ran new wire and plugged new wire to both ends and presto it worked, thanks for making it easy to fix. Thanks- Michael J Dumas
Parts Used:
-
Michael from West Monroe, LA
-
Difficulty Level:Really Easy
-
Total Repair Time:15 - 30 mins
-
Tools:Nutdriver, Screw drivers, Wrench (Adjustable)
Was this instruction helpful to you?
Thank you for voting!
none to occasional power to burner elements
Exactly followed the instructional video and my installation was flawless. Now the burners power up and function like new. The whole repair was smooth and easy.
Parts Used:
-
Mohammed from San Jose, CA
-
Difficulty Level:Really Easy
-
Total Repair Time:15 - 30 mins
-
Tools:Nutdriver, Pliers
Was this instruction helpful to you?
Thank you for voting!
Burned out heating element
took 5 minutes with a nut driver and son. I had previously watch your video and went exactly as the video described and showed.
Parts Used:
-
David from Alice, TX
-
Difficulty Level:Really Easy
-
Total Repair Time:Less than 15 mins
-
Tools:Nutdriver
Was this instruction helpful to you?
Thank you for voting!
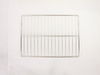
Missing oven rack
-
Damaris from Easton, PA
-
Difficulty Level:Really Easy
-
Total Repair Time:Less than 15 mins
Was this instruction helpful to you?
Thank you for voting!
I needed an oven with three racks, mine came with two.
-
BETTY from CYPRESS, TX
-
Difficulty Level:Easy
-
Total Repair Time:Less than 15 mins
Was this instruction helpful to you?
Thank you for voting!
Replaced damaged oven rack
I ordered the oven rack on a Tuesday and received it the very next day - was wowed at the service.
Parts Used:
-
Vicki from Irvine, CA
-
Difficulty Level:Really Easy
-
Total Repair Time:Less than 15 mins
Was this instruction helpful to you?
Thank you for voting!
stained drip bowls
unplugged burners replaced drip bowls plugged in burners
Parts Used:
-
Sunny from Salt Lake City, UT
-
Difficulty Level:Really Easy
-
Total Repair Time:Less than 15 mins
Was this instruction helpful to you?
Thank you for voting!
Bake Element burnt out
-
Greg from Chicopee, MA
-
Difficulty Level:Really Easy
-
Total Repair Time:Less than 15 mins
-
Tools:Socket set
Was this instruction helpful to you?
Thank you for voting!
lower burner quit working.
easy, less then 15 min. but take off door first makes alot easier. and don't forget to unplug, like i did. just a few sparks but no damage thank god.
Parts Used:
-
Robert from Rock Falls, IL
-
Difficulty Level:Easy
-
Total Repair Time:Less than 15 mins
-
Tools:Nutdriver, Screw drivers
Was this instruction helpful to you?
Thank you for voting!
the bottom element of the oven was broken
attached the element,pushed it back in the pocket,put the plate back on, screwed the nut and bolt back on and was done in less than 4 minutes!!
Parts Used:
-
DAVID from PARIS, MI
-
Difficulty Level:Really Easy
-
Total Repair Time:Less than 15 mins
Was this instruction helpful to you?
Thank you for voting!
heating element blew apart
I watched the video on this website and it couldn't have been easier. The only thing I did differently was I took the door off for an easier reach. To take the door off, you open just a little and pull up. It makes it so much easier to get at the screws, and maked the repair a snap.
Parts Used:
-
Lori from Bellows Falls, VT
-
Difficulty Level:Really Easy
-
Total Repair Time:Less than 15 mins
-
Tools:Nutdriver
Was this instruction helpful to you?
Thank you for voting!