




















ABR3740AGW Maytag Range - Instructions
Keep searches simple. Use keywords, e.g. "leaking", "pump", "broken" or "fit".
oven would take a very long time to warm
took out both racks and under tray at bottom of stove no tools required.
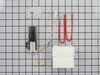
used a nut driver to remove both screws holding ignighter in place ,pulled wires up gentily and remove from standard clip by pushing ends in.
clip new ignighter in place push wires down again and install 2 screws . put all back together and it works like new .
used a nut driver to remove both screws holding ignighter in place ,pulled wires up gentily and remove from standard clip by pushing ends in.
clip new ignighter in place push wires down again and install 2 screws . put all back together and it works like new .
Parts Used:
-
Barry from East Islip, NY
-
Difficulty Level:Really Easy
-
Total Repair Time:15 - 30 mins
-
Tools:Nutdriver
2 of 2 people
found this instruction helpful.
Was this instruction helpful to you?
Thank you for voting!
oven wouldn't heat
removed 2 screws and unpluged ingiter plug ed new igniter in replaced screws and worked fine
Parts Used:
-
Dana from Windchester, IN
-
Difficulty Level:Really Easy
-
Total Repair Time:15 - 30 mins
-
Tools:Nutdriver
2 of 2 people
found this instruction helpful.
Was this instruction helpful to you?
Thank you for voting!
Ice maker working with no production of ice
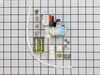
Turn off the water source and unplug freezer. Remove copper tube and then remove valve from back of refrigerator. Disconnect plastic tube and power connection. Mark power connection plug top with a "T", this reminder helps with the new valve. Plug power and plastic tube into new valve and screw assembly back into refrigerator. Using a wrench, connect copper tube into valve. Restore water source and plug back in in freezer. Within a couple hours, ice production was back.
Like the other repair stories (that helped me), this job was very easy.
Like the other repair stories (that helped me), this job was very easy.
Parts Used:
-
Paul from East Northport, NY
-
Difficulty Level:Really Easy
-
Total Repair Time:15 - 30 mins
-
Tools:Socket set, Wrench (Adjustable)
2 of 2 people
found this instruction helpful.
Was this instruction helpful to you?
Thank you for voting!
gas burners would not light with electric ignighters
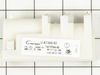
using the diagram shown on line Looked up the ignition module and ordered it by phone. Received it the next day and installed it within the hour. Previously I had called the repairman and he said it would be a couple of weeks before he could look at it and a service call was $75 plus parts..I fixed it for the cost of the module $34. I am very satisfied.
Parts Used:
-
Leo from Temple, TX
-
Difficulty Level:Easy
-
Total Repair Time:30 - 60 mins
-
Tools:Screw drivers, Wrench (Adjustable)
3 of 5 people
found this instruction helpful.
Was this instruction helpful to you?
Thank you for voting!
The problem was exactly what was described on your site.
I pretty much did the repair the same way the video described it. I first turned off the gas valve and disconnected the power. Then removed the two screws holding in the burner tube and removed it. Then I unplugged the old igniter. The screws were a bit corroded so I gave them a little spray of liquid wrench. They came right out them. After removing them I replaced the igniter plugged it in. Then I put the wire through the hole in the wall of the oven. Replaced the insulation that was included in the kit. Replaced the burner tube on the venture. And reinstalled the screws. It was pretty cut and dry. The glow plug had the burner fired up in 15 seconds.
Parts Used:
-
William from FREELAND, MI
-
Difficulty Level:Very Easy
-
Total Repair Time:15 - 30 mins
-
Tools:Nutdriver, Screw drivers
2 of 2 people
found this instruction helpful.
Was this instruction helpful to you?
Thank you for voting!
The oven igniter came on but the gas valve never turned on.
1. remove oven door 2. remove racks and oven floor 3. remove oven burner 4. unhook igniter 5. install new igniter 6. tuck wiring back in as reinstalling burner 7. put in the insulation supplied in kit 8. install floor and racks. 9. install door. 10. test system 11. oven came on. SUCCESS
Parts Used:
-
James from PEORIA, IL
-
Difficulty Level:Very Easy
-
Total Repair Time:Less than 15 mins
-
Tools:Screw drivers
2 of 2 people
found this instruction helpful.
Was this instruction helpful to you?
Thank you for voting!
F 3 signal on display pad every time oven warmed up
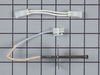
Removed all the racks from inside the oven, unscrewed the 6 screws that held it into the cabinet, pulled it out and sat it on the floor in front of the cabinet. Removed the oven sensor from the inside of the oven after disconnecting the wire harness from the rear right exterior of the oven. Installed new sensor from inside (2screws), plugged it into the harness in the back and reinstalled oven in the cabinet.
Parts Used:
-
jeff from haskell, NJ
-
Difficulty Level:Easy
-
Total Repair Time:15 - 30 mins
-
Tools:Screw drivers
2 of 3 people
found this instruction helpful.
Was this instruction helpful to you?
Thank you for voting!
Broken glass in oven door
Disassembled the oven door, removed broken glass, replaced with new glass and reassembled oven door. Took very little time. Online diagram on this site helped to keep everything in order and easily know what part was needed. Thanks!!!!
Parts Used:
-
Jamie from Hoover, AL
-
Difficulty Level:Easy
-
Total Repair Time:30 - 60 mins
-
Tools:Screw drivers
3 of 6 people
found this instruction helpful.
Was this instruction helpful to you?
Thank you for voting!
ice maker quit working
Replaced the water valve. I knew that the ice maker was working by watching the movement. It was not getting water to it, s I figured it was the electric water valve and sure enough, that fixed the problem.
Parts Used:
-
Randy from Yale, OK
-
Difficulty Level:Easy
-
Total Repair Time:15 - 30 mins
-
Tools:Screw drivers, Wrench (Adjustable)
2 of 3 people
found this instruction helpful.
Was this instruction helpful to you?
Thank you for voting!
Old Valve was dead
This was very easy and pretty fast to do and its working great...all for $40 bucks ! you can do this...trust me!
Parts Used:
-
Joseph from Bloomfield Hills, MI
-
Difficulty Level:Really Easy
-
Total Repair Time:15 - 30 mins
-
Tools:Pliers
2 of 3 people
found this instruction helpful.
Was this instruction helpful to you?
Thank you for voting!
The back of the knob was broken and looked bad
I got on-line, found your website, put in the required information (model #, brand, part, etc.) and ordered. Before ordering however, I measured, looked at the picture on-line, and compared to the part I needed. It looked right. I ordered, and the parts came in a timely manner. Got an e-mail saying they were ordered, then another e-mail saying they were shipped. Got the parts, installed, they look so good. I'm very pleased. Thanks!
Parts Used:
-
VONDA L from BAILEY, CO
-
Difficulty Level:Really Easy
-
Total Repair Time:15 - 30 mins
-
Tools:Screw drivers
2 of 3 people
found this instruction helpful.
Was this instruction helpful to you?
Thank you for voting!
oven would not turn on
I first removed oven racks.then I removed bottom of oven by sliding locks,then lifting out bottom.Next I removed screw holding e. control cove,then removed cover.Igniter plug was exposed,I then unpluged egniter. I next removed 2 screws holding burner and igniter .I removed igniter and burner as a unit. removed 1 screw from igniter,and replaced igniter on burner.Then assembled every thing in reverse order,and tested Oven worked perfectly.
Parts Used:
-
Robert from Clymer, NY
-
Difficulty Level:Easy
-
Total Repair Time:15 - 30 mins
-
Tools:Screw drivers
2 of 3 people
found this instruction helpful.
Was this instruction helpful to you?
Thank you for voting!
I needed a broiler pan
I took the broiler pan out of the shipping container and put it in the oven.
Parts Used:
-
Rhoda P. from Secaucus, NJ
-
Difficulty Level:Really Easy
-
Total Repair Time:Less than 15 mins
4 of 9 people
found this instruction helpful.
Was this instruction helpful to you?
Thank you for voting!
Bad Gasket
I just twist the burner, pulled it out, disconect the two wires. Reconect the wires to the new burner and placed back .
Parts Used:
-
javier from Santa Ana, CA
-
Difficulty Level:Really Easy
-
Total Repair Time:Less than 15 mins
-
Tools:Pliers, Screw drivers
2 of 3 people
found this instruction helpful.
Was this instruction helpful to you?
Thank you for voting!
corroded burners
Unscrew the burners an install new ones! Anyone could do this.
Parts Used:
-
Daniel from Can Francisco, CA
-
Difficulty Level:Really Easy
-
Total Repair Time:Less than 15 mins
-
Tools:Wrench (Adjustable)
2 of 3 people
found this instruction helpful.
Was this instruction helpful to you?
Thank you for voting!