




















ABL2522FES Amana Refrigerator - Instructions
Keep searches simple. Use keywords, e.g. "leaking", "pump", "broken" or "fit".
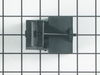
No cooling, compressor not running and was very hot
Plied off the relay switch with a screw driver. I could not pull it off by hand. Disconnected the wires to it and replaced with new part. Had problem getting the part back on and lining up the pins with the connector. I had to line up one pin and start at an angle and roll the part onto the contact pins.
I was impressed with the one day delivery without paying because it was shipped from a warehouse in California where the repair was made.
I was impressed with the one day delivery without paying because it was shipped from a warehouse in California where the repair was made.
Parts Used:
-
Miriam from Canyon Country, CA
-
Difficulty Level:Really Easy
-
Total Repair Time:15 - 30 mins
-
Tools:Nutdriver, Screw drivers
8 of 9 people
found this instruction helpful.
Was this instruction helpful to you?
Thank you for voting!
Inlet valve was leaking water...
Took the valve off from the back of the frig and reinstalled the part I purchased from Part Select. The part was an exact OEM part, not a substitute that others had. The install went very smooth and once again we have water and ice from our frig. Can't thank Part Select enough for the thier sales team and the order department. They made sure that I got the exact part that I needed. Customer for life.... Mike D. Wisconsin
Parts Used:

-
Michael E from Green Bay, WI
-
Difficulty Level:Really Easy
-
Total Repair Time:15 - 30 mins
-
Tools:Screw drivers, Socket set, Wrench (Adjustable)
9 of 12 people
found this instruction helpful.
Was this instruction helpful to you?
Thank you for voting!
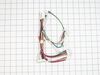
Refrigerator would not cool,freezer worked.
Took too panel down. Remove.bulbs . Unplugged refrigerator. Removed electronic control board .installed new electronic control board. Plugged in refrigerator , programmed control for ice in about 1 hour refrigerator went to work and got cold Simple operation. Donald Harrell, Don's Repair Service .
Parts Used:

-
Donald from SAN SABA, TX
-
Difficulty Level:Very Easy
-
Total Repair Time:15 - 30 mins
-
Tools:Screw drivers
9 of 12 people
found this instruction helpful.
Was this instruction helpful to you?
Thank you for voting!
Power surge cause compressor to stop functioning
Followed the YouTube video linked to the Compressor Start Device and Capacitor I purchased. The repair was just as easy as the technician in the video said it would be. Removed the back panel, remove the clamp, worked the Compressor Start Device and Capacitor off the electrical prongs and replace it with the new one. After I reassemble the refrigerator, it was fully operational. Very easy to do and only required a few tools.
Parts Used:
-
Alvin from ORANGE PARK, FL
-
Difficulty Level:Really Easy
-
Total Repair Time:15 - 30 mins
-
Tools:Pliers, Screw drivers, Socket set
7 of 7 people
found this instruction helpful.
Was this instruction helpful to you?
Thank you for voting!
Compressor would not start
Removed back access cover with quarter inch nut driver, unplugged wire harness, pulled old relay out & plugged in new one, reconnected wire harness, and reinstalled access cover. Piece of cake. (Shipping was very quick) ***Frig was only 3yr an 1 mounth old.*** Maytag - Dependable Huh?
Parts Used:
-
Rich from Monon, IN
-
Difficulty Level:Really Easy
-
Total Repair Time:Less than 15 mins
-
Tools:Nutdriver
7 of 7 people
found this instruction helpful.
Was this instruction helpful to you?
Thank you for voting!
Ice Maker was not working
Based on other feedback, it sounded like a bad valve. I ordered it from Part Select and received it the next day. I am in NO WAY handy, but it took about 5 min to change using the instructions. Not bad considering I spent $33 on the part and I was quoted $280 by the authorized repair center.
Parts Used:

-
Robert from Tampa, FL
-
Difficulty Level:Really Easy
-
Total Repair Time:Less than 15 mins
-
Tools:Nutdriver
8 of 10 people
found this instruction helpful.
Was this instruction helpful to you?
Thank you for voting!
The glass shattered in a 1000 pieces during a mild cleaning!
These guys had my part mailed in lighting fast! It arrived in 2 days in a padded box in perfect shape.The price was the best on line and they saved my life one day before thansgiving!! They got my vote and respect! Great job partselect!!! walt , crete illinois
Parts Used:

-
walter from crete, IL
-
Difficulty Level:Really Easy
-
Total Repair Time:Less than 15 mins
8 of 10 people
found this instruction helpful.
Was this instruction helpful to you?
Thank you for voting!
Not freezing or keeping thing cold in fridge
Once I got the right part the repair was quick and easy. All I had to do is get the old part off with a screwdriver and curved needle nose pliers and the old part came right off. The new part went in just as easy. Quick and easy. Less than 15 minutes.
Parts Used:
-
BRUCE from AMMON, ID
-
Difficulty Level:Really Easy
-
Total Repair Time:Less than 15 mins
-
Tools:Pliers, Screw drivers
8 of 10 people
found this instruction helpful.
Was this instruction helpful to you?
Thank you for voting!
35 year old water tube became brittle and cracked; leaking water
Unscrewed clamp holding water tube to refrigerator ice maker. Pulled water tube from ice maker and water valve inlet. Cut the new tubing to the exact same length and inserted one end to the water valve inlet and the other end to the ice maker then screwed clamp holding water tube back to the refrigerator ice maker.
Parts Used:

-
Melvin from OPELIKA, AL
-
Difficulty Level:Very Easy
-
Total Repair Time:Less than 15 mins
-
Tools:Screw drivers
8 of 10 people
found this instruction helpful.
Was this instruction helpful to you?
Thank you for voting!
The plastic wheel broke in half at the right front of the refrigerator.
The good news is that the part (the wheel was available.) I bought two in the event that the other wheel may break in the future. The bad news is that the housing that holds the wheel was riveted together by the wheel axle. It would have been nice to know that before I bought the part and if the housing with the wheel installed was available. The refrigerator was at my summer house a hundred miles away. Anyway, we had to grind the end of the riveted axle to dislodge it from the wheel housing. With the axle dislodged from the housing we were able to install the wheel and then hammer the end of the axle flat to keep in place, like the original rivet installation. It is not perfect but it held and should be fine. I am glad I was able to get the part and will be back in the future, if in need of other parts.
Parts Used:

-
Ralph from Camillus, NY
-
Difficulty Level:A Bit Difficult
-
Total Repair Time:30 - 60 mins
-
Tools:Pliers, Screw drivers, Socket set
7 of 8 people
found this instruction helpful.
Was this instruction helpful to you?
Thank you for voting!
Broken Piece

-
anthony from georgetown, IL
-
Difficulty Level:A Bit Difficult
-
Total Repair Time:30 - 60 mins
-
Tools:Screw drivers
7 of 8 people
found this instruction helpful.
Was this instruction helpful to you?
Thank you for voting!
Center Crisper rail was broken and the drawers were not closing all the way
Just pulled out theold and squeezed in the new. I forced it and it went in.
Parts Used:

-
Edward from Lowell, MA
-
Difficulty Level:Really Easy
-
Total Repair Time:Less than 15 mins
8 of 11 people
found this instruction helpful.
Was this instruction helpful to you?
Thank you for voting!
light not working in fridge
It was so easy!
Thanks for the rush to my home on the part.
I just unscrewed the plate that locks in the light switch (screwdriver) and unplugged the old faulty part and plugged in the new switch, screwed the cover back on and I was done!
Easy!
And I am not Mr. Fix-it!
Thanks for the rush to my home on the part.
I just unscrewed the plate that locks in the light switch (screwdriver) and unplugged the old faulty part and plugged in the new switch, screwed the cover back on and I was done!
Easy!
And I am not Mr. Fix-it!
Parts Used:

-
Michael from East Meadow, NY
-
Difficulty Level:Really Easy
-
Total Repair Time:Less than 15 mins
-
Tools:Screw drivers
7 of 8 people
found this instruction helpful.
Was this instruction helpful to you?
Thank you for voting!
3-year-old refrigerator wouldn't cool, digital temp. control stopped working
The digital display numbers (0= off and 7=coldest setting) controlled by the ECB would continually be replaced by straight lines, and the refrigerator would stop cooling. I tried unplugging it for a while. After plugging it in again, it worked (the digital display came on, I set it to "4" and it reached the proper temp), but the problem occurred again the following day, and then it stopped cooling entirely. I ordered the ECB, and it arrived in 3 business days. I watched the installation instruction video, took my time, double-checked the vid a few times to make sure I was doing it correctly, and replaced the ECB by myself in less than an hour. The refrigerator has been running without problems for 3 weeks now. My fridge had a different light bulb configuration than the one in the video, but everything else was the same, and it was a simple repair.
Parts Used:
-
Rebecca from SAINT JOHN, IN
-
Difficulty Level:Easy
-
Total Repair Time:30 - 60 mins
-
Tools:Screw drivers
6 of 6 people
found this instruction helpful.
Was this instruction helpful to you?
Thank you for voting!
ice maker dripped water into ice bin, freeezing into large block of ice,
turn off water and unplug fridge. remove ice maker bottom mounting screw. just loosen the 2 top mounting screws. unplug wire harness from back of fridge. remove old icemaker from freezer compartment. once removed, salvage square endcover and reinstall on new maker. unfasten wire harness from old maker and reinsatll on new one. reinsert thermal wire in new ice maker holding bracket. remove second wiring bracket and reinstall on new maker to hold remaining wires (not mentioned on "how to-" video). remove old ice maker on/off bale and reinstall on new one. remount new maker to top mounting screws, reinsert harness plug into fridge. replace bottom screw,
Parts Used:

-
charles from PHOENIX, AZ
-
Difficulty Level:Easy
-
Total Repair Time:30 - 60 mins
-
Tools:Nutdriver
6 of 6 people
found this instruction helpful.
Was this instruction helpful to you?
Thank you for voting!