




















ABL2222FES Refrigerator - Instructions
Keep searches simple. Use keywords, e.g. "leaking", "pump", "broken" or "fit".
compressor didnt turn on

-
gerardo from el monte, CA
-
Difficulty Level:Really Easy
-
Total Repair Time:Less than 15 mins
-
Tools:Screw drivers
24 of 41 people
found this instruction helpful.
Was this instruction helpful to you?
Thank you for voting!
no cooling either fridge or freezer
Refrigerator was stored for about 2 years and we picked it up when the owner decided to move into an apartment and no longer needed to unit (lost home to foreclosure). Brought the unit home and it worked great for about 3 days. On the third day my wife noticed a slight electrical burning smell. I did also and quickly emptied the unit and hoped for the best. The unit did indeed stop working. I fancy myself a do it myselfer but I would normally not go near electricity but thought what the heck it was free if i ruin it I would give it away. After a little research i found Partselect and they had a great design and a few stories that sounded similar so i pulled the relay capacitor for the compressor and sure enough the unit showed burn marks where the unit had shorted out. Maybe a bug got in there or water, dirt but I ordered the part. I arrived in two days which was great. I installed the part and plug the unit in and crossed my fingers. Very happily the unit clicked on and has been running great ever since. thanks Partselect, while I may not be one of your big customers I will refer anyone with appliance issues to your site first.
Parts Used:
-
chad from stockton, CA
-
Difficulty Level:Easy
-
Total Repair Time:30 - 60 mins
-
Tools:Nutdriver, Pliers
15 of 17 people
found this instruction helpful.
Was this instruction helpful to you?
Thank you for voting!
Original bracket foot brake screw hole was stripped and foot brake would not extend
The repair seemed simple, I just needed to remove the old bracket -- 4 screws -- and slip the new one on.
The tricky bit is that the roller bracket holds the weight of the fridge. So in order to make sure that the fridge did not fall over, and to keep the installation point off the ground so that I could align the screw holes, I needed to shim up the side of the fridge that I was working on.
To tap in the shims, I used a hammer and a spare chunk of wood. I ultimately used 3 shims, and kept tapping until the roller wheel could roll freely. Then I knew that the fridge was high enough. After that, it was pretty easy to remove the 4 screws, align the new bracket, and replace the screws. After that, in order to get the shims out I could just extend the foot brake as it was designed, and that lifted the fridge enough for me to easily slide out the shims. After that I just had to level out the fridge by adjusting the two feet.
The tricky bit is that the roller bracket holds the weight of the fridge. So in order to make sure that the fridge did not fall over, and to keep the installation point off the ground so that I could align the screw holes, I needed to shim up the side of the fridge that I was working on.
To tap in the shims, I used a hammer and a spare chunk of wood. I ultimately used 3 shims, and kept tapping until the roller wheel could roll freely. Then I knew that the fridge was high enough. After that, it was pretty easy to remove the 4 screws, align the new bracket, and replace the screws. After that, in order to get the shims out I could just extend the foot brake as it was designed, and that lifted the fridge enough for me to easily slide out the shims. After that I just had to level out the fridge by adjusting the two feet.
Parts Used:

-
Daniel from BOCA RATON, FL
-
Difficulty Level:A Bit Difficult
-
Total Repair Time:30 - 60 mins
-
Tools:Nutdriver, Screw drivers, Socket set
16 of 20 people
found this instruction helpful.
Was this instruction helpful to you?
Thank you for voting!
Our refrigerator was too cold as the thermistor seems to have gone
It was great. We replaced the thermistor A little difficult to get to the thermistor but once we found it five minutes. My refrigerator seems happy but we will monitor it and see.
Parts Used:
-
Ellen from SUN CITY WEST, AZ
-
Difficulty Level:Really Easy
-
Total Repair Time:15 - 30 mins
-
Tools:Screw drivers
19 of 29 people
found this instruction helpful.
Was this instruction helpful to you?
Thank you for voting!
Ice stripper broken on ice maker
I unplugged the fridge. Loosened the 2 top screws on the ice maker and removed the lower screw. I disconnected the wiring harness and removed the Ice maker. I removed the plastic timer cover in front. I then loosened the screws on the face of the ice maker and removed the broken ice stripper and replaced it with a new one. Re-tightened the screws on the face, installed the timer cover, plugged in the wiring harness, re-attached the ice maker. Plugged the fridge back in and walla, it was making ice in 30 minutes!
Parts Used:

-
Kenneth from New Braunfels, TX
-
Difficulty Level:Really Easy
-
Total Repair Time:Less than 15 mins
-
Tools:Screw drivers
17 of 24 people
found this instruction helpful.
Was this instruction helpful to you?
Thank you for voting!
Old Icemaker noisy and stopped making Ice
The old icemaker had a bad motor and would stall in the fill cycle causing my kitchen to flood on occasion.
The new one was so quiet, I thought it didn't work!
Anyway, one nutdriver and 5 minutes and I had the new one in there... It is so quiet, and I always have plenty of ice now!!!
Thanks!!!
The new one was so quiet, I thought it didn't work!
Anyway, one nutdriver and 5 minutes and I had the new one in there... It is so quiet, and I always have plenty of ice now!!!
Thanks!!!
Parts Used:

-
Daniel from Rhinelander, WI
-
Difficulty Level:Really Easy
-
Total Repair Time:Less than 15 mins
-
Tools:Nutdriver
18 of 28 people
found this instruction helpful.
Was this instruction helpful to you?
Thank you for voting!
center bar to hold crispers was broken
I was easily able to find the part using the online search. I order the part and it arrived in about two days. Installing the part meant pulling out the two crisper drawers, emptying the shelf above the crispers, removing two glass shelf plates, inserting the new part, replacing the glass plates, replacing the food on the shelf and sliding in the two crisper drawers. All in all, about 3 minutes.
Parts Used:

-
Robert from Evanston, IL
-
Difficulty Level:Really Easy
-
Total Repair Time:Less than 15 mins
13 of 14 people
found this instruction helpful.
Was this instruction helpful to you?
Thank you for voting!
light inside fridge was flickering and clicking
tested bulb good ,replaced door switch first(least expensive)then ordered light socket and circuitboard.If clicking sound is heard replace circuitboard first to save on return shipping because the switch and socket where ok
Parts Used:

-
bill from escondido, CA
-
Difficulty Level:Easy
-
Total Repair Time:15 - 30 mins
-
Tools:Nutdriver
20 of 35 people
found this instruction helpful.
Was this instruction helpful to you?
Thank you for voting!
No Water Dispensing
4-Screws 3 plactic hoses to remove pull 3 tubes out and instol new part last then 15 min. Making shure is no leaks. Easy
Parts Used:

-
LOUIE from WESLEY CHAPEL, FL
-
Difficulty Level:Easy
-
Total Repair Time:15 - 30 mins
-
Tools:Nutdriver
13 of 15 people
found this instruction helpful.
Was this instruction helpful to you?
Thank you for voting!
Broken cup water fill on ice maker
I called the local Amana repair man, wanted $150 for a new ice maker because they could not get the part I needed. Found Partsselect.com and the part cost $17 with shipping. They saved me over $100. The repair was very easy too, just removed a couple of screws.
Thanks,
Matt
Thanks,
Matt
Parts Used:

-
Matthew from Aurora, CO
-
Difficulty Level:Easy
-
Total Repair Time:15 - 30 mins
-
Tools:Nutdriver, Screw drivers
13 of 15 people
found this instruction helpful.
Was this instruction helpful to you?
Thank you for voting!
didn't shut crisper pan and cracked pan with refrig door

-
Karen from Ontario, NY
-
Difficulty Level:Really Easy
-
Total Repair Time:Less than 15 mins
13 of 16 people
found this instruction helpful.
Was this instruction helpful to you?
Thank you for voting!
fridge and freezer quit working
noticed the fridge and frezzer were not cold one day.i got on google and typed in the problem and found out the the relay goes bad rather often. was an easy fix. found the parts here on partselect and recieved in with in 2 days of ordering. pulled the old part out put new part in and plugged fridge in and was back up and running with in minutes..thank you partselect....
Parts Used:
-
mike from galt, CA
-
Difficulty Level:Really Easy
-
Total Repair Time:Less than 15 mins
-
Tools:Nutdriver
12 of 14 people
found this instruction helpful.
Was this instruction helpful to you?
Thank you for voting!
Scratches in Surface
This product comes in a bottle with a brush like Liquid Paper. It goes on incredibly easy. A second coat might be needed. I wanted to prevent rust from setting in so I covered the scratches and dings. The paint is a little brighter since my washer is 10 years old but it still looks great.
Parts Used:
-
Michelle from Richardson, TX
-
Difficulty Level:Really Easy
-
Total Repair Time:Less than 15 mins
83 of 227 people
found this instruction helpful.
Was this instruction helpful to you?
Thank you for voting!
Refrigerator section wasn't getting cold.
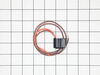
To keep from having to pay the appliance repairman $100.00 for a diagnostic fee I just started replacing parts that were known for causing this problem. First I replaced the compressor switch and capacitor that didn't work so then I replaced the damper controller then I replaced the control board then I saw that the evaporator fan wasn't spinning so I replaced the evaporator fan motor and the bimetal defrost thermostat. That was the problem I wish I would have checked that first. But it works like new now.
Parts Used:
-
Edward from Muncie, IN
-
Difficulty Level:A Bit Difficult
-
Total Repair Time:1- 2 hours
-
Tools:Nutdriver, Pliers, Screw drivers, Socket set
12 of 15 people
found this instruction helpful.
Was this instruction helpful to you?
Thank you for voting!
freezer icing up no cold air circulation to refrigerator
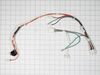
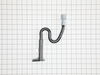
unplugged the unit pulled it away from the wall removed the lower panel removed the drain installed the new replacement . removed the wiring harness and replaced it with the new one replaced the panel and plugged back in
Parts Used:
-
THOMAS M from DENVER, CO
-
Difficulty Level:Easy
-
Total Repair Time:30 - 60 mins
-
Tools:Screw drivers, Socket set
13 of 18 people
found this instruction helpful.
Was this instruction helpful to you?
Thank you for voting!