




















ABD2533DES0 Amana Refrigerator - Instructions
Keep searches simple. Use keywords, e.g. "leaking", "pump", "broken" or "fit".
Ice stripper broken on ice maker
I unplugged the fridge. Loosened the 2 top screws on the ice maker and removed the lower screw. I disconnected the wiring harness and removed the Ice maker. I removed the plastic timer cover in front. I then loosened the screws on the face of the ice maker and removed the broken ice stripper and replaced it with a new one. Re-tightened the screws on the face, installed the timer cover, plugged in the wiring harness, re-attached the ice maker. Plugged the fridge back in and walla, it was making ice in 30 minutes!
Parts Used:

-
Kenneth from New Braunfels, TX
-
Difficulty Level:Really Easy
-
Total Repair Time:Less than 15 mins
-
Tools:Screw drivers
17 of 24 people
found this instruction helpful.
Was this instruction helpful to you?
Thank you for voting!
the crisper cover which covers both crispers broke in a million pieces as i was cleaning it in my sink
well, first, after calming down i removed the glass from my sink (this took a half hour). then i went to the computer and looked for jenn-air parts. the part-select site came up. the site was very easy to use and although i usually leave things like this for my husband to do i decided to order the part myself, which i did.
the trick was finding something on hand to cover the tops of the crispers which were both full of vegetables. i innovated and used a shallow broiler pan and its lid which covered 90% of both the crispers. the part came in five days unwrapping the part was easy, cleaned it with windex (no sink soaking this time) and inserted it on top of crispers............totally easy!!!!!
the trick was finding something on hand to cover the tops of the crispers which were both full of vegetables. i innovated and used a shallow broiler pan and its lid which covered 90% of both the crispers. the part came in five days unwrapping the part was easy, cleaned it with windex (no sink soaking this time) and inserted it on top of crispers............totally easy!!!!!
Parts Used:

-
dora ellen from winnemucca, NV
-
Difficulty Level:Easy
-
Total Repair Time:1- 2 hours
14 of 16 people
found this instruction helpful.
Was this instruction helpful to you?
Thank you for voting!
Freezer was not staying cold enugh for ice maker to work. Discovered fan was not working to cool condensor. Fan motor would only run if manually turned.
Unplugged refrigerator. Removed lower back access panels and panel running up the back of refrigerator. Removed and disconnected old fan. Removed old fan motor from mounting bracket. Removed fan blade from old fan motor and placed on new fan motor. Connected new fan motor to power supply. Tested. Reinstalled.
Parts Used:

-
David from Cedarville, OH
-
Difficulty Level:A Bit Difficult
-
Total Repair Time:More than 2 hours
-
Tools:Screw drivers, Socket set
14 of 16 people
found this instruction helpful.
Was this instruction helpful to you?
Thank you for voting!
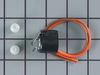
Freezer didn't defrost
I removed the back panel. I used my hair dryer to remove the build up ice. Then I removed the old thermostat, spliced the wires to install the new thermostat, and crimped the wires. I saved $150 doing it myself. If you know how to splice and crimp wires, you can do this; even a caveman can do it.
Parts Used:
-
Charlene from Baltimore, MD
-
Difficulty Level:Really Easy
-
Total Repair Time:15 - 30 mins
15 of 19 people
found this instruction helpful.
Was this instruction helpful to you?
Thank you for voting!
Old Icemaker noisy and stopped making Ice
The old icemaker had a bad motor and would stall in the fill cycle causing my kitchen to flood on occasion.
The new one was so quiet, I thought it didn't work!
Anyway, one nutdriver and 5 minutes and I had the new one in there... It is so quiet, and I always have plenty of ice now!!!
Thanks!!!
The new one was so quiet, I thought it didn't work!
Anyway, one nutdriver and 5 minutes and I had the new one in there... It is so quiet, and I always have plenty of ice now!!!
Thanks!!!
Parts Used:

-
Daniel from Rhinelander, WI
-
Difficulty Level:Really Easy
-
Total Repair Time:Less than 15 mins
-
Tools:Nutdriver
18 of 28 people
found this instruction helpful.
Was this instruction helpful to you?
Thank you for voting!
No ice or water at door
Removed the filter from inside the ref then disconneted the water line to filter and to ice maker on blue line just push line down then up to remove. Then pull whole assb. thru refreg. and install new one. very easy 2nd time mine went bad 1st time it coast almost $300.00 this time less than $50.00. Take your time and its fool proof.
Parts Used:

-
Harvey O. from Venice, FL
-
Difficulty Level:Really Easy
-
Total Repair Time:15 - 30 mins
-
Tools:Nutdriver, Screw drivers, Wrench (Adjustable)
19 of 32 people
found this instruction helpful.
Was this instruction helpful to you?
Thank you for voting!
Water head filter was leaking
Followed the first set of instructions from the parts select website. It worked perfectly. Just note that the way to remove the "blue" tube is by pushing down on the fitting and then pull the tube out. Be careful with the styrofoam piece around the hole for the tubes as it can crumble around the edges.
Parts Used:
-
Lee from Yarmouth, ME
-
Difficulty Level:Really Easy
-
Total Repair Time:15 - 30 mins
-
Tools:Wrench (Adjustable)
17 of 26 people
found this instruction helpful.
Was this instruction helpful to you?
Thank you for voting!
light inside fridge was flickering and clicking
tested bulb good ,replaced door switch first(least expensive)then ordered light socket and circuitboard.If clicking sound is heard replace circuitboard first to save on return shipping because the switch and socket where ok
Parts Used:

-
bill from escondido, CA
-
Difficulty Level:Easy
-
Total Repair Time:15 - 30 mins
-
Tools:Nutdriver
20 of 35 people
found this instruction helpful.
Was this instruction helpful to you?
Thank you for voting!
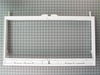
Parts broke due to overloading crisper trays
Wife learned you can overload the cheese and fresh veggie trays and the plastic rails broke. Repair required removing parts from the old crisper frame -- no experience and no instructions. Had to study broken part and figure out how to remove parts. Released catches with a knife and, by trial and error, figured out how to install rescued components on new crisper frame with minor damage and frustration.
Parts Used:

-
Joe from Richardson, TX
-
Difficulty Level:A Bit Difficult
-
Total Repair Time:30 - 60 mins
15 of 21 people
found this instruction helpful.
Was this instruction helpful to you?
Thank you for voting!
Broken cup water fill on ice maker
I called the local Amana repair man, wanted $150 for a new ice maker because they could not get the part I needed. Found Partsselect.com and the part cost $17 with shipping. They saved me over $100. The repair was very easy too, just removed a couple of screws.
Thanks,
Matt
Thanks,
Matt
Parts Used:

-
Matthew from Aurora, CO
-
Difficulty Level:Easy
-
Total Repair Time:15 - 30 mins
-
Tools:Nutdriver, Screw drivers
13 of 15 people
found this instruction helpful.
Was this instruction helpful to you?
Thank you for voting!
Tab on end broke off allow crispers to fall off rail.
-
Ed from South Lebanon, OH
-
Difficulty Level:Really Easy
-
Total Repair Time:Less than 15 mins
12 of 13 people
found this instruction helpful.
Was this instruction helpful to you?
Thank you for voting!
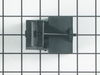
fridge and freezer quit working
noticed the fridge and frezzer were not cold one day.i got on google and typed in the problem and found out the the relay goes bad rather often. was an easy fix. found the parts here on partselect and recieved in with in 2 days of ordering. pulled the old part out put new part in and plugged fridge in and was back up and running with in minutes..thank you partselect....
Parts Used:
-
mike from galt, CA
-
Difficulty Level:Really Easy
-
Total Repair Time:Less than 15 mins
-
Tools:Nutdriver
12 of 14 people
found this instruction helpful.
Was this instruction helpful to you?
Thank you for voting!
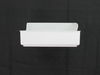
ice maker stopped making ice
I loosened the two top screws, removed the bottom screw, lifted up on ice maker and slid it off, unplugged the wire from refrig. I transfered the wire to the new icemaker, pluged it back in, placed it on the two screws, installed lower screw, tighten top screws. Total time spent less than 15 minutes. The ice maker cost $125.00 with freight. Sears wanted $374.00
Parts Used:
-
ROBERT from FLAGLER BEACH, FL
-
Difficulty Level:Really Easy
-
Total Repair Time:Less than 15 mins
-
Tools:Nutdriver
20 of 39 people
found this instruction helpful.
Was this instruction helpful to you?
Thank you for voting!
fridge side was not getting cold
first I removed the panels to see if the coils were getting frosty . Then I noticed that the fan was not spinning. I tested voltage to the fan and it was hot. I ordered the new fan put it in placve and, voila!.
Fixed my fride for under 50 bucks
Fixed my fride for under 50 bucks
Parts Used:


-
neil from murfreesboro, TN
-
Difficulty Level:Easy
-
Total Repair Time:15 - 30 mins
-
Tools:Nutdriver, Pliers
14 of 22 people
found this instruction helpful.
Was this instruction helpful to you?
Thank you for voting!
Left front plastic wheel was broken
Pop loose the plastic grate at the bottom.
Locate and remove the wheel leveling screw from the front bottom corner.
Remove cotter pin from the pin that mounts the wheel assembly to the refrigerator. Tap out the mounting pin.
Lift out the wheel assembly.
Remove the Roller pin from the wheel assembly. I used a Dremel tool with a cutting disk. A hack saw will also probably work.
Install the new roller pin and wheel into the wheel assembly. Use a hammer or vice to peen over the end of the roller pin.
Reinstall and adjust wheel assembly.
Locate and remove the wheel leveling screw from the front bottom corner.
Remove cotter pin from the pin that mounts the wheel assembly to the refrigerator. Tap out the mounting pin.
Lift out the wheel assembly.
Remove the Roller pin from the wheel assembly. I used a Dremel tool with a cutting disk. A hack saw will also probably work.
Install the new roller pin and wheel into the wheel assembly. Use a hammer or vice to peen over the end of the roller pin.
Reinstall and adjust wheel assembly.
Parts Used:

-
mike from holly springs, NC
-
Difficulty Level:Really Easy
-
Total Repair Time:30 - 60 mins
-
Tools:Nutdriver, Pliers, Screw drivers
12 of 16 people
found this instruction helpful.
Was this instruction helpful to you?
Thank you for voting!