




















ABB2222FEQ Amana Refrigerator - Instructions
Keep searches simple. Use keywords, e.g. "leaking", "pump", "broken" or "fit".
replace plastic wheels on refridgerator
I used board levers to do one side at a time.Kinda tricky, but you can hoist up fridge high enough to replace wheels. take your time think it out and be safe . Make sure you use saftey boards to support load to protect yourself==good luck A small mirror may help to see how the rollers alien in the supports.
Parts Used:
-
robert from oak forest, IL
-
Difficulty Level:A Bit Difficult
-
Total Repair Time:1- 2 hours
-
Tools:Socket set
24 of 36 people
found this instruction helpful.
Was this instruction helpful to you?
Thank you for voting!
very noisy intermittently
Inside the food section above the top shelf behind the light in the back, remove the lid from the cover in lifting from the lower edge no tools necessary here. Remove two screws with Phillips screw driver remove entire housing inclusive Styrofoam insert. Unplug damper Control Unit. Remove two screws and remove damper control unit and replace in reverse order. Finally that refrigerator is quiet, I should have done this long time ago. Unbelievable this is the second part I have to replace on this expensive refrigerator.
Parts Used:

-
klaus from san diego, CA
-
Difficulty Level:Really Easy
-
Total Repair Time:Less than 15 mins
-
Tools:Screw drivers
20 of 25 people
found this instruction helpful.
Was this instruction helpful to you?
Thank you for voting!
Refrigerator wouldn't get cold enough.
Freezer would get cold at bottom and some of the refrigerator. Took of freezer back panel and located freezer fan. Took a meter and saw power was getting to it, but not working. Removed fan and replaced with new on, working like a charm. Cold air was not circulating enough throughout the unit because fan was not working. It was not the thermostat or adapter control.
Parts Used:

-
Ty from Wentzville, MO
-
Difficulty Level:Easy
-
Total Repair Time:15 - 30 mins
-
Tools:Screw drivers
20 of 26 people
found this instruction helpful.
Was this instruction helpful to you?
Thank you for voting!
center rail to hold drawers straight was broken
Took drawers out, inserted the rail and put the drawers back in and voila. Fixed.
Parts Used:

-
Georgette from Webster, MA
-
Difficulty Level:Really Easy
-
Total Repair Time:Less than 15 mins
17 of 19 people
found this instruction helpful.
Was this instruction helpful to you?
Thank you for voting!
Freezer icing up .
Watched Partselect video of P-trap installation.Removed water line & back cover& disconnected wires to water solenoid .Removed old drain tube & old problematic rubber funnel. Used contact cleaner to clean rubber residue from drain line and used a little silicone to aide reassembly. Job went well thanks to video.
Parts Used:
-
Rich from Lansing, IL
-
Difficulty Level:Easy
-
Total Repair Time:30 - 60 mins
-
Tools:Nutdriver, Wrench (Adjustable)
17 of 19 people
found this instruction helpful.
Was this instruction helpful to you?
Thank you for voting!
compressor didnt turn on

-
gerardo from el monte, CA
-
Difficulty Level:Really Easy
-
Total Repair Time:Less than 15 mins
-
Tools:Screw drivers
24 of 41 people
found this instruction helpful.
Was this instruction helpful to you?
Thank you for voting!
No Problem, time to replace water filter
Turned the old one to unseat and replaced with a new one in the reverse order.
Parts Used:
-
Ralph from Longmont, CO
-
Difficulty Level:Really Easy
-
Total Repair Time:Less than 15 mins
18 of 24 people
found this instruction helpful.
Was this instruction helpful to you?
Thank you for voting!
Following a brief power outage, it stopped producing ice. Harvester was at 6:00 with fingers frozen in ice cubes. Would make a batch if I freed the harvester and jumped the t-stat, but would quit again.
Unplugged refrigerator. Used nut driver to remove small bolt retaining wire cover on right side of ice maker. Removed wire cover, used flat head screw driver to depress side-rail clips. Ice maker slid out, unplugged. Timer module cover pops off easily. Three screws removed the timer module. Installation was reverse of removal. Had ice in less than an hour, bin was full by next morning. If you have a screw driver and know what it's for, this job should come easily.
Parts Used:
-
Joe from Pryor, OK
-
Difficulty Level:Really Easy
-
Total Repair Time:Less than 15 mins
-
Tools:Nutdriver, Screw drivers
18 of 26 people
found this instruction helpful.
Was this instruction helpful to you?
Thank you for voting!
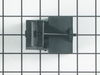
no cooling either fridge or freezer
Refrigerator was stored for about 2 years and we picked it up when the owner decided to move into an apartment and no longer needed to unit (lost home to foreclosure). Brought the unit home and it worked great for about 3 days. On the third day my wife noticed a slight electrical burning smell. I did also and quickly emptied the unit and hoped for the best. The unit did indeed stop working. I fancy myself a do it myselfer but I would normally not go near electricity but thought what the heck it was free if i ruin it I would give it away. After a little research i found Partselect and they had a great design and a few stories that sounded similar so i pulled the relay capacitor for the compressor and sure enough the unit showed burn marks where the unit had shorted out. Maybe a bug got in there or water, dirt but I ordered the part. I arrived in two days which was great. I installed the part and plug the unit in and crossed my fingers. Very happily the unit clicked on and has been running great ever since. thanks Partselect, while I may not be one of your big customers I will refer anyone with appliance issues to your site first.
Parts Used:
-
chad from stockton, CA
-
Difficulty Level:Easy
-
Total Repair Time:30 - 60 mins
-
Tools:Nutdriver, Pliers
15 of 17 people
found this instruction helpful.
Was this instruction helpful to you?
Thank you for voting!
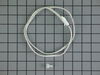
Our refrigerator was too cold as the thermistor seems to have gone
It was great. We replaced the thermistor A little difficult to get to the thermistor but once we found it five minutes. My refrigerator seems happy but we will monitor it and see.
Parts Used:
-
Ellen from SUN CITY WEST, AZ
-
Difficulty Level:Really Easy
-
Total Repair Time:15 - 30 mins
-
Tools:Screw drivers
19 of 29 people
found this instruction helpful.
Was this instruction helpful to you?
Thank you for voting!
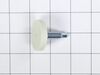
Original bracket foot brake screw hole was stripped and foot brake would not extend
The repair seemed simple, I just needed to remove the old bracket -- 4 screws -- and slip the new one on.
The tricky bit is that the roller bracket holds the weight of the fridge. So in order to make sure that the fridge did not fall over, and to keep the installation point off the ground so that I could align the screw holes, I needed to shim up the side of the fridge that I was working on.
To tap in the shims, I used a hammer and a spare chunk of wood. I ultimately used 3 shims, and kept tapping until the roller wheel could roll freely. Then I knew that the fridge was high enough. After that, it was pretty easy to remove the 4 screws, align the new bracket, and replace the screws. After that, in order to get the shims out I could just extend the foot brake as it was designed, and that lifted the fridge enough for me to easily slide out the shims. After that I just had to level out the fridge by adjusting the two feet.
The tricky bit is that the roller bracket holds the weight of the fridge. So in order to make sure that the fridge did not fall over, and to keep the installation point off the ground so that I could align the screw holes, I needed to shim up the side of the fridge that I was working on.
To tap in the shims, I used a hammer and a spare chunk of wood. I ultimately used 3 shims, and kept tapping until the roller wheel could roll freely. Then I knew that the fridge was high enough. After that, it was pretty easy to remove the 4 screws, align the new bracket, and replace the screws. After that, in order to get the shims out I could just extend the foot brake as it was designed, and that lifted the fridge enough for me to easily slide out the shims. After that I just had to level out the fridge by adjusting the two feet.
Parts Used:

-
Daniel from BOCA RATON, FL
-
Difficulty Level:A Bit Difficult
-
Total Repair Time:30 - 60 mins
-
Tools:Nutdriver, Screw drivers, Socket set
16 of 20 people
found this instruction helpful.
Was this instruction helpful to you?
Thank you for voting!
Ice stripper broken on ice maker
I unplugged the fridge. Loosened the 2 top screws on the ice maker and removed the lower screw. I disconnected the wiring harness and removed the Ice maker. I removed the plastic timer cover in front. I then loosened the screws on the face of the ice maker and removed the broken ice stripper and replaced it with a new one. Re-tightened the screws on the face, installed the timer cover, plugged in the wiring harness, re-attached the ice maker. Plugged the fridge back in and walla, it was making ice in 30 minutes!
Parts Used:

-
Kenneth from New Braunfels, TX
-
Difficulty Level:Really Easy
-
Total Repair Time:Less than 15 mins
-
Tools:Screw drivers
17 of 24 people
found this instruction helpful.
Was this instruction helpful to you?
Thank you for voting!
Old Icemaker noisy and stopped making Ice
The old icemaker had a bad motor and would stall in the fill cycle causing my kitchen to flood on occasion.
The new one was so quiet, I thought it didn't work!
Anyway, one nutdriver and 5 minutes and I had the new one in there... It is so quiet, and I always have plenty of ice now!!!
Thanks!!!
The new one was so quiet, I thought it didn't work!
Anyway, one nutdriver and 5 minutes and I had the new one in there... It is so quiet, and I always have plenty of ice now!!!
Thanks!!!
Parts Used:

-
Daniel from Rhinelander, WI
-
Difficulty Level:Really Easy
-
Total Repair Time:Less than 15 mins
-
Tools:Nutdriver
18 of 28 people
found this instruction helpful.
Was this instruction helpful to you?
Thank you for voting!
icemaker quit working
removed screws that held the ice maker in place, then removed the cover (popped off) The drive element was easy to remove, three screws and it was out. I put in the new part and reinstalled the icemaker with the three screws that hold it in place. I never call Sears for any repair. They use contract help and I have heard horror stories about those guys!
Parts Used:
-
Kenneth from Aledo, TX
-
Difficulty Level:Really Easy
-
Total Repair Time:30 - 60 mins
-
Tools:Pliers, Screw drivers
16 of 22 people
found this instruction helpful.
Was this instruction helpful to you?
Thank you for voting!
center bar to hold crispers was broken
I was easily able to find the part using the online search. I order the part and it arrived in about two days. Installing the part meant pulling out the two crisper drawers, emptying the shelf above the crispers, removing two glass shelf plates, inserting the new part, replacing the glass plates, replacing the food on the shelf and sliding in the two crisper drawers. All in all, about 3 minutes.
Parts Used:
-
Robert from Evanston, IL
-
Difficulty Level:Really Easy
-
Total Repair Time:Less than 15 mins
13 of 14 people
found this instruction helpful.
Was this instruction helpful to you?
Thank you for voting!