




















AAV7000AGW Admiral Washer - Instructions
Keep searches simple. Use keywords, e.g. "leaking", "pump", "broken" or "fit".
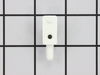
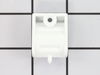
lid hinge pin broke
-
Charles from TEMPE, AZ
-
Difficulty Level:Very Easy
-
Total Repair Time:15 - 30 mins
-
Tools:Screw drivers
1 person
found this instruction helpful.
Was this instruction helpful to you?
Thank you for voting!
Hinge Broken
-
Angela from FACTORYVILLE, PA
-
Difficulty Level:Really Easy
-
Total Repair Time:15 - 30 mins
-
Tools:Screw drivers
1 person
found this instruction helpful.
Was this instruction helpful to you?
Thank you for voting!
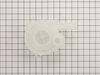
washer wasnt spinning out water and making noises
i removed 3 screws from back of washer , took off 2 hose clamps , then i took 4 screws out of waterpump, removed belt . put new pump on very easy. thanks part was perfect, fixed problem
Parts Used:
-
john from bremen, OH
-
Difficulty Level:Really Easy
-
Total Repair Time:15 - 30 mins
-
Tools:Pliers, Socket set
1 person
found this instruction helpful.
Was this instruction helpful to you?
Thank you for voting!
1Loud Reaking Noise During Pump Cycle
Removed front panel from washer,removed belt, used 1/2 inch socket setand channel locks to remove hose and pump. Installed new pump, reinstalled hoses and belt, and placed front panel on machine.
Parts Used:
-
JOHN from WINTER SPRINGS, FL
-
Difficulty Level:Easy
-
Total Repair Time:15 - 30 mins
-
Tools:Screw drivers, Socket set
2 of 4 people
found this instruction helpful.
Was this instruction helpful to you?
Thank you for voting!
Plastic Lid Hinge was broken
Changing the hinge was not difficult, but here's a hint: the top of the washer raises up if you pry it with a big screwdriver- be sure to wrap the screwdriver in a cloth so as not to scratch the appliance. Doing it this way makes it easy to access the retaining screws. You can push the wash tub to one side and reach the screws from underneath, but they're a tight fit and doing it that way is difficult. Overall a pretty easy repair and I'm only moderately handy.
Parts Used:
-
Thomas from Coral Springs, FL
-
Difficulty Level:Easy
-
Total Repair Time:15 - 30 mins
-
Tools:Nutdriver, Screw drivers
2 of 4 people
found this instruction helpful.
Was this instruction helpful to you?
Thank you for voting!
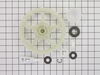
Wouldn't spin after rince
-
joe from LAWRENCEVILLE, NJ
-
Difficulty Level:Really Easy
-
Total Repair Time:30 - 60 mins
-
Tools:Nutdriver, Screw drivers
1 person
found this instruction helpful.
Was this instruction helpful to you?
Thank you for voting!
Spin cycle out of Balance - Machine walks from wall
Disconnect Power. Disconnect supply hoses. Open top by releasing top retainer clips with a thin blade or putty knife. Remove 2 sheet metal screws retaining front cover. Remove front cover. Lay a blanket on the floor and lay the machine over on its side leaving access to the front where the panel was just removed. Take belt off. Remove pump hose at bottom of drum. Prop up drum so it is centered in its normal position and not laying to one side. Do this near the lid end. Remove all centering springs - carefully. Drum and transmission assy will now come out through the front opening. Flip drum assy upside down with transmission up. Loosen the screws (do not remove completely - WARNING OF 200 LBS SPRING LOAD!) that clamp the snubber ring to the transmission. Remove the old snubber ring and replace with new. Be sure it is completely under the flange all the way around. Tighten the retaining ring screws. Reassemble all parts in reverse order. Done. Be sure to level the machine per owners manual instructions.
Parts Used:

-
Needham from Leesville, SC
-
Difficulty Level:A Bit Difficult
-
Total Repair Time:1- 2 hours
-
Tools:Nutdriver, Pliers, Screw drivers
1 person
found this instruction helpful.
Was this instruction helpful to you?
Thank you for voting!
Noise
-
Marylou from Old Forge, NY
-
Difficulty Level:Easy
-
Total Repair Time:30 - 60 mins
-
Tools:Nutdriver, Wrench (Adjustable)
1 person
found this instruction helpful.
Was this instruction helpful to you?
Thank you for voting!
crack in tub hose causing washer water to spill on to floor
raised the top of the washer to get at the front panel screws. Removed the front panel. Removed the cracked hose and installed the new one. Reinstalled the front and top panels.
Parts Used:
-
Bette from S BARRINGTON, IL
-
Difficulty Level:Easy
-
Total Repair Time:30 - 60 mins
-
Tools:Pliers, Socket set
1 person
found this instruction helpful.
Was this instruction helpful to you?
Thank you for voting!
Water leak
Removed front panel by releasing spring clips with putty knife and removed two screws with a ratchet and 5/16” socket. Removed rear access cover with a ratchet and 5/16” socket. Removed and replaced tub to pump hose. Loosened clamps on each end of hose with channel locks.
Re installed rear access cover and front panel.
Re installed rear access cover and front panel.
Parts Used:
-
Stephen M. from LEWES, DE
-
Difficulty Level:Really Easy
-
Total Repair Time:30 - 60 mins
-
Tools:Socket set
1 person
found this instruction helpful.
Was this instruction helpful to you?
Thank you for voting!
Washer basket shaking / thumping during spin
Washer was shaking/thumping during the spin cycle for even the lightest loads. Previously changed the suspension springs, and the problem was not resolved.
I was able to locate the service manual for this washing machine online and download the PDF for free. Getting this will provide dis-assembly instructions and photos.
Sorta like requiring that you disassemble an engine in order to change the oil filter. Engineering suggestion here for any Maytag folks cruising the site. Mount the snubber ring with it's own clamping ring so that you can change it (snubber) without removing the agitator & spinner basket from the tub. Think something like this... Remove suspension springs, remove hoses, flip entire assy. upside down, then replace snubber ring without any further dis-assembly.
I followed the service manual's recommended approach, here are the basic steps:
1) Open the small back cover and detach the wash drum's drain hose at the waste pump, and while you've got back of the unit visible, tip forward and unhook the drive belt from the motor, pump and agitator.
2) Use a spatula or putty knife on the front seam between the lid and the lower body to unlock the spring latches which keep the top on. Flip the top up and back to get into the basket area. Take off the front cover so you can see the wash drum.
3) Remove the top cap/splash guard around the wash drum by pressing the cap/splash guard down while unhooking the little ears.
4) Remove the fabric softener cap from the center of the agitator and remove the bolt that's down the center of the agitator. This will require a socket. Remove agitator and plastic skirt that goes around the bottom of the agitator.
5) Remove the plastic sealing nut. This nut has a number of small plastic points on it and I broke a number of them off with the channel-locks while removing this. You may need to order a spare.
6) Remove the washing drum.
7) Use the spanner to remove the basket hub. I made a spanner out of some scrap steel parts I had and mounted using the screws I took out in step 5. If you have a spanner, you're set here.
8) Unhook the suspension springs and you should be able to lift the entire unit right out of the base.
9) Remove the cap on the bottom pulley and pull the E-clip that holds locks the pulley in place. Remove the pulley and plastic gears which mesh with the transmission shaft.
9) The snubber ring (the problem here) is located under the brake plate/ring on the very bottom. The brake assembly is preloaded with a spring inside, the manual says to use a special spring compressor while assembling. I didn't have any trouble holding it down while I had my 5 year-old daughter start the screws for me. Remove the 6 small screws around the brake ring and remove the shards of the worn out snubber. Replace with new snubber and start re-assembly.
Possible Shortcut:
After doing this, I see it may be possible to shortcut the factory directions. I can't guarantee that it will be successful, but after doing it I don't see any reason it wouldn't work. Following above numbers:
1) Do numbers 1-3 above.
2) Jump to step 8, remove the suspension springs and just get the entire drum removed and inverted. Don't mess with the legs, don't mess with the attachments or anything. You will only need to work on the pulley.
3) Remove the drive pulley and brake retaining plate. Shouldn't need to do anything with the inside of the washing drum here. No need to mess with the seals and/or plastic nuts.
4) Replace snubber and reassemble.
I was able to locate the service manual for this washing machine online and download the PDF for free. Getting this will provide dis-assembly instructions and photos.
Sorta like requiring that you disassemble an engine in order to change the oil filter. Engineering suggestion here for any Maytag folks cruising the site. Mount the snubber ring with it's own clamping ring so that you can change it (snubber) without removing the agitator & spinner basket from the tub. Think something like this... Remove suspension springs, remove hoses, flip entire assy. upside down, then replace snubber ring without any further dis-assembly.
I followed the service manual's recommended approach, here are the basic steps:
1) Open the small back cover and detach the wash drum's drain hose at the waste pump, and while you've got back of the unit visible, tip forward and unhook the drive belt from the motor, pump and agitator.
2) Use a spatula or putty knife on the front seam between the lid and the lower body to unlock the spring latches which keep the top on. Flip the top up and back to get into the basket area. Take off the front cover so you can see the wash drum.
3) Remove the top cap/splash guard around the wash drum by pressing the cap/splash guard down while unhooking the little ears.
4) Remove the fabric softener cap from the center of the agitator and remove the bolt that's down the center of the agitator. This will require a socket. Remove agitator and plastic skirt that goes around the bottom of the agitator.
5) Remove the plastic sealing nut. This nut has a number of small plastic points on it and I broke a number of them off with the channel-locks while removing this. You may need to order a spare.
6) Remove the washing drum.
7) Use the spanner to remove the basket hub. I made a spanner out of some scrap steel parts I had and mounted using the screws I took out in step 5. If you have a spanner, you're set here.
8) Unhook the suspension springs and you should be able to lift the entire unit right out of the base.
9) Remove the cap on the bottom pulley and pull the E-clip that holds locks the pulley in place. Remove the pulley and plastic gears which mesh with the transmission shaft.
9) The snubber ring (the problem here) is located under the brake plate/ring on the very bottom. The brake assembly is preloaded with a spring inside, the manual says to use a special spring compressor while assembling. I didn't have any trouble holding it down while I had my 5 year-old daughter start the screws for me. Remove the 6 small screws around the brake ring and remove the shards of the worn out snubber. Replace with new snubber and start re-assembly.
Possible Shortcut:
After doing this, I see it may be possible to shortcut the factory directions. I can't guarantee that it will be successful, but after doing it I don't see any reason it wouldn't work. Following above numbers:
1) Do numbers 1-3 above.
2) Jump to step 8, remove the suspension springs and just get the entire drum removed and inverted. Don't mess with the legs, don't mess with the attachments or anything. You will only need to work on the pulley.
3) Remove the drive pulley and brake retaining plate. Shouldn't need to do anything with the inside of the washing drum here. No need to mess with the seals and/or plastic nuts.
4) Replace snubber and reassemble.
Parts Used:
-
Dan from Seattle, WA
-
Difficulty Level:A Bit Difficult
-
Total Repair Time:1- 2 hours
-
Tools:Nutdriver, Pliers, Screw drivers, Socket set, Wrench (Adjustable)
2 of 5 people
found this instruction helpful.
Was this instruction helpful to you?
Thank you for voting!
Pulley Insert Coming Out Of Pully Hitting Housing
Replaced pump because pulley did not come off pump without breaking pump in half.
Parts Used:
-
Edward from Hollywood, FL
-
Difficulty Level:Really Easy
-
Total Repair Time:30 - 60 mins
-
Tools:Socket set
1 of 2 people
found this instruction helpful.
Was this instruction helpful to you?
Thank you for voting!
Washer making loud noise and tub off balance
-
Hollee from Rancho Mirage, CA
-
Difficulty Level:A Bit Difficult
-
Total Repair Time:30 - 60 mins
-
Tools:Nutdriver, Pliers, Screw drivers, Socket set, Wrench (Adjustable)
1 of 2 people
found this instruction helpful.
Was this instruction helpful to you?
Thank you for voting!
noisy out of balance during spin cycles
I followed the instructions that other posters suggested. The springs were the toughest part to remove and reinstall. Having my wife push the tub enabled me to use vice grips to get them back on. Read about the coins or washers to spread the springs too late... would have helped. Running a wash now and it's spinning great and no noise!
Parts Used:
-
Ronald from Wading River, NY
-
Difficulty Level:A Bit Difficult
-
Total Repair Time:More than 2 hours
-
Tools:Nutdriver, Socket set
1 of 2 people
found this instruction helpful.
Was this instruction helpful to you?
Thank you for voting!
broken lid hinge
short drive, 90 degree, "star" driver. push tub to side and back to reach lower part of old hinge, remove single screw. (careful not to drop it into the "mechanics" of the tub.) repeat for the other side. remove parts from lid. reassemble new parts onto lid, along with lower hinge parts. secure the lower hinge to door part(s) with masking tape to hold in place. hold lid in place over lower hinge screw holes and start screws by hand. snug up the screws and your done! the 'STAR" screws may be relpaced with similar "phillips" so you wont have to scrounge for a "star" driver the next time.
Parts Used:
-
dorris from slaughters, KY
-
Difficulty Level:Easy
-
Total Repair Time:15 - 30 mins
-
Tools:Screw drivers
1 of 2 people
found this instruction helpful.
Was this instruction helpful to you?
Thank you for voting!