




















AAV4200AGW Admiral Washer - Instructions
Keep searches simple. Use keywords, e.g. "leaking", "pump", "broken" or "fit".
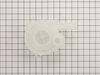
drain pump failed
I first had to take the old part out to find out what the part number was. Then I went online and ordered the part. Once the part came in I attached to part and replaced the drive belt. I did not think it could be so easy.
Parts Used:
-
Gregg from Glendale, AZ
-
Difficulty Level:Really Easy
-
Total Repair Time:Less than 15 mins
-
Tools:Socket set
3 of 5 people
found this instruction helpful.
Was this instruction helpful to you?
Thank you for voting!
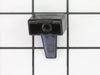
actuater broke and I replaced it in 5 minutes
unscrewed screw holding old actuater in and replaced it whith the new part.
Parts Used:
-
Thomas from Clayton, NJ
-
Difficulty Level:Really Easy
-
Total Repair Time:Less than 15 mins
-
Tools:Screw drivers
6 of 14 people
found this instruction helpful.
Was this instruction helpful to you?
Thank you for voting!
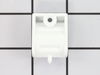
Wind blew lid off washing machine while being moved
First I lifted the top of the washer to get access to the screws that held the hinges in place, unscrewed them, removed the broken hinges and put the new ones on, replaced the screws and closed the top. It was very easy. I was amazed that I could still get replacement parts and at such a great price, less than $15.00 with shipping!
Parts Used:
-
Lisa from West Branch, MI
-
Difficulty Level:Really Easy
-
Total Repair Time:Less than 15 mins
-
Tools:Screw drivers
2 of 2 people
found this instruction helpful.
Was this instruction helpful to you?
Thank you for voting!
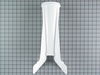
Broken agitator top
Pretty simple repair--popped the fabric softener cup off of the agitator top and took out the bolt that secures it to the assembly. Removed the broken agitator top, replaced with the new one and reinstalled the bolt and softener cup. EZ as pie for only $24 including shipping! Great price!
Fabulous turnaround time from www.partselect.com. I had the problem corrected inside of 4 days using standard shipping. I will definitely do business with them again!
Fabulous turnaround time from www.partselect.com. I had the problem corrected inside of 4 days using standard shipping. I will definitely do business with them again!
Parts Used:
-
sherman from mckinney, TX
-
Difficulty Level:Really Easy
-
Total Repair Time:Less than 15 mins
-
Tools:Socket set
2 of 2 people
found this instruction helpful.
Was this instruction helpful to you?
Thank you for voting!
Wing on agitator was broken
Removed one bolt, main thing was I had to buy a 10 inch extension for the socket and wrench to reach inside of the agitator, pulled the old one off replaced the new one tighten the bolt and I was done. 10 minutes start to finish.
Parts Used:
-
Roy from Annapolis, MD
-
Difficulty Level:Really Easy
-
Total Repair Time:Less than 15 mins
-
Tools:Socket set
2 of 2 people
found this instruction helpful.
Was this instruction helpful to you?
Thank you for voting!
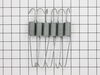
banging out of balance
-
Daryl from LYNCHBURG, OH
-
Difficulty Level:Really Easy
-
Total Repair Time:15 - 30 mins
-
Tools:Nutdriver, Pliers
2 of 2 people
found this instruction helpful.
Was this instruction helpful to you?
Thank you for voting!
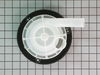
Noise from pump
On a scale of 1 to 5 (with 5 being the most difficult), I would rate this a 2 or 3. It is just a matter of knowing how to access the pump. First I unplugged the washer. Then used putty knife to push in clips to lift up top of washer (the clips are located about 1 inch in from each side). Used socket to remove the two screws holding on front panel. Disconnected the two hoses from pump using pliers to squeeze clips (be sure to have cup or bowl handy because water will come out of the hoses). Lifted up washer and removed belt from pump. Used socket wrench to remove pump and replace with new one. Reattached hoses and belt. Reattached front panel and closed the top of the washer. Everything was easy to access.
Parts Used:
-
Donald from Brielle, NJ
-
Difficulty Level:Really Easy
-
Total Repair Time:15 - 30 mins
-
Tools:Socket set
3 of 5 people
found this instruction helpful.
Was this instruction helpful to you?
Thank you for voting!
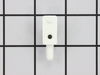
Left hinge pin & hinge sheared
Hving read some of the tips in regards to this repair I set out with equal parts of confidence & apprehension. The advice of shifting the tub toward the hinge to be removed is in itself the key to the whole procedure. After having done so & wedging a dust pan handle between the tub & frame to first one side & then the other, I removed the entire lid with the hinge & hinge pin assys. attached as ther is not sufficient clearance to slide a servicable hinge pin from a hinge when only one hinge has beeen removed. With the lid completely removed access to the hinge pin(s) is straight forward. I suggest screwing & unscrewing the fastening screw into a new hinge assy before mounting the hinge onto the machine & also using an offset philips screwdriver or ,as I did, a 1/4" drv. ratchet with a #2 philips apex bit which allows for a better feel & more control over the upside down blind operation of removing & replacing the fastening screw into the hinge assy. Hope this helps. Tom
Parts Used:
-
Tom from Camp Verde, AZ
-
Difficulty Level:Easy
-
Total Repair Time:15 - 30 mins
-
Tools:Screw drivers, Socket set
2 of 2 people
found this instruction helpful.
Was this instruction helpful to you?
Thank you for voting!
My washing machine would be extremley loud when washing clothes then one day it stopped working.
First i unscrewed the bottom latch to check inside the maching, i then disconected the vertical style pump with pulley from its position and i discoverd a huge crack that was made by a loose pulley. After that i ordered another pulley from this web site easaly installed the pulley and now my maching works like new. The part was less than 50 bucks i saved over 200 bucks by not going out and buying a new machine.
Parts Used:
-
damian from carpentersville, IL
-
Difficulty Level:Easy
-
Total Repair Time:15 - 30 mins
-
Tools:Screw drivers
2 of 2 people
found this instruction helpful.
Was this instruction helpful to you?
Thank you for voting!
washer would get off balance on spin cycle

-
sidney from JAX BCH, FL
-
Difficulty Level:Really Easy
-
Total Repair Time:30 - 60 mins
-
Tools:Nutdriver, Pliers, Socket set
2 of 2 people
found this instruction helpful.
Was this instruction helpful to you?
Thank you for voting!
'Machine' wobbled & 'walked away from the wall'. Had to stop it and re-arrange the load, almost everytime!
I pretty much followed the video,and read some of the other comments on how to do it. I only had one problem, the back panel had an opening of about 14"x14" to access the 2 rear balance springs. I finally laid the machine on it's face,so I didn't have to kneel down.The only problem with that,is the tub falls forward, making the springs farther away from the upper hole to attach/stretch, the springs to remove/install. I cured that problem by cutting a wedge out of a piece of 2x4, and stuck it between the top edge of the tub & upper frame. Worked great,held the tub in position, closer to the springs & locating holes. Taking them off is no problem,installing them, was made easier by using the wedge. The parts were a perfect fit, no more 'walking away from the wall' now! Thanks PartSelect
Parts Used:
-
jim from warne, NC
-
Difficulty Level:Easy
-
Total Repair Time:30 - 60 mins
-
Tools:Nutdriver, Pliers, Socket set
2 of 2 people
found this instruction helpful.
Was this instruction helpful to you?
Thank you for voting!
Drain Pump
Remove back compartment, remove belt disconnect two water rubber tubes from the drain pump, unscrew three screws securing the drain pump from the frame. Replace with a new drain pump, secure to frame with thee screws, reconnect rubber tubes, and replace belt.
Parts Used:
-
Ali from PLACENTIA, CA
-
Difficulty Level:Easy
-
Total Repair Time:30 - 60 mins
2 of 2 people
found this instruction helpful.
Was this instruction helpful to you?
Thank you for voting!
Water leak and it would not agitate
Turned off the water supply. Removed clothing and bailed out water fro tub. Removed back access panel. Turned washer over to access the bottom and removed drive belt by turning the large pulley attached the drum while pulling the belt over the pulley. Next remove the two hoses attached to the pump, remove the screws holding the pump on and remove the pump. Replace the pump by reversing the procedure, as for replacing the drive belt, place the belt on the motor and pump first and start it on the larger pulley and hold it on while you turn the pulley, it will pull the motor adjustment as you turn and when fully in the pulley it will be properly adjusted. Then replace the access panel, turn the washer upright, push back in place, turn on the water supply and replace the drain hose. Back in business. For me, while I was waiting for the new pump to arrive, I took the time to remove the agitator and tub and give it a good cleaning inside and out, but that's me.
Parts Used:
-
George from WILMINGTON, NC
-
Difficulty Level:Easy
-
Total Repair Time:30 - 60 mins
-
Tools:Socket set
2 of 2 people
found this instruction helpful.
Was this instruction helpful to you?
Thank you for voting!
Washer making squealing noise in spin cycle
Pump is readily accessible at the back of the machine by taking off the access cover. First step is to disconnect power and remove drive belt off tub pulley which is the largest in the center - the takeup is in the drive motor mount but it seems easier to turn the larger pulley and wind the belt off. There are three 3/8 hex mount screws fastening the pump to the washer base and two hose spring clamps attaching the tub drain hose and outlet drain hose to the pump. Follow the directions in the utube video which is the best (most others don't give detailed directions and best method). The only caution I would give is that there is some water in the drain hoses so be prepared to mop it up with sponge and bucket or have some towels available. Install new pump (loose assemble two visible screws to locate pump and then loose assemble far side blind screw and tighten all 3),replace hoses snug to stops and assemble clamps, replace access panel and replace drive belt and plug washer back in.
Parts Used:
-
Edward D from GRAND BLANC, MI
-
Difficulty Level:Easy
-
Total Repair Time:30 - 60 mins
-
Tools:Nutdriver, Pliers, Socket set
2 of 2 people
found this instruction helpful.
Was this instruction helpful to you?
Thank you for voting!
Washing machine was walking around and sometimes knocking pretty loudly
Brought unit out to garage so I would have room to work on it. Popped the top off, removed two screws to remove the front panel, removed back panel also, since there was no way I was going to the trouble of dis-assembly to get to the snubber without changing those 6 springs also - and you HAVE to remove the back cover to access all 6 springs.Removed belt and level and drain hoses- tub came right out. Loosened those 6 screws without removing them and pulled old snubber out- very straight-forward. Spent 10 minutes just comparing the old and new snubbers- I saw that there's a "ridge" around the inside of the new part that is gone on the old snubber. Sprinkled some corn starch at base of unit where the new snubber will fit (Great Idea someone had!) After everything was re-assmbled, I noticed the tub was now nice and tight when I grabbed it to move it. Before, it took no effort AT ALL to move it all around. Did a test load with some laundry the wife had stacked on the drier. Imagine my disappointment when I heard loud knocking inside when it started to agitate, but not while it spun!
Got all my tools back out and took the wet laundry out to take it all apart again- found the wife's heavy glass vase had been hidden in one of the towels. Re-tested- everything works GREAT!So far I've changed the drum seal (hardest) and the waterpump (easiest)- thi springs and snubber was alsmost as easy as the pump.
Above average shipping from Parts Select also- very helpful and efficient people on the phones.
Got all my tools back out and took the wet laundry out to take it all apart again- found the wife's heavy glass vase had been hidden in one of the towels. Re-tested- everything works GREAT!So far I've changed the drum seal (hardest) and the waterpump (easiest)- thi springs and snubber was alsmost as easy as the pump.
Above average shipping from Parts Select also- very helpful and efficient people on the phones.
Parts Used:
-
Burt from Sparks, NV
-
Difficulty Level:Really Easy
-
Total Repair Time:30 - 60 mins
-
Tools:Nutdriver
3 of 6 people
found this instruction helpful.
Was this instruction helpful to you?
Thank you for voting!