




















9KSM5CBER1 KitchenAid Mixer - Instructions
Keep searches simple. Use keywords, e.g. "leaking", "pump", "broken" or "fit".
plastic worm gear was stripped would nut turn
replaced worm gear and wonderd why they used plastic instead of a stronger metal gear, unit works fine
Parts Used:

-
anthony from harviell, MO
-
Difficulty Level:A Bit Difficult
-
Total Repair Time:1- 2 hours
-
Tools:Screw drivers
3 of 6 people
found this instruction helpful.
Was this instruction helpful to you?
Thank you for voting!
oil leak
just as the you tube instructions said.
Parts Used:



-
Jim from CIRCLE, MT
-
Difficulty Level:Really Easy
-
Total Repair Time:30 - 60 mins
-
Tools:Screw drivers
2 of 3 people
found this instruction helpful.
Was this instruction helpful to you?
Thank you for voting!
grease from housing leaking into bowl
Followed instructions found onllne at Kitchenaid.com and replaced seals with parts obtained from PartSelect.
Parts Used:
-
Marvin from Hemet, CA
-
Difficulty Level:Easy
-
Total Repair Time:1- 2 hours
-
Tools:Pliers, Screw drivers
1 person
found this instruction helpful.
Was this instruction helpful to you?
Thank you for voting!
Leaking Grease
First i went to the Kitchen Aid web site and found a video on how to take a part the mixer. Followed the instructions from the video and it was very easy. The grease in the machine was black so i cleaned it out of the transmission and repack it with hi-heat wheel bearing grease that i got from a auto parts store it took about a 1/2 lb. then put the gasket in and back together and put the o-ring on. Have run for awhile and it is ok. Want to say that these are very well built machine.
Parts Used:
-
Larry from Salina, KS
-
Difficulty Level:Really Easy
-
Total Repair Time:1- 2 hours
-
Tools:Screw drivers
1 person
found this instruction helpful.
Was this instruction helpful to you?
Thank you for voting!
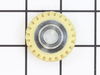
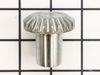
Decorative plug at top of mixer fell into the bowl and jammed the mixer stripping gears
Watch U Tube video. Take care to keep track of disassembly. Hard part was to have 4 types of screw drivers to fit the different screw heads. Be sure to clean broken gear clogs out of the grease. Parts select lady was a great help. Download Parts select diagram for extra help. Time and patience!
Parts Used:
-
BRIAN from PALISADE, CO
-
Difficulty Level:A Bit Difficult
-
Total Repair Time:1- 2 hours
-
Tools:Screw drivers
1 person
found this instruction helpful.
Was this instruction helpful to you?
Thank you for voting!
Mixer was making a loud noise and the attachment port was not working

-
steve from OWASSO, OK
-
Difficulty Level:Easy
-
Total Repair Time:1- 2 hours
-
Tools:Screw drivers
1 person
found this instruction helpful.
Was this instruction helpful to you?
Thank you for voting!
The mixer would not spin so I assumed it was a bad worm gear
I watched a video on how to replace the worm gear. When I opened the mixer I noticed a small screw laying in the grease. I removed as much grease as I could and could not find anywhere that the screw would have come from. All the gears turned and looked fine so I replaced the grease put the mixer back together and it worked fine. I am thinking the small screw must have somehow fallen into the mixer when manufactured. So proud of my 70 year old self for getting the job done.
Parts Used:
-
Karen from MARION, IN
-
Difficulty Level:Easy
-
Total Repair Time:1- 2 hours
-
Tools:Nutdriver, Screw drivers
1 person
found this instruction helpful.
Was this instruction helpful to you?
Thank you for voting!
pinion teeth sheared off the shaft
Repair went well after I figured out how to dis-assemble the mixer. Used straight & phillips screwdrivers and a small hammer & punch to drive out 3 pins. Ordered part# PS734233 pinion & shaft as shown in the parts page, it arrived on schedule, received part # 240210-2. Only problem was the new pinion had 10 teeth, the old/failed pinion had 11 teeth. Could not learn from anyone I called at PartsSelect or Whirlpool if the 10 tooth pinion was the correct part to use.
The teeth appeared to mesh with the mating gear,
installed the new pinion, reassembled and it worked fine. Not sure if it made a noticable difference in the output shaft speed.
The teeth appeared to mesh with the mating gear,
installed the new pinion, reassembled and it worked fine. Not sure if it made a noticable difference in the output shaft speed.
Parts Used:

-
Ray from Roanoke, VA
-
Difficulty Level:Easy
-
Total Repair Time:1- 2 hours
-
Tools:Screw drivers
1 person
found this instruction helpful.
Was this instruction helpful to you?
Thank you for voting!
Worm gear was stripped and needed to be replaced
I am not handy, but was able to follow this YouTube video and do this repair easily and successfully: https://www.youtube.com/watch?v=1QsgPIL9FpA
I did take the mixer apart first to verify that the worm gear was the issue, then ordered the part from you site. I received it quickly and was able to do the repair and get back to mixing in a few days!
I did take the mixer apart first to verify that the worm gear was the issue, then ordered the part from you site. I received it quickly and was able to do the repair and get back to mixing in a few days!
Parts Used:
-
Rachael from SEATTLE, WA
-
Difficulty Level:A Bit Difficult
-
Total Repair Time:1- 2 hours
1 person
found this instruction helpful.
Was this instruction helpful to you?
Thank you for voting!
Mixer making a grinding noise

-
Jamie from FLORENCE, CO
-
Difficulty Level:Really Easy
-
Total Repair Time:30 - 60 mins
-
Tools:Screw drivers
1 person
found this instruction helpful.
Was this instruction helpful to you?
Thank you for voting!
Worm gear was worn out .
I watched the university of YouTube videos, and followed their instructions.
Parts Used:

-
Peter from SALADO, TX
-
Difficulty Level:A Bit Difficult
-
Total Repair Time:30 - 60 mins
-
Tools:Pliers, Screw drivers, Wrench (Adjustable)
1 person
found this instruction helpful.
Was this instruction helpful to you?
Thank you for voting!
Teeth on the gear were worn off.
-
Curt from SHELBY, MI
-
Difficulty Level:Easy
-
Total Repair Time:30 - 60 mins
-
Tools:Pliers, Screw drivers
1 person
found this instruction helpful.
Was this instruction helpful to you?
Thank you for voting!
SPEED WENT CRAZY, VERY VERY FAST. NO CONTROL AT ALL EXCEPT OFF
INSTALLED PHASE CONTROL BOARD AND SPEED CONTROL PLATE, BOTH AT SAME TIME
Your DYI video was helpful, especially holding the spring with a cloth. Also good for fine tuning to get the speed exact
Your DYI video was helpful, especially holding the spring with a cloth. Also good for fine tuning to get the speed exact
Parts Used:


-
Doug from ELKHART, IN
-
Difficulty Level:Easy
-
Total Repair Time:30 - 60 mins
-
Tools:Pliers, Screw drivers, Wrench set
1 person
found this instruction helpful.
Was this instruction helpful to you?
Thank you for voting!
Hard to knock out pins, and connecting the top to the bottom after repair
-
Sheldon from RICHMOND, TX
-
Difficulty Level:Easy
-
Total Repair Time:30 - 60 mins
-
Tools:Socket set, Wrench (Adjustable)
1 person
found this instruction helpful.
Was this instruction helpful to you?
Thank you for voting!
Attachment hub stopped spinning
Used youtube movies to disassemble the mixer and found that the gear was stripped. I kept the screws in labeled ziploc baggies so I wouldn't forget which screws went where. Once the part arrived, it was very simple to replace the gear. I regreased the mixer and then reassembled. The trickiest part was how greasy everything was! It was also hard to get the pin through the beater hub - I found a video that suggested using a very slim screwdriver to thread the hole before inserting the pin. This was the most involved part replacement I've done on my own, and it was very satisfying to get my mixer back in working order!
Parts Used:
-
Sarah from GRAPEVINE, TX
-
Difficulty Level:Easy
-
Total Repair Time:30 - 60 mins
-
Tools:Screw drivers
1 person
found this instruction helpful.
Was this instruction helpful to you?
Thank you for voting!