




















9KSM180QHSD0 Whirlpool Mixer - Instructions
Keep searches simple. Use keywords, e.g. "leaking", "pump", "broken" or "fit".
Mixer would only run Full Fast. Could not determine cause or fault.
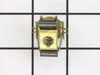
1. Removed the mixer back plate Cover. 2. Removed the Speed Control Plate and retained spring, wires and ground wire. 3. Removed the old Speed Control Plate screws. Noted Control Plate pitted contact. 4. Removed old Triac Phase Control Board. 5. Removed old Governor. 6. Installed new Governor. 7. Installed new Phase Control Board. 8. Installed new Speed Control Plate and retaining spring. 9. Reattached Speed Control Plate wires. 10. Adjusted Speed Control Plate Screws and set mixer speeds from Stir to maximum settings. 11. Replaced Motor Brushes on left and right side of mixer. 12. Reinstalled mixer back plate cover.
Parts Used:



-
E.F. from HUNTINGTN BCH, CA
-
Difficulty Level:Easy
-
Total Repair Time:30 - 60 mins
-
Tools:Screw drivers, Wrench set
3 of 5 people
found this instruction helpful.
Was this instruction helpful to you?
Thank you for voting!
noisy


-
Brian from SPOKANE, WA
-
Difficulty Level:Really Easy
-
Total Repair Time:30 - 60 mins
-
Tools:Nutdriver, Pliers, Screw drivers
2 of 2 people
found this instruction helpful.
Was this instruction helpful to you?
Thank you for voting!
The mixer would not operate so I took out the brushes. Work afterwards but was a little noisy so, considering the advanced age of the machine and after doing research, I decided to replace the worm gear and bracket.
I followed the instructional video linked to my email order confirmation. Partselect provided one of the best how-to videos I've ever seen. With the right tools, a little patience and the video, I had an outstanding repair experience.
Parts Used:

-
Benjamin W. Tice, from El Paso, TX
-
Difficulty Level:Really Easy
-
Total Repair Time:30 - 60 mins
-
Tools:Screw drivers
2 of 2 people
found this instruction helpful.
Was this instruction helpful to you?
Thank you for voting!
mixer wouldnt turn on
watched an internet video to see what to do. Unfortunately even after replacing the chip the mixer it still didn't work.
Parts Used:
-
marc from MOBRIDGE, SD
-
Difficulty Level:Very Easy
-
Total Repair Time:30 - 60 mins
-
Tools:Screw drivers
2 of 2 people
found this instruction helpful.
Was this instruction helpful to you?
Thank you for voting!
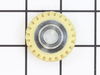
Replaced worn out gear

-
Richard from SUQUAMISH, WA
-
Difficulty Level:Easy
-
Total Repair Time:1- 2 hours
-
Tools:Screw drivers, Socket set
2 of 2 people
found this instruction helpful.
Was this instruction helpful to you?
Thank you for voting!
None
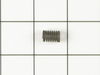
I removed the spring loaded brush screw on the side of my mixer and lost it the next day. I found a schematic of this part on your website and ordered the four pieces that make up the brush screw(?). They arrived in just a few days and I referred back to the schematic to put it together. I then popped it in my mixer, screwed it down, plugged her in and away we go! Easiest repair I’ve ever done! I’m a 70 year old retired lady and not very handy, but this was an easy fix! Thank you, PartSelect!
Parts Used:


-
Mary from RICHMOND HILL, GA
-
Difficulty Level:Very Easy
-
Total Repair Time:Less than 15 mins
-
Tools:Screw drivers
2 of 2 people
found this instruction helpful.
Was this instruction helpful to you?
Thank you for voting!
Old screw cap wore out and would not hold bowl when mixing heavy batters.
Unscrewed old Screw Cap, tapped it out with hammer. Replaced with new screw cap that was slightly different and tight. Tapped it in with piece of wood over it and hammered it on. No problems.
Parts Used:

-
Sharon from FAIRFIELD, CT
-
Difficulty Level:Very Easy
-
Total Repair Time:Less than 15 mins
-
Tools:Screw drivers
2 of 2 people
found this instruction helpful.
Was this instruction helpful to you?
Thank you for voting!
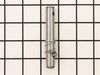
Broken beater shaft
-
Glenda from SANTA FE, NM
-
Difficulty Level:Really Easy
-
Total Repair Time:15 - 30 mins
-
Tools:Screw drivers
2 of 2 people
found this instruction helpful.
Was this instruction helpful to you?
Thank you for voting!
bowel would come out of screwcap when making dough for pasta
The repair was easy only requiring a phillips head screw driver to remove the old screw cap. The new screw cap fit snuggly and required a little downward pressure from my hand to seat it. Then I simply tightened the screws. Good as new for this 30+ year old mixer. My wife loves this mixer that was given to her by her Aunt. Glad we could keep it going.
Parts Used:
-
Robert from AURORA, CO
-
Difficulty Level:Really Easy
-
Total Repair Time:Less than 15 mins
-
Tools:Screw drivers
2 of 2 people
found this instruction helpful.
Was this instruction helpful to you?
Thank you for voting!
Base plate destored
I removed three screws, pulled off the old base plate.
Put new base plate in place and replaced the screws
Put new base plate in place and replaced the screws
Parts Used:
-
Gordon from West Stockbridge, MA
-
Difficulty Level:Really Easy
-
Total Repair Time:Less than 15 mins
-
Tools:Screw drivers
3 of 5 people
found this instruction helpful.
Was this instruction helpful to you?
Thank you for voting!
Updated 1970's KitchenAid Mixer Electronics
I did some research and evaluated a modern day Kitchen Aid Mixer. Looked a the wire diagram and found out what items I needed. Ordered them from Partselect. Overall Mixer is updated and running. I made up some cookie dough with it. The Project took a few evenings due to rewiring the coils on the motor/armature and modifying the rear bearing bracket to hold the Phase control board (not OEM on 70's mixers). Then put it back together and adjusted the speed control.
Parts Used:



-
James from BROOKFIELD, WI
-
Difficulty Level:A Bit Difficult
-
Total Repair Time:More than 2 hours
2 of 2 people
found this instruction helpful.
Was this instruction helpful to you?
Thank you for voting!
plastic worm gear was stripped would nut turn
replaced worm gear and wonderd why they used plastic instead of a stronger metal gear, unit works fine
Parts Used:
-
anthony from harviell, MO
-
Difficulty Level:A Bit Difficult
-
Total Repair Time:1- 2 hours
-
Tools:Screw drivers
3 of 6 people
found this instruction helpful.
Was this instruction helpful to you?
Thank you for voting!
oil leak
just as the you tube instructions said.
Parts Used:

-
Jim from CIRCLE, MT
-
Difficulty Level:Really Easy
-
Total Repair Time:30 - 60 mins
-
Tools:Screw drivers
2 of 3 people
found this instruction helpful.
Was this instruction helpful to you?
Thank you for voting!
The worm gears were broken.
We simply replaced the gear with the new one. It was very easy to install.
Parts Used:
-
Rejana from FAIRVIEW PARK, OH
-
Difficulty Level:Really Easy
-
Total Repair Time:30 - 60 mins
-
Tools:Screw drivers
2 of 3 people
found this instruction helpful.
Was this instruction helpful to you?
Thank you for voting!
turn and quit
Disassembled gear housing and replaced worm gear/bracket assembly. The hardest part was cleaning and working around what looked like 2 pound of grease. I will contact you again if I need parts for anything. Thanks.
Parts Used:
-
GARY from BECKLEY, WV
-
Difficulty Level:Really Easy
-
Total Repair Time:30 - 60 mins
-
Tools:Screw drivers
2 of 3 people
found this instruction helpful.
Was this instruction helpful to you?
Thank you for voting!