




















9703871220 Kenmore Washer - Instructions
Keep searches simple. Use keywords, e.g. "leaking", "pump", "broken" or "fit".
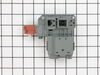
Our washer would not do the final spin. Error code was 47, which is door not closing
I removed 2 screws from the the top back of top. Removed the cover. Removed the 2 screws holding the door lock assembly.Removed the door lock assembly, disconnected the 3 wiring harnesses. Connected the wiring harnesses to the new door lock switch assembly. Installed the new unit in the door lock, reinstalled the top.Done.
Parts Used:
-
Russell from SEVIERVILLE, TN
-
Difficulty Level:Very Easy
-
Total Repair Time:15 - 30 mins
-
Tools:Screw drivers
3 of 3 people
found this instruction helpful.
Was this instruction helpful to you?
Thank you for voting!
timer knob broken off
Easiest repair I've ever done. Spun off the remainder of the old broken know assembly, and spun on the new part. It fit perfectly.
Parts Used:
-
Daniel from Rogers, AR
-
Difficulty Level:Really Easy
-
Total Repair Time:Less than 15 mins
3 of 3 people
found this instruction helpful.
Was this instruction helpful to you?
Thank you for voting!
broken timer knob
received new part from Partselect within 48 hours! Very simple replacement by unscrewing remainder of old knob counterclockwise. The screwed in new knob in clockwise direction. That was all.
Parts Used:
-
Jens from PALO ALTO, CA
-
Difficulty Level:Really Easy
-
Total Repair Time:Less than 15 mins
-
Tools:Pliers
5 of 9 people
found this instruction helpful.
Was this instruction helpful to you?
Thank you for voting!
timer knob broke
The repair was easy, easy, easy. The part arrived within 2 days after I ordered it. I used pliers to remove the broken knob and replaced it with the new knob. It takes about 30 seconds to fix.
Parts Used:
-
Lisa from gorham, ME
-
Difficulty Level:Really Easy
-
Total Repair Time:Less than 15 mins
-
Tools:Pliers
4 of 6 people
found this instruction helpful.
Was this instruction helpful to you?
Thank you for voting!
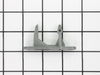
The plastic door strike/catch had become brittle and broken off inside the door on a front loading washer.
There were only two screws that held the door strike/catch in place. I had to fish out the broken plastic piece with a pair of hemostats. The only difficult part about changing the new piece was that I had to find someone with the correct screwdriver to use since it was not a standara screwdriver. Luckily I live next door to a mechanic and borrowed his. The two screws came off easilty and I was able to replace it in 2 minutes. I was thrilled that the part that I ordered arrived the next day.
Parts Used:
-
Barbara from Lutz, FL
-
Difficulty Level:Easy
-
Total Repair Time:Less than 15 mins
-
Tools:Screw drivers
3 of 4 people
found this instruction helpful.
Was this instruction helpful to you?
Thank you for voting!
the latch broke
It was very easy. I simply unscrewed the 2 screws set the new latch into place and replaced the screws.
Parts Used:
-
Sarah from Gilford, NH
-
Difficulty Level:Really Easy
-
Total Repair Time:Less than 15 mins
-
Tools:Screw drivers
3 of 4 people
found this instruction helpful.
Was this instruction helpful to you?
Thank you for voting!
Wouldn't start
With the help of PartSelect's diagnosting tool it was easy to find the right part. The part arrived very fast and the installation was "child's play" by following PartSelect's video. I must have saved > $100. Thank You very much. -Anna-
Parts Used:
-
Anne from Storrs, CT
-
Difficulty Level:Really Easy
-
Total Repair Time:Less than 15 mins
-
Tools:Screw drivers
3 of 4 people
found this instruction helpful.
Was this instruction helpful to you?
Thank you for voting!
Door wouldn't lock because the striker was broken
-
Bernette from MIAMI, FL
-
Difficulty Level:Really Easy
-
Total Repair Time:Less than 15 mins
-
Tools:Screw drivers
3 of 4 people
found this instruction helpful.
Was this instruction helpful to you?
Thank you for voting!
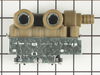
over filling
no problemO top loader. open top, disco two electrical plugs and a small hose, then remove two screws that hold valve in place and remove. Re install in reverse order. Thanks for your support Eliot in Alaska!
Parts Used:
-
eliot from fairbanks, AK
-
Difficulty Level:Really Easy
-
Total Repair Time:15 - 30 mins
-
Tools:Pliers, Screw drivers
3 of 4 people
found this instruction helpful.
Was this instruction helpful to you?
Thank you for voting!
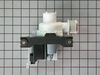
Washer would not drain on certain cycles
Thank you for this web site! A friend suggested the problem being the drain pump, but I was not convinced as the washer would still drain on certain cycles. I took the chance and ordered the part after reading like stories on this website. For the repair: don't forget to lay towels down or have a shop vac ready to collect the water in the lines! The clamps were somewhat difficult to manage as the space is tight, but I did get them off with a medium size adjustable wrench. Getting them back on was a bit more difficult; I gave up on one and put a new o clamp on. It's metal, so I'm sure I would have been better off using the plastic-coated factory clamps.
Parts Used:
-
Diana from Milan, OH
-
Difficulty Level:Easy
-
Total Repair Time:15 - 30 mins
-
Tools:Nutdriver, Screw drivers, Wrench (Adjustable)
3 of 4 people
found this instruction helpful.
Was this instruction helpful to you?
Thank you for voting!
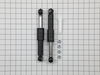
excessive vibration
I followed the instalation instructions provided with new parts. Getting the mounting pins out was relatively easy However, the shock on the right, behind the pump, was a bit more difficult to remove than the one on the left. I took the rubber drain off the pump in order to get at the pin behind the pump. The new replacement shocks came with the plastic bushings inserted in the shocks in alternate directions. The original pins were all inserted into the bracket / shocks from the rear so when I installed the new shocks I reinserted one bushing on each shock so they we both oriented in the same direction. The instruction says to be sure the mounting pin is pressed from the side with the busing collar. It seemed strange the shocks came that way, with no mention of switching them. The most difficult part on the installation was pushing the pins back through the bracket and shock since there was no easy way to push the pins in from the rear. I used a large channel locks on the left side, but the right side was more difficult with all of the obstructions. I finally was able to push in place with my bare hands but was very difficult. Sorry to say the new shocks did not cure the vibration at all. I was very careful to make sure the machine is level. I'm not sure if there is a cure other than replacing the machine.
Parts Used:
-
Jon from Holland, MI
-
Difficulty Level:Very Difficult
-
Total Repair Time:1- 2 hours
-
Tools:Pliers, Screw drivers, Socket set, Wrench (Adjustable)
3 of 4 people
found this instruction helpful.
Was this instruction helpful to you?
Thank you for voting!
Noisy shaky operation; Inspection revealed broken shock absorber; Drive belt was intact but replaced anyway due to age
The hardest part was moving the stacked washer/dryer from the alcove. I found the instruction videos from this site accurate and helpful.
After disconnecting the water/gas/electrical connections:
Shock Absorbers:
-Remove front service panel
-Squeeze lock tab on shock absorber pins and gently tap out of sockets
(inserting a small screw driver kept tab depressed when starting)
(lower left is pretty easy due to clear access)
(right side is more difficult)
-Optional: remove drain boot on lower right to improve access
(squeeze spring clamp and wiggle off of connection then work boot off of nipple)
(I did this step but in the end discovered it was not necessary, as I ended up taking the back panel off of the washer to replace the belt)
-Position new shock absorber in mounting brackets
-Manually extend shock absorbers to line up with pin holes
-Tap pins into place
(For lower right, the pin was captured by the circuit board enclosure. I was able to remove it but ended up removing the two mounting screws for the enclosure to reinstall the lower shock absorber pin)
-Reinstall drain boot & spring clamp
-Replace front service panel
Drive belt:
-Remove back panel of washer (multiple phillips head screws around perimeter)
-Remove old belt by pulling toward you and rotating drum
-Position new belt on motor pulley
-Position new belt on drum pulley
-Zip tie new belt to drum pulley to keep it engaged as you rotate the drum
(new belt will likely be much tighter than old belt)
-With belt installed on both pulleys, clip zip tie
-Rotate drum multiple times to ensure belt is centered and tracking properly
(if needed, the belt can be manipulated in/out while rotating drum to ensure engagement on drive (motor) pulley)
-Replace back panel
-Put unit back in service
After disconnecting the water/gas/electrical connections:
Shock Absorbers:
-Remove front service panel
-Squeeze lock tab on shock absorber pins and gently tap out of sockets
(inserting a small screw driver kept tab depressed when starting)
(lower left is pretty easy due to clear access)
(right side is more difficult)
-Optional: remove drain boot on lower right to improve access
(squeeze spring clamp and wiggle off of connection then work boot off of nipple)
(I did this step but in the end discovered it was not necessary, as I ended up taking the back panel off of the washer to replace the belt)
-Position new shock absorber in mounting brackets
-Manually extend shock absorbers to line up with pin holes
-Tap pins into place
(For lower right, the pin was captured by the circuit board enclosure. I was able to remove it but ended up removing the two mounting screws for the enclosure to reinstall the lower shock absorber pin)
-Reinstall drain boot & spring clamp
-Replace front service panel
Drive belt:
-Remove back panel of washer (multiple phillips head screws around perimeter)
-Remove old belt by pulling toward you and rotating drum
-Position new belt on motor pulley
-Position new belt on drum pulley
-Zip tie new belt to drum pulley to keep it engaged as you rotate the drum
(new belt will likely be much tighter than old belt)
-With belt installed on both pulleys, clip zip tie
-Rotate drum multiple times to ensure belt is centered and tracking properly
(if needed, the belt can be manipulated in/out while rotating drum to ensure engagement on drive (motor) pulley)
-Replace back panel
-Put unit back in service
Parts Used:
-
Justin from SEATTLE, WA
-
Difficulty Level:A Bit Difficult
-
Total Repair Time:1- 2 hours
-
Tools:Pliers, Screw drivers
2 of 2 people
found this instruction helpful.
Was this instruction helpful to you?
Thank you for voting!
Broken shock
Watched the video on website and followed what they said. Worked great.
Parts Used:
-
Blake from WINTER HAVEN, FL
-
Difficulty Level:Really Easy
-
Total Repair Time:1- 2 hours
-
Tools:Pliers, Screw drivers
2 of 2 people
found this instruction helpful.
Was this instruction helpful to you?
Thank you for voting!
Washer door wouldn't lock so it would not run
Watched a u tube video and did it myself and I'm a 58 year old woman who has never worked on a washer before!
Parts Used:
-
Lynne from ST MICHAELS, MD
-
Difficulty Level:Very Easy
-
Total Repair Time:30 - 60 mins
-
Tools:Screw drivers
2 of 2 people
found this instruction helpful.
Was this instruction helpful to you?
Thank you for voting!
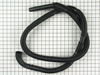
Replace Drain Hose
Ordered this part to replace a drain hose that had been cut short on the washer. Installation was straight-forward. Removed the two front screws to access the cabinet. Locate the drain hose and remove with a pair of pliers. Install the new part and attach the clamp with the pliers just like removal. Took about 15 minutes.
Parts Used:
-
Patrick from BIRMINGHAM, AL
-
Difficulty Level:Easy
-
Total Repair Time:30 - 60 mins
-
Tools:Pliers
2 of 2 people
found this instruction helpful.
Was this instruction helpful to you?
Thank you for voting!