




















91195501990 Kenmore Range - Instructions
Keep searches simple. Use keywords, e.g. "leaking", "pump", "broken" or "fit".
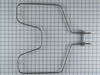
The bake element went crazy , caught fire and shot off sparks
We ordered the part, it arrived quickly my husband removed the burnt out element. We took the back off the stove in order to install the new part. It was easier to connect from the back than reach in to the oven. An easy repair and the stove works fine now.
Parts Used:
-
Mary from Lexington, KY
-
Difficulty Level:Easy
-
Total Repair Time:15 - 30 mins
-
Tools:Nutdriver
2 of 3 people
found this instruction helpful.
Was this instruction helpful to you?
Thank you for voting!
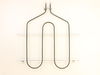
Broiler element was burned out
The repair was so simple. First i killed the circuit breaker then removed five screws upluged element from contacts and removed the element plugged new element into the contacts popped the screws back and was done.
Parts Used:
-
Charles from Washingtin, DC
-
Difficulty Level:Really Easy
-
Total Repair Time:15 - 30 mins
-
Tools:Socket set
2 of 3 people
found this instruction helpful.
Was this instruction helpful to you?
Thank you for voting!
Bake element broke into pieces
First I removed the screws and popped off the existing element. One of the wires "disappeared" back into the insulation, so I had to remove the back panel of the oven to access that wire and push it back through the opening. Then I attached the new element to the wires and replaced the finishing screws.
Parts Used:
-
Michael from Findlay, OH
-
Difficulty Level:Easy
-
Total Repair Time:15 - 30 mins
-
Tools:Nutdriver, Pliers, Screw drivers
2 of 3 people
found this instruction helpful.
Was this instruction helpful to you?
Thank you for voting!
Broil (top) element burned out.
Unplugged the power supply. Took off the cover on the back of the unit. Unplugged the wires to the broiler element. Removed the bolts(4) holding the element inside the oven. Removed the temprature sensor from element and took it out. Put it all back the way it came out. Worked great. Took 25 minutes.
Parts Used:
-
Dee from McKinney, TX
-
Difficulty Level:Easy
-
Total Repair Time:15 - 30 mins
-
Tools:Nutdriver
2 of 3 people
found this instruction helpful.
Was this instruction helpful to you?
Thank you for voting!
Bake element not working, due to fire during cleaning cycle.
Unplugged Stove. Removed two screws. Unplugged two wires from heating element. Connected the two wires to new heating element. Replaced screws. That's all. 5 minute repair job.....(45 minutes to find right socket haha)
Ordered new heating element on Friday afternoon (3pm) and received part on Saturday at 1:00pm. Impressive! (standard shipping)
Ordered new heating element on Friday afternoon (3pm) and received part on Saturday at 1:00pm. Impressive! (standard shipping)
Parts Used:
-
BRENDA from DELAWARE, OH
-
Difficulty Level:Really Easy
-
Total Repair Time:Less than 15 mins
-
Tools:Socket set
2 of 3 people
found this instruction helpful.
Was this instruction helpful to you?
Thank you for voting!
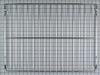
Cleaned oven with shelves inside...
I too made the mistake of cleaning the oven with the shelves in place. It doesn't really harm them...but they turn a tarnished brown color...they look dirty. These replacement shelves were a perfect match. Pricing was reasonable, communication was terrific and shipping was super fast. Happy camper here :-)
Parts Used:
-
Carol from Roanoke, VA
-
Difficulty Level:Really Easy
-
Total Repair Time:Less than 15 mins
3 of 6 people
found this instruction helpful.
Was this instruction helpful to you?
Thank you for voting!
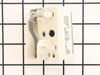
Burner spontaneously cycled without knob activation
First I cut the circuit at the breaker, and then pulled the range from wall to access the access panel. This top panel was held with 4 screws and removable with a standard phillips head screwdriver.
I then removed the 5 wire-crimped fasteners from the defective surface burner switch. (I first labeled these wires to ensure correct placement to the new switch). There were an additional two screws behind the corresponding knob that needed to be removed in order to completely remove the old switch.
The new switch was installed in reverse order to the steps indicated above (two screws behind knob, 5 wire-crimped fasteners, 4 screws to panel). Range was pushed back into position and breaker turned on.
I then removed the 5 wire-crimped fasteners from the defective surface burner switch. (I first labeled these wires to ensure correct placement to the new switch). There were an additional two screws behind the corresponding knob that needed to be removed in order to completely remove the old switch.
The new switch was installed in reverse order to the steps indicated above (two screws behind knob, 5 wire-crimped fasteners, 4 screws to panel). Range was pushed back into position and breaker turned on.
Parts Used:
-
Anil from Milpitas, CA
-
Difficulty Level:Easy
-
Total Repair Time:Less than 15 mins
-
Tools:Screw drivers
2 of 3 people
found this instruction helpful.
Was this instruction helpful to you?
Thank you for voting!
Heat element died
Very easy to replace. So easy even a man can do it.
Parts Used:
-
Andrea Hines from ELGIN, AZ
-
Difficulty Level:Very Easy
-
Total Repair Time:15 - 30 mins
-
Tools:Pliers, Screw drivers
2 of 3 people
found this instruction helpful.
Was this instruction helpful to you?
Thank you for voting!
Broken Bake Element
First I turned off breaker, pulled out oven unplugged/or dissconnected electricity to oven, unscrewed broken element in oven, unscrewed back panel of oven to disconnect 2 wires from element, and replaced with new element, then repeated the above in reverse.
Very easy for a typical DYI person.
Very easy for a typical DYI person.
Parts Used:
-
Ronald from Houston, TX
-
Difficulty Level:Really Easy
-
Total Repair Time:15 - 30 mins
-
Tools:Nutdriver, Screw drivers
2 of 3 people
found this instruction helpful.
Was this instruction helpful to you?
Thank you for voting!
The broiler had shorted out.
I had my husband fix it! Very easy for me.
It didn't take him long. The most difficult part was getting to the screws. He had to practically climb into the oven.
The parts were shipped promptly and the whole process was relatively painless!
It didn't take him long. The most difficult part was getting to the screws. He had to practically climb into the oven.
The parts were shipped promptly and the whole process was relatively painless!
Parts Used:
-
Marjorie from Salem, IN
-
Difficulty Level:Really Easy
-
Total Repair Time:15 - 30 mins
-
Tools:Socket set
2 of 3 people
found this instruction helpful.
Was this instruction helpful to you?
Thank you for voting!
baking element went up like a sparkler
removed the two screws,then pulled element out and removed the wires,took out element that needed replacing, then connected new element . the repair job took no time at all. i was really impressed with how easy it was.
Parts Used:
-
sherry from washington, ME
-
Difficulty Level:Really Easy
-
Total Repair Time:Less than 15 mins
-
Tools:Screw drivers
2 of 3 people
found this instruction helpful.
Was this instruction helpful to you?
Thank you for voting!
Bake Element cracked
Pulled the range out from wall (which took most on the repair time to do), removed back cover, pulled of terminals, went inside oven a remove the two screws holding Bake element. Inserted new element, tighten down screws, etc.............
Parts Used:
-
Kevin from Grovetown, GA
-
Difficulty Level:Really Easy
-
Total Repair Time:Less than 15 mins
-
Tools:Socket set
1 person
found this instruction helpful.
Was this instruction helpful to you?
Thank you for voting!
The previous element decided it was really an arc welder
First cut the power at the breaker and then removed the rear panel of the range. Then removed the two retaninig screws in the oven and then unplugged the old element in the back. Cleaned out the molten metal and remains of dinner and installed new element same way the old one came out and voila, oven is back in operation.
Parts Used:
-
Robert from Clermont, FL
-
Difficulty Level:Really Easy
-
Total Repair Time:15 - 30 mins
-
Tools:Pliers
1 person
found this instruction helpful.
Was this instruction helpful to you?
Thank you for voting!
oven door gasket needed replaced
Ordered the part, it arrived and 5 minutes later it a complete installation
Parts Used:
-
Mary from LONGS, SC
-
Difficulty Level:Very Easy
-
Total Repair Time:Less than 15 mins
1 person
found this instruction helpful.
Was this instruction helpful to you?
Thank you for voting!
Burner no longer heats
Remove two screws with nut driver that holds range top down. Turn off breaker or unplug before lifting top. Brace top with 2x4. Take picture with cell phone just in case. Orient replacement part with old burner. Remove one wire at a time and install on new burner in corresponding correcting terminal. be sure they are snug. Drop top install nuts . Test! Done! I am not an electrician!!!!!!!! Please do not publish !!!!
Parts Used:

-
Anthony from Apopka, FL
-
Difficulty Level:Very Easy
-
Total Repair Time:Less than 15 mins
-
Tools:Nutdriver, Screw drivers
1 person
found this instruction helpful.
Was this instruction helpful to you?
Thank you for voting!