




















91195482991 Kenmore Range - Instructions
Keep searches simple. Use keywords, e.g. "leaking", "pump", "broken" or "fit".
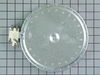
8" Haliant element stopped working/burned out!
After watching the demonstration on YOU TUBE by two separate persons, , I felt I could accomplish this repair job by myself. After all, if a 9 months pregnant lady on YOU TUBE can do it in 15 minutes then so could I. However, my particular stove turned out to be a bit more involved, and different than those whose demonstrations I had viewed! .. First turn off your electrical power at the circuit breaker. There is no need to unplug the stove, just test by turning it on and observing if the display is lit or the burners come on. If it doesn't then you are good to start the repair with the power off. 1) Open the oven door, then bend over and check underneath. There are two screws one on each side at the front. Using an 8 mm socket wrench undo those screws and put them in a safe place where they wont roll away. 2) I would suggest using an old towel or an old sheet once you have the stove top lifted to cover your work surface, so if you drop any little parts that might roll away, you will be able to just pick them up without a problem. Next you will need something to prop the stove top open or someone to hold it for you. I used the box that my new element came in and that worked well. 3) Here's where my stove differed.. I had a metal retaining bar across the two front elements holding them up in place. .. I unscrewed the two small screws that held it in place at the edge of the stove. (I just did it on the side where I was replacing the element). This does not release your element just the bar so you can get access to the element. 4) Next, using your pliers you will see a couple of round washers that have teeth, these are holding a spring in place on a metal peg, this keeps the element from falling or moving out of position.. It was a bit difficult releasing the washers but I eventually did it, with my pliers, and then had to straighten the washers out for use afterwards 5) Once the washers are off, this frees the spring and allows the element to be removed. from the bar. 6)Next, I recommend taking a picture of the wiring, so you will know what goes to where. There are four wires on the old element, so I just followed the color coded placement and fasten them in the same place onto the new element. The wires are a bit stiff to remove, and if you are using pliers be careful as they are fragile and could break. 6) When I removed my GE replacement element from the packaging, it turned out to be a little different, and did not have the two metal pegs on it. In order to make it fit so I could do the repair. I unscrewed the two pegs from the old element, then counting around the outside holes on the new element to get them in the exact same place, I then attempted to screw them in.. This was the difficult part as they did not easily fit, and I had to ream out the holes to get the posts to screw into the new element. 6) Once that was done, the rest is easy just putting it back together the same way you took it apart. With the pegs screwed in place and the four wiring clips put on the new element, then it should not take long to complete. Next fit the spring over the metal peg first, then put the peg through the hole on the retaining bar. Make sure you get them lined up in the correct position. If you don't then they will be out of alignment with the Ring marking on the glass surface. Check this before you get it all put back together. The retaining bar has four holes in it, so you will see what I mean. The metal pegs on my element went into two opposing holes. Once that is done, the spring goes over the peg, then the peg goes into the retaining bar, and lastly, the small round washer fits the bottom of the peg to keep the spring held tight and the element in place on the metal retaining bar. You are almost done. Next simply put the retaining bar back up, make sure your element lines up on the top of your stove in the position it was before, then put the two small screws
Parts Used:
-
Gwendoline from Vero Beach, FL
-
Difficulty Level:A Bit Difficult
-
Total Repair Time:1- 2 hours
-
Tools:Pliers, Screw drivers, Socket set
Was this instruction helpful to you?
Thank you for voting!
Rust on Bottom of Oven Door
Self-clean the oven or use Easy-Off. Lay some towels or other padded ragging on the kitchen table. Open the oven door and lock the hinges. Pull the door out of the oven and lay it on the table with the oven handle hanging off the edge of the table. The inside of the oven door will be face up on the table. Use the 1/4 Nut Driver to remove three sheet metal screws from the bottom of the door. Use the T10 to remove two long screws from the top inside of the door. lift the door guts and set aside along with the 5 screws and two spacers you found under the top of the door. Use the nut driver to remove 4 screws holding the Door Bottom Channel Trim. The door handle and side channels will fall off (catch and set aside). you are left with one piece of glass with the old bottom channel trim. Gently tap the lip of the channel with a screwdriver in a towel to slip it off the glass. Gentle patience is a virtue here or the glass will break. Clean the glass with CeramaBryte or equal to get the burnt oven goop off. (While you're at it, do the same to the bottom of the door guts above.) Slip the new bottom channel on the glass as far as it will go (not very far in my case) and replace the door handle and side channels. You will see that the holes line up pretty well without having to jam the bottom channel onto the glass. Screw (4) the side channels to the bottom channel. Replace the Door Guts, being careful to line up the two spacers at the top of the door. Three screws in the bottom of the door, then the two Torx screws back in the top of the door. Put each screw in just finger tight and after they are all started, screw them home. Slip the reassembled door back in the oven frame, flip the locks up and Voila! Now that it's over, let me just say that if a camel is a horse designed by a committee, this thing must have been thought up by the US Congress!
Parts Used:

-
Nat from Irvine, CA
-
Difficulty Level:A Bit Difficult
-
Total Repair Time:1- 2 hours
-
Tools:Nutdriver
Was this instruction helpful to you?
Thank you for voting!
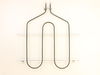
Broiler unit burned out!
For someone who does not do this often, the directiions walked us through it well. Saved big service call. I helped him hold the unit in place and he was able to connect the connections, and it works! But it was awkward to get to.
Parts Used:
-
mary from sunbury, OH
-
Difficulty Level:A Bit Difficult
-
Total Repair Time:30 - 60 mins
-
Tools:Screw drivers, Socket set
Was this instruction helpful to you?
Thank you for voting!
Bad Burner
I simply removed the 2 anchor screws in front of the stove and wrote down the wiring order on the instillation diagram, removed the old burner, removed the two studs, made sure they were installed on the right numbers place them in the new burner, wired the new burner, placed the springs respectively. Placed them in the correct holes in the frame to be sure that the burner was aligned properly. Put the washers on the studs and replaced the frame screws, lowered the cook top and returned the screws to lock the cook top in place.
Parts Used:
-
Roosevelt from Waggaman, LA
-
Difficulty Level:Really Easy
-
Total Repair Time:15 - 30 mins
Was this instruction helpful to you?
Thank you for voting!
Bottom door trim (pc 119) corroded
Open oven door, unlock hinges and lift off. Lay on face on carpet or piece of cardboard. Remove 2 screws at top that go thru door and hold handle assembly. Remove 3 screws on bottom that hold bottom door trim to inner door. Carefully turn assembly over (hold it together so you don't drop the glass front!) and place back on floor, hinge side down. Lift off front glass and frame assembly. Lay flat on floor. Remove 4 screws that hold bottom door trim to side frames. If glass is stuck to bottom door trim (which it probably will be from rust and gunk)..... Remove 4 screws that hold side frames to upper handle assembly and completely lift glass and bottom trim out. Holding glass vertical, stand on the bottom trim piece and carfully work the glass up and out of the groove (do not wiggle it side to side or you will need to buy a new piece of glass). While you have everything apart, clean all the parts and remove the decade of gunk. Reassemble in reverse. The long screws at the top of the door that hold the upper handle assembly in place, have spacers around them, they thread onto the screws and maintain distance and alignment when re-assembling. Also, I found it easier to remove the handle from the upper piece (4 screws) to allow me to lay the whole assembly flat while screwing the bottom, side, and upper trim pieces together around the glass front. Once that is done, then put the handle back on before you assemble it to the inner oven door. That is it !
Parts Used:
-
Jonathan from Bremerton, WA
-
Difficulty Level:Easy
-
Total Repair Time:30 - 60 mins
-
Tools:Nutdriver, Screw drivers
Was this instruction helpful to you?
Thank you for voting!
Bottom trim on oven door rusted - poor GE design
In order to replace the bottom trim (and side trims if needed) it is necessary to separate the oven door front panel and its outer glass from the inside door panel. It is best to remove the entire oven door and lay it down on a table in order to do this. (Refer to owner's manual for instructions on removing the door from the oven, but it basically lifts out easily when is is in the broil-open position). Remove the front panel of the oven door by unscrewing the two machine screws (these may be torx head screws on your appliance) on the top inside corners of the door that hold the door handle. (screw spacers on the inside likely will fall out when you remove the machine screws - don't be alarmed) Then remove the three screws at the bottom of door trim. The front panel can then be lifted away from the back panel. This will allow access to the screws that hold the bottom trim to the side trim. Remove these and the bottom trim will slide off. Replace trim pieces and reassemble.
Parts Used:
-
Wallace from Vestal, NY
-
Difficulty Level:Easy
-
Total Repair Time:30 - 60 mins
-
Tools:Nutdriver
Was this instruction helpful to you?
Thank you for voting!
Burner Would Not Turn Off
-
BILLY from WEBSTER, FL
-
Difficulty Level:Really Easy
-
Total Repair Time:30 - 60 mins
-
Tools:Nutdriver
Was this instruction helpful to you?
Thank you for voting!
burned out oven light
Turned off the power to the stove. Removed the oven door, Removed two screws holding the metal housing from the oven wall. pulled the assembly forward, removed the two electrical wires from the back of the socket, installed new gasket on back of metal assembly,inserted the wires thru the hole in the metal assembly, attached the wires to the new socket, pushed the new socket in place making sure the two holding clamps were in place, screwed assembly back in oven wall, replaced new bulb, replaced glass cover over bulb, Replaced oven door, turned the power back on, Light works like new.
Parts Used:

-
Herbert from Virginia Beach, VA
-
Difficulty Level:Easy
-
Total Repair Time:15 - 30 mins
-
Tools:Pliers, Socket set
Was this instruction helpful to you?
Thank you for voting!
Broiler unit in oven quit working.
Removed old broiler unit and installed new broiler unit. Very easy. We ordered the part on Monday over the internet and got it on Wednesday. Such speedy delivery and way in time for Easter. Thank you. Very impressed. I am keeping this site for any future repairs!
Parts Used:
-
Carol from Bolckow, MO
-
Difficulty Level:Really Easy
-
Total Repair Time:15 - 30 mins
-
Tools:Screw drivers
Was this instruction helpful to you?
Thank you for voting!
Part rusted ... Looked bad.
-
Joseph from Powell, OH
-
Difficulty Level:Easy
-
Total Repair Time:15 - 30 mins
-
Tools:Nutdriver
Was this instruction helpful to you?
Thank you for voting!
Replacement of Broiler Element
-Pull the oven away from the wall and unplug it. -Remove the sheet metal panel on the middle of the back of the oven exposing the electrical connections. -Pull off the wire connections from the broiler element and identify which one goes to which side. Pull apart the connector for the thermostat -Go inside the oven and remove the 2 screws holding the element to the back wall. -Remove the 2 screws holding the element to the top of the oven. -Pull the element out and remove the thermostat, and attach it to the new element bracket. Reinstall everything in the reverse order.
Parts Used:
-
Jamesd from Penfield, NY
-
Difficulty Level:Really Easy
-
Total Repair Time:Less than 15 mins
-
Tools:Nutdriver
Was this instruction helpful to you?
Thank you for voting!
no problem, needed to replace the racks
took the old ones out & put the new ones in. Piece of cake!!Thanks for the prompt delivery!!
Parts Used:
-
Joanne from Parrish, FL
-
Difficulty Level:Really Easy
-
Total Repair Time:Less than 15 mins
Was this instruction helpful to you?
Thank you for voting!
bake element broke
I watched a you tube video that was extremely helpful.I removed the two screws holding the bake element in.Once I removed the two wires,I bent them so they did not retract intot he oven.I attached the two wires,installed the screws and was done in less than 15 minutes.
Parts Used:
-
Larry from Mansfield, TX
-
Difficulty Level:Really Easy
-
Total Repair Time:Less than 15 mins
-
Tools:Nutdriver
Was this instruction helpful to you?
Thank you for voting!
8 inch burner was burnt out
replacement was easy. pulled away the stove from wall. unplug the stove. open oven door. remove the two hex head screws holdings stove top. raise the stove top in the front. supported stove top with a 16 inch piece of wood. place New Burner under old burner. remove old burner remove wires remove old burner and place it on top of new burner connected the wires from burner to new burner. install new burner. remove support lowered top down. plugged in stove tested. .burner. burner w.ork fine. reinstall hex head screws back top. pushback stove back into the wall. testes over again. all the stove work done.
Parts Used:
-
Luis from Kissimmee, FL
-
Difficulty Level:Really Easy
-
Total Repair Time:Less than 15 mins
-
Tools:Nutdriver, Screw drivers
Was this instruction helpful to you?
Thank you for voting!
Light Lens damaged
Required new light lens for oven this type has five (5) of them; only the oven temp light lens was damaged. Ordered from Parts Select.com received item fast in seven days. removed rear guard plate, than oven temperture switch than slid the neon light switch off of the light lens.Lens is removed from the front panel. Installation is reverse order.
Parts Used:
-
THOMAS J from Las Vegas, NV
-
Difficulty Level:Easy
-
Total Repair Time:15 - 30 mins
-
Tools:Nutdriver
Was this instruction helpful to you?
Thank you for voting!