




















91195482990 Kenmore Range - Instructions
Keep searches simple. Use keywords, e.g. "leaking", "pump", "broken" or "fit".
Rust on Bottom of Oven Door
Self-clean the oven or use Easy-Off. Lay some towels or other padded ragging on the kitchen table. Open the oven door and lock the hinges. Pull the door out of the oven and lay it on the table with the oven handle hanging off the edge of the table. The inside of the oven door will be face up on the table. Use the 1/4 Nut Driver to remove three sheet metal screws from the bottom of the door. Use the T10 to remove two long screws from the top inside of the door. lift the door guts and set aside along with the 5 screws and two spacers you found under the top of the door. Use the nut driver to remove 4 screws holding the Door Bottom Channel Trim. The door handle and side channels will fall off (catch and set aside). you are left with one piece of glass with the old bottom channel trim. Gently tap the lip of the channel with a screwdriver in a towel to slip it off the glass. Gentle patience is a virtue here or the glass will break. Clean the glass with CeramaBryte or equal to get the burnt oven goop off. (While you're at it, do the same to the bottom of the door guts above.) Slip the new bottom channel on the glass as far as it will go (not very far in my case) and replace the door handle and side channels. You will see that the holes line up pretty well without having to jam the bottom channel onto the glass. Screw (4) the side channels to the bottom channel. Replace the Door Guts, being careful to line up the two spacers at the top of the door. Three screws in the bottom of the door, then the two Torx screws back in the top of the door. Put each screw in just finger tight and after they are all started, screw them home. Slip the reassembled door back in the oven frame, flip the locks up and Voila! Now that it's over, let me just say that if a camel is a horse designed by a committee, this thing must have been thought up by the US Congress!
Parts Used:

-
Nat from Irvine, CA
-
Difficulty Level:A Bit Difficult
-
Total Repair Time:1- 2 hours
-
Tools:Nutdriver
Was this instruction helpful to you?
Thank you for voting!
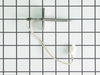
oven continued to get F2, F3 and F5 error messages when ovewn got hot
This repair was quite a bit more difficult then what had been described on the web site. First off, I have a double wall oven that is built in. Sliding it out of the cabinet was difficult and because oven was hard wired, I had to disconnect the actual wiring from the oven back. . Positioning the oven and allowing for it to rest on a support bench was the most difficult part The oven is heavy. Eventually, removing the back and top panels of the oven revealed the sensor connection. I was then able to feed it through the oven and reconnect all the wiring harnesses.. Getting the oven back in the cabinet was equally a challenge. But it did seem to fix the problem with over heating.
Parts Used:
-
Ralph from Redding, CA
-
Difficulty Level:Difficult
-
Total Repair Time:1- 2 hours
-
Tools:Nutdriver, Screw drivers, Socket set
Was this instruction helpful to you?
Thank you for voting!
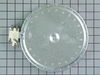
Bad Burner
I simply removed the 2 anchor screws in front of the stove and wrote down the wiring order on the instillation diagram, removed the old burner, removed the two studs, made sure they were installed on the right numbers place them in the new burner, wired the new burner, placed the springs respectively. Placed them in the correct holes in the frame to be sure that the burner was aligned properly. Put the washers on the studs and replaced the frame screws, lowered the cook top and returned the screws to lock the cook top in place.
Parts Used:
-
Roosevelt from Waggaman, LA
-
Difficulty Level:Really Easy
-
Total Repair Time:15 - 30 mins
Was this instruction helpful to you?
Thank you for voting!
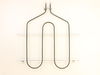
Broiler Element Turning White - Disintegrating
Ordered part which arrived in 4 days. Removed range door (simple), removed shelves. With a power nut driver, removed support brackets holding element from top of oven. Removed screws holding element and temp probe at the rear of oven. Removed 2 wire connectors attached to element. Removed damaged element. Attached the replacement element to the 2 wire connectors and fed cables and probe wires back into the cable opening at the rear of the oven. Attached the new element to the top of the range with the existing screws. Attached the rear of the element with the temp probe with screws at the rear of the oven. Replaced range door. Plugged in power and tested for 15 minutes. Job complete. Parts price, great! Service call saved, priceless!
Parts Used:
-
Kevin from Glenwood, IL
-
Difficulty Level:Really Easy
-
Total Repair Time:15 - 30 mins
-
Tools:Nutdriver
Was this instruction helpful to you?
Thank you for voting!
broil element wasn't heating
-
Kathryn from Cope, SC
-
Difficulty Level:Really Easy
-
Total Repair Time:15 - 30 mins
-
Tools:Screw drivers
Was this instruction helpful to you?
Thank you for voting!
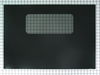
Broken Oven Glass
Removed two screws inside the oven door using hex key. Then I gained access to 4 screws that allowed me to remove the oven door handle assembly. I place the oven door glass in the tracks and replaced the handle assemby and reinstalled the two hex screws.
Parts Used:
-
Mike from Phoenix, AZ
-
Difficulty Level:Really Easy
-
Total Repair Time:15 - 30 mins
-
Tools:Socket set
Was this instruction helpful to you?
Thank you for voting!
Broiler burner burned up
Dear PARTSELECT
My experience with you was spectacular!!!!
The oven broiler burner went out on a Sunday afternoon while my wife was using it to cook for our family dinner. We ordered it that day and it was received, installed, and working on Tuesday afternoon...
How could it be any better?
Thanks
George Crady
My experience with you was spectacular!!!!
The oven broiler burner went out on a Sunday afternoon while my wife was using it to cook for our family dinner. We ordered it that day and it was received, installed, and working on Tuesday afternoon...
How could it be any better?
Thanks
George Crady
Parts Used:
-
George from Yuleef, FL
-
Difficulty Level:Really Easy
-
Total Repair Time:15 - 30 mins
-
Tools:Nutdriver
Was this instruction helpful to you?
Thank you for voting!
Broil element broken
Never did a repair like that. Had to ask store clerk what you call that thing you take off bolts with. But repair went great. Very satisfied. Part arrived very quickly and saved our Christmas dinner. THANK YOU!
Parts Used:
-
Laura from Stratford, CT
-
Difficulty Level:Really Easy
-
Total Repair Time:15 - 30 mins
-
Tools:Socket set
Was this instruction helpful to you?
Thank you for voting!
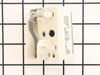
Replacment of burner control switches
I watched your video on the subject and followed it exactly. It explained everything I needed to know. The hardest part was CLEANING under the stove once I pulled it out from the wall!
Parts Used:
-
Judith from Keezletown, VA
-
Difficulty Level:Really Easy
-
Total Repair Time:15 - 30 mins
-
Tools:Nutdriver, Pliers, Screw drivers
Was this instruction helpful to you?
Thank you for voting!
The broiler elemet had burned through
First I unplugged the range. Then I removed the hex head screws, disconnected the two flag connectors and removed the old element. Then I reversed the process with the new element. I plugged the range back in and set the control to broil. It works like a charm!
Parts Used:
-
Cyndi from Beaverton, OR
-
Difficulty Level:Really Easy
-
Total Repair Time:15 - 30 mins
-
Tools:Nutdriver
Was this instruction helpful to you?
Thank you for voting!
Oven broiler not functioning
Pulled unit away from wall with help of husband and followed instructions.
Parts Used:
-
Mary Ellen from Chicago, IL
-
Difficulty Level:Really Easy
-
Total Repair Time:15 - 30 mins
-
Tools:Pliers, Screw drivers, Wrench (Adjustable)
Was this instruction helpful to you?
Thank you for voting!
Broil element broke
-
Amanda from Logan, OH
-
Difficulty Level:Really Easy
-
Total Repair Time:15 - 30 mins
-
Tools:Socket set
Was this instruction helpful to you?
Thank you for voting!
Replacement of Broiler Element
-Pull the oven away from the wall and unplug it. -Remove the sheet metal panel on the middle of the back of the oven exposing the electrical connections. -Pull off the wire connections from the broiler element and identify which one goes to which side. Pull apart the connector for the thermostat -Go inside the oven and remove the 2 screws holding the element to the back wall. -Remove the 2 screws holding the element to the top of the oven. -Pull the element out and remove the thermostat, and attach it to the new element bracket. Reinstall everything in the reverse order.
Parts Used:
-
Jamesd from Penfield, NY
-
Difficulty Level:Really Easy
-
Total Repair Time:Less than 15 mins
-
Tools:Nutdriver
Was this instruction helpful to you?
Thank you for voting!
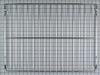
no problem, needed to replace the racks
took the old ones out & put the new ones in. Piece of cake!!Thanks for the prompt delivery!!
Parts Used:
-
Joanne from Parrish, FL
-
Difficulty Level:Really Easy
-
Total Repair Time:Less than 15 mins
Was this instruction helpful to you?
Thank you for voting!
Oven rack - just put it in the oven.
I wanted a third rack in my oven to speed up baking. This is already serving that purpose for me. No trouble at all and very fast delivery!Thank you!
Parts Used:
-
Hazel from Ypsilanti, MI
-
Difficulty Level:Really Easy
-
Total Repair Time:Less than 15 mins
Was this instruction helpful to you?
Thank you for voting!