




















91195482990 Kenmore Range - Instructions
Keep searches simple. Use keywords, e.g. "leaking", "pump", "broken" or "fit".
lights blown out

-
Gerald from WINTERVILLE, GA
-
Difficulty Level:Very Easy
-
Total Repair Time:Less than 15 mins
6 of 14 people
found this instruction helpful.
Was this instruction helpful to you?
Thank you for voting!
Top glass top burner wasn’t working
I first ordered the wrong part and had to call customer service. They handled the return and ordered the new piece beautifully!! The installation was really simple. Once I took out two screws holding the top down, I removed three clips holding the burner on then switched out the electrical leads. Put everything back and it worked perfectly!!
Parts Used:
-
Robert from PAWTUCKET, RI
-
Difficulty Level:Very Easy
-
Total Repair Time:15 - 30 mins
-
Tools:Nutdriver, Pliers, Screw drivers
2 of 2 people
found this instruction helpful.
Was this instruction helpful to you?
Thank you for voting!
front lift burner not working and surface light on with everything off
unplugged the range removed 4 screws from back top cover then took the knob off controller removed 2 screws from behind the knob removed 1 wirer at a time and placed it on the new controller in same order the wires came off put everything back to gather did not fix the problem .
Parts Used:
-
kevin from GAYLORD, MI
-
Difficulty Level:Really Easy
-
Total Repair Time:15 - 30 mins
-
Tools:Nutdriver, Screw drivers
2 of 2 people
found this instruction helpful.
Was this instruction helpful to you?
Thank you for voting!
Heat element died
Very easy to replace. So easy even a man can do it.
Parts Used:
-
Andrea Hines from ELGIN, AZ
-
Difficulty Level:Very Easy
-
Total Repair Time:15 - 30 mins
-
Tools:Pliers, Screw drivers
2 of 3 people
found this instruction helpful.
Was this instruction helpful to you?
Thank you for voting!
Cleaned oven with shelves inside...
I too made the mistake of cleaning the oven with the shelves in place. It doesn't really harm them...but they turn a tarnished brown color...they look dirty. These replacement shelves were a perfect match. Pricing was reasonable, communication was terrific and shipping was super fast. Happy camper here :-)
Parts Used:
-
Carol from Roanoke, VA
-
Difficulty Level:Really Easy
-
Total Repair Time:Less than 15 mins
3 of 6 people
found this instruction helpful.
Was this instruction helpful to you?
Thank you for voting!
Burner spontaneously cycled without knob activation
First I cut the circuit at the breaker, and then pulled the range from wall to access the access panel. This top panel was held with 4 screws and removable with a standard phillips head screwdriver.
I then removed the 5 wire-crimped fasteners from the defective surface burner switch. (I first labeled these wires to ensure correct placement to the new switch). There were an additional two screws behind the corresponding knob that needed to be removed in order to completely remove the old switch.
The new switch was installed in reverse order to the steps indicated above (two screws behind knob, 5 wire-crimped fasteners, 4 screws to panel). Range was pushed back into position and breaker turned on.
I then removed the 5 wire-crimped fasteners from the defective surface burner switch. (I first labeled these wires to ensure correct placement to the new switch). There were an additional two screws behind the corresponding knob that needed to be removed in order to completely remove the old switch.
The new switch was installed in reverse order to the steps indicated above (two screws behind knob, 5 wire-crimped fasteners, 4 screws to panel). Range was pushed back into position and breaker turned on.
Parts Used:
-
Anil from Milpitas, CA
-
Difficulty Level:Easy
-
Total Repair Time:Less than 15 mins
-
Tools:Screw drivers
2 of 3 people
found this instruction helpful.
Was this instruction helpful to you?
Thank you for voting!
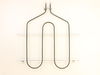
Broiler element burned out in the oven.
The only hard thing was contorting my old beat up body and joints long enuff to reconnect the 2 wires and oven heat sensor and put in 6 screws with a 1/4" nut driver. I did remover the oven door and that made it much easier for me.
Parts Used:
-
Emmett from Buffalo, TX
-
Difficulty Level:Really Easy
-
Total Repair Time:30 - 60 mins
-
Tools:Nutdriver, Screw drivers
2 of 3 people
found this instruction helpful.
Was this instruction helpful to you?
Thank you for voting!
Broil (top) element burned out.
Unplugged the power supply. Took off the cover on the back of the unit. Unplugged the wires to the broiler element. Removed the bolts(4) holding the element inside the oven. Removed the temprature sensor from element and took it out. Put it all back the way it came out. Worked great. Took 25 minutes.
Parts Used:
-
Dee from McKinney, TX
-
Difficulty Level:Easy
-
Total Repair Time:15 - 30 mins
-
Tools:Nutdriver
2 of 3 people
found this instruction helpful.
Was this instruction helpful to you?
Thank you for voting!
The broiler had shorted out.
I had my husband fix it! Very easy for me.
It didn't take him long. The most difficult part was getting to the screws. He had to practically climb into the oven.
The parts were shipped promptly and the whole process was relatively painless!
It didn't take him long. The most difficult part was getting to the screws. He had to practically climb into the oven.
The parts were shipped promptly and the whole process was relatively painless!
Parts Used:
-
Marjorie from Salem, IN
-
Difficulty Level:Really Easy
-
Total Repair Time:15 - 30 mins
-
Tools:Socket set
2 of 3 people
found this instruction helpful.
Was this instruction helpful to you?
Thank you for voting!
Broiler element was burned out
The repair was so simple. First i killed the circuit breaker then removed five screws upluged element from contacts and removed the element plugged new element into the contacts popped the screws back and was done.
Parts Used:
-
Charles from Washingtin, DC
-
Difficulty Level:Really Easy
-
Total Repair Time:15 - 30 mins
-
Tools:Socket set
2 of 3 people
found this instruction helpful.
Was this instruction helpful to you?
Thank you for voting!
Replaced oven door gasket
-
Paul from JACKSONVILLE, FL
-
Difficulty Level:Really Easy
-
Total Repair Time:15 - 30 mins
-
Tools:Screw drivers
1 person
found this instruction helpful.
Was this instruction helpful to you?
Thank you for voting!
Burned out
Remove two screws to loosen the ceramic top....prop top open and change part...the part was exactly the same...change wires from one to the other and transfer clamps.....1st grade craft class would have done it in half the time I did......you folks have your parts inventory and description application to a science.....God Bless
Parts Used:

-
Dean from Elkton, FL
-
Difficulty Level:Really Easy
-
Total Repair Time:15 - 30 mins
-
Tools:Screw drivers
1 person
found this instruction helpful.
Was this instruction helpful to you?
Thank you for voting!
Plastic guide Broken
-
NICK from Vernon, CA
-
Difficulty Level:Easy
-
Total Repair Time:15 - 30 mins
-
Tools:Pliers, Screw drivers
9 of 25 people
found this instruction helpful.
Was this instruction helpful to you?
Thank you for voting!
Broiler coil burnt out
It was just a matter of removing 5 screws that attached the broiler coil to oven top. Then carefully removing coil so as not to cause wires attached to fall into the back of the oven. Needed an extra pair of hands to hold coil while i guided the wires back thru the opening. All that was left to do was to secure the broiler coil to oven. All completed in less then 30 mins. A lot easier then originally thought. And, a lot cheaper then getting a repair person to do the job.
Parts Used:
-
Howard from LEXINGTON, KY
-
Difficulty Level:Easy
-
Total Repair Time:15 - 30 mins
-
Tools:Screw drivers
2 of 4 people
found this instruction helpful.
Was this instruction helpful to you?
Thank you for voting!
Replaced stove top burner element
Disconnect stove electrical connection. Removed 2 bolts common to the upper stove top cover. Disconnected 4 wires from burner element along with 2 retaining clips.
Removed burner element and replaced with new element. Reinstalled 4 wires and 2 retaining clips. Lowered stove top cover and reinstalled 2 bolts. Connect stove electrical to wall outlet. Turn on burner element and verify that it works.
Removed burner element and replaced with new element. Reinstalled 4 wires and 2 retaining clips. Lowered stove top cover and reinstalled 2 bolts. Connect stove electrical to wall outlet. Turn on burner element and verify that it works.
Parts Used:
-
Steve from Forest, VA
-
Difficulty Level:Easy
-
Total Repair Time:1- 2 hours
-
Tools:Screw drivers, Socket set
1 person
found this instruction helpful.
Was this instruction helpful to you?
Thank you for voting!