




















91195404000 Kenmore Range - Instructions
Keep searches simple. Use keywords, e.g. "leaking", "pump", "broken" or "fit".
oven door gasket needed replaced
Ordered the part, it arrived and 5 minutes later it a complete installation
Parts Used:
-
Mary from LONGS, SC
-
Difficulty Level:Very Easy
-
Total Repair Time:Less than 15 mins
1 person
found this instruction helpful.
Was this instruction helpful to you?
Thank you for voting!
Previous owner left racks in during self clean
-
SHARON from EDMOND, OK
-
Difficulty Level:Very Easy
-
Total Repair Time:Less than 15 mins
1 person
found this instruction helpful.
Was this instruction helpful to you?
Thank you for voting!
The light inside the oven had burned out
0. As a safety precaution, unplug the range or hit the relevant fuse breaker before you start. You might also want to grab a flashlight. Definitely do not try to do this while the oven is hot.
1. Pinch the wire over the light bulb cap to remove it. This is inside the oven at the back.
2. Pop off the hemispherical glass cap.
3. Unscrew the old light bulb, and screw the new light bulb in its place.
4. Put the cap back.
5. Secure the cap by putting the wire back in its slots on the cap.
No tools needed, the cap is just held in place with pressure from the wire.
1. Pinch the wire over the light bulb cap to remove it. This is inside the oven at the back.
2. Pop off the hemispherical glass cap.
3. Unscrew the old light bulb, and screw the new light bulb in its place.
4. Put the cap back.
5. Secure the cap by putting the wire back in its slots on the cap.
No tools needed, the cap is just held in place with pressure from the wire.
Parts Used:

-
Catherine from SEATTLE, WA
-
Difficulty Level:Very Easy
-
Total Repair Time:Less than 15 mins
3 of 7 people
found this instruction helpful.
Was this instruction helpful to you?
Thank you for voting!
Burner burned out
Very easy. Unpluged range from outlet, took two screws from the front under side of the range top, raised cook top up, took off four wires from burner, removed two screws than holds burner on cook top, replaced with new burner, installed two screws that hold burner in place, installed the four wires to burner, lowered cook top back into place replaced two screws that hold cook top down, pluged back into outlet. DONE!
Parts Used:

-
Daniel from Norborne, MO
-
Difficulty Level:Really Easy
-
Total Repair Time:Less than 15 mins
-
Tools:Pliers, Screw drivers
1 person
found this instruction helpful.
Was this instruction helpful to you?
Thank you for voting!
Burner didn't go on
Turned off juice
Pulled stove from wall
Unscrewed 2 screws to loosen range top
Lifted n propped top
Unplugged 4 wires
Unscrewed burner assembly
Installed burner-reversed steps to reassemble
Pulled stove from wall
Unscrewed 2 screws to loosen range top
Lifted n propped top
Unplugged 4 wires
Unscrewed burner assembly
Installed burner-reversed steps to reassemble
Parts Used:
-
Mike from Hatfield, PA
-
Difficulty Level:Really Easy
-
Total Repair Time:Less than 15 mins
-
Tools:Nutdriver, Screw drivers
1 person
found this instruction helpful.
Was this instruction helpful to you?
Thank you for voting!
Burned out
Remove two screws to loosen the ceramic top....prop top open and change part...the part was exactly the same...change wires from one to the other and transfer clamps.....1st grade craft class would have done it in half the time I did......you folks have your parts inventory and description application to a science.....God Bless
Parts Used:
-
Dean from Elkton, FL
-
Difficulty Level:Really Easy
-
Total Repair Time:15 - 30 mins
-
Tools:Screw drivers
1 person
found this instruction helpful.
Was this instruction helpful to you?
Thank you for voting!
Replaced oven door gasket
-
Paul from JACKSONVILLE, FL
-
Difficulty Level:Really Easy
-
Total Repair Time:15 - 30 mins
-
Tools:Screw drivers
1 person
found this instruction helpful.
Was this instruction helpful to you?
Thank you for voting!
temperature sensor went
Took back panel off unplugged sensor and replugged in and worked like a charm!Sears wanted $400 and was going to 'overrepair"Got the 60 dollar part on here. UPS shipped to wrong address and customer service refunded my shipping and was excellent! would definetly use again!thanks
Parts Used:
-
Alex R from Randoff, NJ
-
Difficulty Level:Easy
-
Total Repair Time:Less than 15 mins
-
Tools:Nutdriver
1 person
found this instruction helpful.
Was this instruction helpful to you?
Thank you for voting!
burner didn't work
lift stove top, 2 undermount screws. Then unplug 4 wires, I did them 1 at a time plugging into new burner as I go so I wouldn't screw up. Take 2 screws out of old burner to stove top, # all around circle put screws in same # on new burner.Done Good experience all the way around. Order delivery and install
Parts Used:
-
Richard from Coon Rapids, MN
-
Difficulty Level:Really Easy
-
Total Repair Time:Less than 15 mins
-
Tools:Pliers, Screw drivers
1 person
found this instruction helpful.
Was this instruction helpful to you?
Thank you for voting!
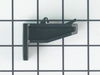
Plastic guide Broken
-
NICK from Vernon, CA
-
Difficulty Level:Easy
-
Total Repair Time:15 - 30 mins
-
Tools:Pliers, Screw drivers
9 of 25 people
found this instruction helpful.
Was this instruction helpful to you?
Thank you for voting!
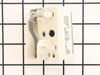
Element blew hole in self then no power to burner.
Replaced burned element, did not fix no power problem. Ordered receptor replacement, replaced it, took less than 10 mminutes, but still no power to burned. Then ordered replacement switch, replacement too less than 10 minutes again and burner works fine.
Parts Used:
-
Melvin from Portland, TN
-
Difficulty Level:Easy
-
Total Repair Time:Less than 15 mins
-
Tools:Screw drivers, Socket set
2 of 4 people
found this instruction helpful.
Was this instruction helpful to you?
Thank you for voting!
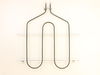
Broiler coil burnt out
It was just a matter of removing 5 screws that attached the broiler coil to oven top. Then carefully removing coil so as not to cause wires attached to fall into the back of the oven. Needed an extra pair of hands to hold coil while i guided the wires back thru the opening. All that was left to do was to secure the broiler coil to oven. All completed in less then 30 mins. A lot easier then originally thought. And, a lot cheaper then getting a repair person to do the job.
Parts Used:
-
Howard from LEXINGTON, KY
-
Difficulty Level:Easy
-
Total Repair Time:15 - 30 mins
-
Tools:Screw drivers
2 of 4 people
found this instruction helpful.
Was this instruction helpful to you?
Thank you for voting!
just want new parts
-
Minnie from hurdle mills, NC
-
Difficulty Level:Really Easy
-
Total Repair Time:15 - 30 mins
-
Tools:Socket set
1 person
found this instruction helpful.
Was this instruction helpful to you?
Thank you for voting!
Replaced stove top burner element
Disconnect stove electrical connection. Removed 2 bolts common to the upper stove top cover. Disconnected 4 wires from burner element along with 2 retaining clips.
Removed burner element and replaced with new element. Reinstalled 4 wires and 2 retaining clips. Lowered stove top cover and reinstalled 2 bolts. Connect stove electrical to wall outlet. Turn on burner element and verify that it works.
Removed burner element and replaced with new element. Reinstalled 4 wires and 2 retaining clips. Lowered stove top cover and reinstalled 2 bolts. Connect stove electrical to wall outlet. Turn on burner element and verify that it works.
Parts Used:
-
Steve from Forest, VA
-
Difficulty Level:Easy
-
Total Repair Time:1- 2 hours
-
Tools:Screw drivers, Socket set
1 person
found this instruction helpful.
Was this instruction helpful to you?
Thank you for voting!
BASE OF BULB BROKE OFF & WELDED TO SOCKET
PULL RANGE OUT FROM WALL & ALSO REMOVED OVEN DOOR BY SLIDING UP. WORKING FROM INSIDE OVEN & ALSO BEHIND I REPLACED PART . ALWAYS " UNPLUG " RANGE BEFORE YOU START.
Parts Used:
-
NEIL from ROCKY POINT, NY
-
Difficulty Level:Easy
-
Total Repair Time:30 - 60 mins
-
Tools:Nutdriver, Pliers
1 person
found this instruction helpful.
Was this instruction helpful to you?
Thank you for voting!