




















9117340192 Kenmore Range - Instructions
Keep searches simple. Use keywords, e.g. "leaking", "pump", "broken" or "fit".
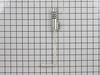
Broken Ignitor
My repair was easy. The hardest part was trying to get the 2 small screws off and on the igniter. You need small hands or a small, angled socket set. I did mine with the door of my oven still on and maybe that was why I couldn't reach the screws that well. If you can do the repair with the door off, I would say that would be easier. As soon as the new piece was screwed in, it worked on the first try.
Parts Used:
-
Matt from Ladera Ranch, CA
-
Difficulty Level:Easy
-
Total Repair Time:30 - 60 mins
-
Tools:Pliers, Socket set
1 person
found this instruction helpful.
Was this instruction helpful to you?
Thank you for voting!
broiler works/oven not so much!
Ignitor is easily reached by removing the bottom of the oven floor. Machine screws remove easily when appliance is relatively new, but from experience, they may give you some trouble when stove is 5+ years old! Our part came in a timely fashion, even when ordered over a holiday weekend . Replace ignitor just as the old one came out-one word to the wise...scrape off enough silver coating on the wires so that a good contact is insured before splicing with the wing-nut included. Having had many GE stoves, I notice that the factory-installed ignitors have a shorter and shorter life; I'll be keeping PartSelect's website handy!
Parts Used:
-
Sandra from Charlevoix, MI
-
Difficulty Level:Easy
-
Total Repair Time:30 - 60 mins
-
Tools:Screw drivers, Socket set
1 person
found this instruction helpful.
Was this instruction helpful to you?
Thank you for voting!
Oven would not heat
Removed the two screws that hold the oven bottom to expose the glow element. Also removed the lower draw to get to the connections. The job was only complicated by getting to the two bolts holding the glow plug to the oven frame. Getting them off and getting the new plug on was not easy with standard tools. There was not a lot of room to work the hex bolts and i wound up cutting the old unit out and attaching the bolts to the frame and cutting slots in the new unit so I could slot it in. That worked. The glow plug was the problem and the oven came right on.
Parts Used:
-
Richard from Seaford, NY
-
Difficulty Level:A Bit Difficult
-
Total Repair Time:1- 2 hours
-
Tools:Screw drivers, Socket set, Wrench set
1 person
found this instruction helpful.
Was this instruction helpful to you?
Thank you for voting!
Oven Would Not Turn On.
Most trouble I had was removing the screws that were located under the bracket. I had to slip the oven door off first to give me more room. Very hard to get to these screws because of where they were located under the bracket. I had to twist and turn the old igniter to get to it. When finally removed, I replaced the old igniter with the new one using my own screws. I twisted the wires together, and replaced the baffles, the oven floor, and then the door. The oven fired up wonderfully! Thank you for your prompt service for getting me the part quickly and correctly.
Parts Used:
-
Joan from Riverdale, NY
-
Difficulty Level:Difficult
-
Total Repair Time:1- 2 hours
-
Tools:Pliers, Wrench (Adjustable), Wrench set
1 person
found this instruction helpful.
Was this instruction helpful to you?
Thank you for voting!
Oven Igniter went out the night before Thanksgiving
First I took out the old Igniter and discovered the part I ordered did not come with any connectors, just bare wires. This is ok but I found myself searching the stores for the correct attatchments. It would be great if your web site gave the options to order these at the same time. This was my first repair of this kind so I had no idea what I was doing. I thought the part would arrive with what I needed to install it. The hardest part was getting the bolts off the under side of the Igniter. The space if very tight and at an angle that a regular took doesn't really fit. What took so long was taking the bolts off by hand. Im a single woman who likes to try to fix things first on my own. My 18 yr. old daughter was in there with me the whole time learning and finally it was her smaller fingers that were able to get the bolts into the new part. We only finger tightened the part because no tools would fit at the curved angle. I love your web site and the ease of finding the part I needed. Its the stove manufacture who made this project difficult by how they place the screws. I will use them for all my part needs in the future.
Parts Used:
-
Sonya from Renton, WA
-
Difficulty Level:Difficult
-
Total Repair Time:1- 2 hours
-
Tools:Wrench (Adjustable)
1 person
found this instruction helpful.
Was this instruction helpful to you?
Thank you for voting!
Burned out
-
John from GLENVIEW, IL
-
Difficulty Level:Really Easy
-
Total Repair Time:15 - 30 mins
-
Tools:Screw drivers
1 person
found this instruction helpful.
Was this instruction helpful to you?
Thank you for voting!
Oven would not work. Burners worked fine. Igniter would not glow.
It was easy. I removed the guts. Removed the heat deflector (one nut). Then removed the igniter and the cover over the wires in order to unplug the wires so I could work with attaching the new part on top of the counter. Replaced everything and it worked great. When the old igniter did not work, the gas valve would not let the gas into the oven, Once replaced, you can here the gas flow in and ignite. Repair man wanted $65 to show up and $175 for part and labor. I paid $77 for the part and did it myself. I do not consider myself handy.
Parts Used:
-
Joe from Kansas City, MO
-
Difficulty Level:Really Easy
-
Total Repair Time:15 - 30 mins
-
Tools:Nutdriver
1 person
found this instruction helpful.
Was this instruction helpful to you?
Thank you for voting!
Igniter would not glow and light oven.
Straight forward as per instructions. Removed old igniter, replaced and tested new one and it worked. However, the gas oven would not turn of. Valve may be defective. Knob control is not stripped and turned to full stop. Troubleshooting continues. Part(s) and instructions worked perfectly.
Parts Used:
-
Robert from FALL CITY, WA
-
Difficulty Level:Really Easy
-
Total Repair Time:15 - 30 mins
-
Tools:Nutdriver, Screw drivers
1 person
found this instruction helpful.
Was this instruction helpful to you?
Thank you for voting!
Igniter coil burned out
- removed the oven unit from the wall
- removed the aluminum backplate to expose the wiring
- Removed both glass wire nuts and disconnected the heating element\
- From the front, I removed both retainer screws and pulled the element wires through.
- In reverse order I reinsalled the new wires and screwed on the heating element.
-I reattached the electrical wiring and rear pane.
- I re-installed the unit into the wall.
- removed the aluminum backplate to expose the wiring
- Removed both glass wire nuts and disconnected the heating element\
- From the front, I removed both retainer screws and pulled the element wires through.
- In reverse order I reinsalled the new wires and screwed on the heating element.
-I reattached the electrical wiring and rear pane.
- I re-installed the unit into the wall.
Parts Used:
-
Chuck from Los Angeles, CA
-
Difficulty Level:Easy
-
Total Repair Time:15 - 30 mins
-
Tools:Nutdriver, Pliers, Screw drivers
1 person
found this instruction helpful.
Was this instruction helpful to you?
Thank you for voting!
The oven igniter burned out.
I rempved the top and bottom doors, than the wire rackes followed by the bottom base of the oven. Then I removed the burner cover plate so I could get to the igniter.. I removed the cover plate for the wiring (2 wires), unpluged them, removed the igniter (2 screws). I had to cut the wires on the old igniter and couple the ends to the new igniter and then replaced everything by just reversing all that I did. Simple! Easy!
Parts Used:
-
Michael from Las Vegas, NV
-
Difficulty Level:Easy
-
Total Repair Time:15 - 30 mins
-
Tools:Pliers, Screw drivers
1 person
found this instruction helpful.
Was this instruction helpful to you?
Thank you for voting!
oven not working, broiler working, burners working
i followed the same directions others had posted - good tip to remove the oven door for easier access - i was nervous about stripping the wires to splice together, so i made my hubby strip the wires for me :) - did all the rest myself. no trouble at all - if a girl can do it, anyone can do it!
Parts Used:
-
Barbara from Fairbury, IL
-
Difficulty Level:Easy
-
Total Repair Time:15 - 30 mins
-
Tools:Screw drivers, Socket set
1 person
found this instruction helpful.
Was this instruction helpful to you?
Thank you for voting!
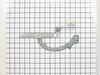
Over door would not open fully; light was always on
Slid off the oven door and loosened the hinge assembly. Removed the storage drawer to unhook the spring and then took off the old hinge assembly.
Inserted the spring into the new hinge assembly and then installed it - just tightened the screws. Hooked the spring into the lower point. Slid in the oven door and tested it so that is opened/closed easily. Cleaned under the oven while the storage drawer was out.
We can now bake bread, pizza, etc. What a relief.
Inserted the spring into the new hinge assembly and then installed it - just tightened the screws. Hooked the spring into the lower point. Slid in the oven door and tested it so that is opened/closed easily. Cleaned under the oven while the storage drawer was out.
We can now bake bread, pizza, etc. What a relief.
Parts Used:
-
Fareed from Randolph, NJ
-
Difficulty Level:Easy
-
Total Repair Time:15 - 30 mins
-
Tools:Screw drivers
1 person
found this instruction helpful.
Was this instruction helpful to you?
Thank you for voting!
Bake didn't work, broiler did
Unplugged the oven. First i removed the 2 screws from the pan at the bottom of the oven and took the pan out. Next i took out the drawer underneath and took the screws out of the pans below to get to the ignitor. Unscrewed the ignitor and cut the wires below it to splice the new ignitor on. Spliced the two sets of wires and put the ceramic wire nuts on. Replaced the top and bottom pans and put the drawer back. plugged the oven back in and started the oven right up. Pretty easy.
Parts Used:
-
Bill from Harleysville, PA
-
Difficulty Level:Easy
-
Total Repair Time:15 - 30 mins
-
Tools:Nutdriver, Screw drivers
2 of 4 people
found this instruction helpful.
Was this instruction helpful to you?
Thank you for voting!
broiler woks ,bake doesnt
i went for 3 months waiting on the electrician who never came then asked the plumber who else could fix it and he said my husband could it only needed to unscrew 4 tiny screws and unplug and cut and twist wires back the hardest part was reaching the bolts hooked to the ignighter the burner was in the way and is not as easy to remove as someone has said all in all it saved us 100 dollars and could have saved us months of burning food trying to cook on broil if i had only called the plumber first.ha ha
Parts Used:
-
HEIDI from NEW ROADS, LA
-
Difficulty Level:Easy
-
Total Repair Time:15 - 30 mins
-
Tools:Socket set
1 person
found this instruction helpful.
Was this instruction helpful to you?
Thank you for voting!
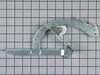
Broken roller on left hinge of oven door.
Followed the excellent removal and installation video by PartSelect. Also the diagram was excellent allowing me to purchase the correct hinge the first time. Fast shipping.
Parts Used:
-
Phillip from Caledonia, MI
-
Difficulty Level:Really Easy
-
Total Repair Time:15 - 30 mins
-
Tools:Pliers, Screw drivers
1 person
found this instruction helpful.
Was this instruction helpful to you?
Thank you for voting!