




















9117318810 Kenmore Range - Instructions
Keep searches simple. Use keywords, e.g. "leaking", "pump", "broken" or "fit".
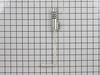
oven would not light
I removed lower drawer, removed oven door,
took out rear screws to oven pan,removed screws that attatch ignighter to oven wall,disconnected wiring and removed old ignighter. reversed process to install new part. total repair time was about 20 minutes. Also take into consideration that i am a building contractor familiar to appliance repair etc.
took out rear screws to oven pan,removed screws that attatch ignighter to oven wall,disconnected wiring and removed old ignighter. reversed process to install new part. total repair time was about 20 minutes. Also take into consideration that i am a building contractor familiar to appliance repair etc.
Parts Used:
-
scott from west barnstable, MA
-
Difficulty Level:Really Easy
-
Total Repair Time:15 - 30 mins
-
Tools:Nutdriver, Screw drivers
1 of 3 people
found this instruction helpful.
Was this instruction helpful to you?
Thank you for voting!
Oven Not Working but, Roaster and Burners work
The repair was easy and not very time consuming. It didn't take very long to fix the problem and thanks to this site, I was able to save the money I would have spent if a repair technician came out to do the same work. Now I can afford Christmas and cook too!
Parts Used:
-
Arthur from Humble, TX
-
Difficulty Level:Really Easy
-
Total Repair Time:15 - 30 mins
-
Tools:Screw drivers
1 of 3 people
found this instruction helpful.
Was this instruction helpful to you?
Thank you for voting!
Light burnt out.
Turned the wire protector to the side. Turned out the old bulb and replaced it with the new. Turned the wire protector back in place and I'm like new.
Parts Used:

-
Roscoe G from ROCHESTER, NY
-
Difficulty Level:Very Easy
-
Total Repair Time:Less than 15 mins
2 of 6 people
found this instruction helpful.
Was this instruction helpful to you?
Thank you for voting!
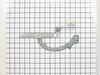
Hinge on oven door neede to be replaced
First I removed the oven door from the support hinges. Next I pulled the bottom pan drawer out to get to the tension spring. I released the tension from the hinge, unscrewed three screws that held the hinge in place. From there I replaced the hinge put all components back in place and did it all under 20 mins. The part was received with in 3 days from PartSelect so I was very satisisfied with the service and ease of repair.
Parts Used:
-
Joe from Matthews, NC
-
Difficulty Level:Really Easy
-
Total Repair Time:Less than 15 mins
-
Tools:Screw drivers
0 of 1 people
found this instruction helpful.
Was this instruction helpful to you?
Thank you for voting!
Gas Oven would not lite - broiler and top burners operate
The stories posted on your web page are great - only improvement would to add a schematic of the parts being removed - no issues were encountered - great service by the way - part arrived the next day - a Saturday!
John M.
John M.
Parts Used:
-
John from Mentor, OH
-
Difficulty Level:Easy
-
Total Repair Time:Less than 15 mins
-
Tools:Screw drivers, Socket set
0 of 1 people
found this instruction helpful.
Was this instruction helpful to you?
Thank you for voting!
oven would not start,
removed screw from heat sheild, unpluged igniter and tested for 110v on wires feeding igniter (ok). removed bad igniter,ordered new one and installed with 2 - 1/4in. hex head screws. cut old male and female plug ends off old igniter, and wirenutted onto new igniter. turned on oven and it works fine. but noticed after oven burner lights, igniter stays on the whole time oven is on. I would think that it should go off when burner lites. Does anyone know if this is normal operation?
Parts Used:
-
Douglas from LaMoille, IL
-
Difficulty Level:Really Easy
-
Total Repair Time:Less than 15 mins
-
Tools:Nutdriver
0 of 1 people
found this instruction helpful.
Was this instruction helpful to you?
Thank you for voting!
oven would not get hot
Removed bottom tray of oven, removed ignighter, unplug two wires.
Parts Used:
-
Ronald from Cedarville, NJ
-
Difficulty Level:Really Easy
-
Total Repair Time:15 - 30 mins
-
Tools:Nutdriver
0 of 1 people
found this instruction helpful.
Was this instruction helpful to you?
Thank you for voting!
Broken roller on hinge
Removed the oven door. Released spring on hinge. Removed 3 screws. Removed broken hinge and replaced new hinge reversing these steps.
Parts Used:
-
Angelina from San Diego, CA
-
Difficulty Level:Easy
-
Total Repair Time:Less than 15 mins
-
Tools:Screw drivers
0 of 1 people
found this instruction helpful.
Was this instruction helpful to you?
Thank you for voting!
Plastic roller on hinge had broken causing door not to open easily
Slid door off hinges. Removed 3 screws which hold hinge in place. Removed drawer to access spring for hinge. Gasped at all the crumbs and crap which had collected underneath the drawer. Cleaned up crumbs+crap from floor. Disconnected spring from hinge and removed old hinge completely. Installed new hinge with 3 screws. Attached spring to hinge - center hole fitting. Slid drawer back in place. Angled hinges outward in order to re-install door. Slid door back onto hinges. Door now operates nice and smoothly. Job well done.
Parts Used:
-
Roderick from Pleasanton, CA
-
Difficulty Level:Easy
-
Total Repair Time:Less than 15 mins
-
Tools:Screw drivers
0 of 1 people
found this instruction helpful.
Was this instruction helpful to you?
Thank you for voting!
Plastic roller on right hinge was broken
Pulled oven door up and off. Removed old hinge and installed new hinge. Replaced oven door. It was a very simple job. The whole project took less than 15 minutes.
Parts Used:
-
Arthur from Northridge, CA
-
Difficulty Level:Really Easy
-
Total Repair Time:Less than 15 mins
-
Tools:Screw drivers
0 of 1 people
found this instruction helpful.
Was this instruction helpful to you?
Thank you for voting!
Old igniter failed
Replaced the old igniter with new one in 15 minutes. Popped the door off, took the bottom plate off, unscrewed the igniter and disconnected wires. Put the new igniter in and reversed the steps.....piece o'cake! Works great now!
Parts Used:
-
Greg from Yuma, AZ
-
Difficulty Level:Really Easy
-
Total Repair Time:Less than 15 mins
-
Tools:Nutdriver, Screw drivers
0 of 1 people
found this instruction helpful.
Was this instruction helpful to you?
Thank you for voting!
Door was hard to open
After reading other stories, I knew enough to slide the lower drawer out and take off the spring. 30 second job. I did not realize that range doors slide vertically off the hinge, did that in about 2 mins. Put the new hinge on in 2 mins (3 Screws). Slid the door back on and done. Works like a champ. My wife has her eye on new stainless appliances. Sadly, she'll have to wait a while longer.
Parts Used:
-
andrew from hudson, WI
-
Difficulty Level:Really Easy
-
Total Repair Time:Less than 15 mins
-
Tools:Screw drivers
0 of 1 people
found this instruction helpful.
Was this instruction helpful to you?
Thank you for voting!
The oven would not ignite
-
Richard from Las Vegas, NV
-
Difficulty Level:Easy
-
Total Repair Time:Less than 15 mins
-
Tools:Pliers, Screw drivers, Socket set
0 of 1 people
found this instruction helpful.
Was this instruction helpful to you?
Thank you for voting!
Broken Plastic wheel on the hinge assembly
Pulled the three screws off unhooked the spring then removed the hinge. attached the the new hinge to the spring put the screws back in slid door back on took less than 15 minutes.
Parts Used:
-
Matthew from Gardnerville, NV
-
Difficulty Level:Really Easy
-
Total Repair Time:Less than 15 mins
-
Tools:Pliers, Screw drivers
0 of 1 people
found this instruction helpful.
Was this instruction helpful to you?
Thank you for voting!
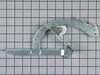
Oven Door Would Not Open All The Way
The left door hinge was broken. There are three screws that hold the hinge. It is very easy to take it out and put the replacement in
Parts Used:
-
ROBERT from NARVON, PA
-
Difficulty Level:Really Easy
-
Total Repair Time:Less than 15 mins
-
Tools:Screw drivers
0 of 1 people
found this instruction helpful.
Was this instruction helpful to you?
Thank you for voting!