




















91147699100 Kenmore Microwave - Instructions
Keep searches simple. Use keywords, e.g. "leaking", "pump", "broken" or "fit".
Quit working

-
William from Socorro, NM
-
Difficulty Level:Really Easy
-
Total Repair Time:Less than 15 mins
-
Tools:Pliers, Screw drivers
Was this instruction helpful to you?
Thank you for voting!
would not turn on - plug in and would shut off right away
-
Vita from Flagstaff, AZ
-
Difficulty Level:Easy
-
Total Repair Time:Less than 15 mins
-
Tools:Screw drivers
Was this instruction helpful to you?
Thank you for voting!
Powered Off completely
After reading reviews that there was no power what so ever and a fuse replacement will solve the problem, I tried it. Replacing the fuse is very easy (and I am not handy at all). All you have to do is remove the microwave cover from the top by removing two screws, slide the cover to the left and pulling the cover off. Then remove the grill in front of you, by removing one or two screws. The fuse is in front of you, use pliers and be firm but gentle. Replacing the fuse is easy but it did not solve my problem.
Parts Used:
-
Mohammad from Piscataway, NJ
-
Difficulty Level:Easy
-
Total Repair Time:Less than 15 mins
-
Tools:Screw drivers
Was this instruction helpful to you?
Thank you for voting!
All power to the microwave went out.
PartSelect had helpful repair instructions on-line which made the repair easier and faster. Unfortunately, there were other problems with the oven that immediately blew the new fuse I had just installed. It was then determined that additional repair would most likely cost almost as much as a new microwave.
Parts Used:
-
Michael from East China Township, MI
-
Difficulty Level:Easy
-
Total Repair Time:Less than 15 mins
-
Tools:Screw drivers
Was this instruction helpful to you?
Thank you for voting!
Fan stayed running when door was open...all else working fine
First, unplug microwave. Unscrew two screws at top of microwave, slide grill cover left and remove. This allows access to single screw holding control panel. Remove this screw and lift up control panel to remove. Secondary door switch is black switch at lowest position. The switch is held in place by a lever in back and very hard to get to. Remove the wires plugged into the switch, then remove two screws holding the plastic switch mount that holds all three switches. These screws use a "star" type screwdriver. Once the plastic mount is free, lift it up, right, and tip it slightly to find the lever that will release the black secondary door switch (the lowest switch)...release the broken switch, snap the new switch in its place. Replace the plastic mount by lifting and replacing back into position and replace the two "star" screws. Now, replace the wires onto the new switch, and test operation. Replace control panel, and top grill. It goes faster than it writes...getting the old switch out through that difficult to reach lever was the hardest part...still less than thirty minutes.
Parts Used:
-
Marla from Arlington, TX
-
Difficulty Level:A Bit Difficult
-
Total Repair Time:15 - 30 mins
-
Tools:Screw drivers
Was this instruction helpful to you?
Thank you for voting!
no hot
-
charlie from spring, TX
-
Difficulty Level:Difficult
-
Total Repair Time:30 - 60 mins
-
Tools:Pliers, Screw drivers
Was this instruction helpful to you?
Thank you for voting!
microwave just stopped working
First unplugged the microwave, took top grill off, took control panel off, took wires off and used color coded tape to make sure they went back in right places, took fuse out and replaced it and put every thing back and it all worked fine and to top it off my wife did it all. So it was pretty easy.
Parts Used:
-
James from Fall Branch, TN
-
Difficulty Level:Easy
-
Total Repair Time:30 - 60 mins
-
Tools:Pliers, Screw drivers
Was this instruction helpful to you?
Thank you for voting!
Motor and fan turned on when door was opened.
Loosen the two long anchor bolts that screw into the top of the microwave cabinet. These are usually in a shelf or cabinet directly above the microwave. Tilt the microwave forward enough to remove the 2 Phillips head screws from the top of the microwave cabinet. They are near the front. When these two screws are out, remove the fan vent. Once the fan vent is off, remove one screw that holds the control pad in place. Let it hang down. Just to the left of the control pad, you will see wires leading to three switches that close when the door is closed. Use a torx driver to remove the two screws that hold the switch bracket in place. With the bracket out, unplug the wire harnesses. On the opposite side of the wiring connected, a tab holds each switch in place. Lift the tab and slide the switches out. Usually, the bad switch will be identified by a loose or broken spring. Test them by pressing down on the switch. If you notice the bad switch spring, this is usually the bad one. When you have the new one, simply push it back into the appropriate slot and be sure that the holding tab snaps back in place. Plug the wires back in and re-attach the bracket. Put the control pad back on, then the fan vent. When down with those, push on the bottom of the microwave to lift it back into place and tighten the two anchor bolts in the top.
Parts Used:
-
Neal from White House, TN
-
Difficulty Level:Easy
-
Total Repair Time:15 - 30 mins
-
Tools:Screw drivers
Was this instruction helpful to you?
Thank you for voting!
Oven slow to heat up
Removed oven door. Removed 2 screws from heat sensor on rear upper wall of oven. Pulled unit out to access rear of unit. Removed six screws on shield on back of unit. Dis connected heat sensor wire and pulled old sensor through from inside of oven. Feed wire of new sensor through from inside and plug in. Everything in reverse. I also had the gas(propane) company come out and check the pressure coming out of the "low pres." regulator. It was low, they changed the regulator.
Parts Used:

-
Joe from Harkers Is., NC
-
Difficulty Level:Easy
-
Total Repair Time:15 - 30 mins
-
Tools:Nutdriver
Was this instruction helpful to you?
Thank you for voting!
broken switch
This was a wall mounted oven. Turned off breaker. Pulled panel off by removing 6 screws. Pulled connectors off old switch. Removed old switch. Just a friction fit. I used my jack knife to get it moving. Pushed in the new switch and connected wires. (just push on tabs) Put panel back together and turned on breaker. Done, easy.
Parts Used:
-
Bob from Marcy, NY
-
Difficulty Level:Easy
-
Total Repair Time:15 - 30 mins
-
Tools:Screw drivers
Was this instruction helpful to you?
Thank you for voting!
Broiler element burnt out
Unscrewed back plate, unplugged old unit, plugged in new unit and ready to go. Don't forget to turn off circuit breaker for oven before starting !
Parts Used:
-
Stephen from Katy, TX
-
Difficulty Level:Easy
-
Total Repair Time:15 - 30 mins
-
Tools:Nutdriver, Pliers
Was this instruction helpful to you?
Thank you for voting!
f-2 or f-3
remove two bolts in on sensor and slip thru back un plug and reverse to put in
Parts Used:
-
daniel from gap, PA
-
Difficulty Level:Easy
-
Total Repair Time:15 - 30 mins
-
Tools:Nutdriver, Screw drivers
Was this instruction helpful to you?
Thank you for voting!
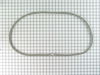
The Metal Fasterners Did Not Line Up With The Holes
What I had to do was skip holes,but the more holes I passed over, it did not end up smooth. The gasket is some what wrinkled. If all the holes had lined up it would have taken about 20 seconds. I took it off and on a lot trying to get it smooth. Finally I said well it's just going to be wrinkled.
Parts Used:
-
BARBARA from FRESNO, CA
-
Difficulty Level:A Bit Difficult
-
Total Repair Time:15 - 30 mins
Was this instruction helpful to you?
Thank you for voting!
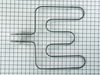
Replacement Lugs different from original
Cut off original termination lugs and re-crimp new lugs to match the replacement element.
Parts Used:
-
Albert from Tracy, CA
-
Difficulty Level:A Bit Difficult
-
Total Repair Time:30 - 60 mins
-
Tools:Nutdriver, Screw drivers
Was this instruction helpful to you?
Thank you for voting!
Microwave would not turn on
Microwave would not turn on. Lights and fan worked fine. Before the microwave stopped completely, it would turn the microware fan on even when door was open. I read the reviews and they were exactly the same issue that others were facing. Once I opened the front panel and got to the switches it was easy to figure out which switch was bad as it was the one that was soft (When clicking it). It was hard to take it out though (it seemed stuck). So, I used a plier to yank it out. I put in the new switch and everything worked just great! I would like to thank other comments that were left on the site to make my task much easier. Thank you (to the commenters on PartsSelect), you not only saved me money, but also ensured that I learn about the microwave more and give me the confidence that I could fix it.
Parts Used:
-
Prashant from Dardenne Prairie, MO
-
Difficulty Level:Really Easy
-
Total Repair Time:1- 2 hours
-
Tools:Pliers, Screw drivers, Socket set
Was this instruction helpful to you?
Thank you for voting!