




















9114698680 Kenmore Range - Instructions
Keep searches simple. Use keywords, e.g. "leaking", "pump", "broken" or "fit".
Element burned out
AMAZING SHIPPING.Ordered on Friday,received saturday WITHOUT NEXT DAY COST.Amazing,worked perfect.
Parts Used:
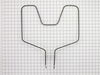
-
Bryan from Overland Park, KS
-
Difficulty Level:Really Easy
-
Total Repair Time:Less than 15 mins
-
Tools:Screw drivers
0 of 1 people
found this instruction helpful.
Was this instruction helpful to you?
Thank you for voting!
Oven wouldn't heat
Turned power off. Removed two screws holding the element. Pulled element out 3 inches, disconnected the two wires, pulled out old element, connected wires of new element, replaced screws. Turned power back on. Eureka!! the oven heats again. :-)
Parts Used:
-
Craig from Catasauqua, PA
-
Difficulty Level:Really Easy
-
Total Repair Time:Less than 15 mins
-
Tools:Nutdriver
0 of 1 people
found this instruction helpful.
Was this instruction helpful to you?
Thank you for voting!
the old oven element burned in two.
After removing the screws holding the element in I disconnected the wires and attached alligator clips to the wires to keep them from pulling back inside the holes. I would have had to pull the stove out and removed some covers if they disappeared through the holes. After getting the part number off of the old element, I ordered a new element from Partselect.com and received the new one in less the a week. Reinstalling the new element took about 5 minutes.
Parts Used:
-
Kenneth from Newport, OR
-
Difficulty Level:Really Easy
-
Total Repair Time:Less than 15 mins
-
Tools:Nutdriver
0 of 1 people
found this instruction helpful.
Was this instruction helpful to you?
Thank you for voting!
Bottom element cracked/split - open circuit
Removed oven shelves (30 seconds). Removed 2 screws holding broken element to oven (2 minutes). Pulled broken element assembly out & removed 2 wires attached to element (1 minute). Connected wires to new element (just push them into place) and mounted new element with the 2 screws (1 1/2 minutes). Turned on oven element to test & since I was so tired from all of this 5-minute activity, I rested.
Al S.
Al S.
Parts Used:
-
Al from Charlotte, NC
-
Difficulty Level:Really Easy
-
Total Repair Time:Less than 15 mins
-
Tools:Nutdriver
0 of 1 people
found this instruction helpful.
Was this instruction helpful to you?
Thank you for voting!
Element broke
First I switched the fuse to the oven had no power and then I removed the old element and wiped down the inside with a damp towel.
I then attached the new element and then used the screws to attach the element firmly into place.
I then restored power by switching the fuse back and then burned the element to remove and chemicals and then done
I then attached the new element and then used the screws to attach the element firmly into place.
I then restored power by switching the fuse back and then burned the element to remove and chemicals and then done
Parts Used:
-
Kim from Vancouver, WA
-
Difficulty Level:Really Easy
-
Total Repair Time:Less than 15 mins
-
Tools:Nutdriver, Pliers
0 of 1 people
found this instruction helpful.
Was this instruction helpful to you?
Thank you for voting!
Bake Element Defective
Cut power to oven from breaker box. Remove two retaining screws using a nutdriver at rear of oven. Slowly pull Bake Element from rear of range exposing connector clips. Disconnect at clips from oven wiring. Connect new Baking Element to wiring connectors. Push new baking element into rear of oven. Reconnect baking element using original screws with nutdriver at rear of oven. Turn on power to oven from breaker box. Job complete in 10-15 mins.
Parts Used:
-
Glenn from Newnan, GA
-
Difficulty Level:Really Easy
-
Total Repair Time:Less than 15 mins
-
Tools:Nutdriver
0 of 1 people
found this instruction helpful.
Was this instruction helpful to you?
Thank you for voting!
Baking element was broken.
I had grease on the baking element when I turned the oven on. I thought it would burn off, it caught fire and destroyed the baking element. I ordered a new element, it came within two days. I didn't wait for my husband to come home. I got a screw driver, took off the screw, used pliers to pull apart the old baking element from the wires. I did this carefully , our oven is old and the element was not pulling away easily. I inserted the new element, put the screws in and it worked perfectly! I was very proud of myself but the truth is that this is a simple job.
Parts Used:
-
Brenda from Orem, UT
-
Difficulty Level:Really Easy
-
Total Repair Time:Less than 15 mins
-
Tools:Screw drivers
0 of 1 people
found this instruction helpful.
Was this instruction helpful to you?
Thank you for voting!
botton bake element burned out
Removed to screws holding the bake element in place. pulled out element to get to the 2 electrical connectors. removed connectors from old unit. connected new unit and secured with the screwes. very simple.
Parts Used:
-
John from Plano, TX
-
Difficulty Level:Really Easy
-
Total Repair Time:Less than 15 mins
-
Tools:Nutdriver
0 of 1 people
found this instruction helpful.
Was this instruction helpful to you?
Thank you for voting!
For some time our oven had been working eratically, temperature spikes and drops during baking process. I thought the thermostat was the problem. The last time baking, element sparked and overheated in one spot so we removed the element. It was warped and cracked. We replaced it with the new ele
I removed the two screws with a nut driver, pulled the element out far enough to expose the connection point and disconnected the electrical clips. Upon receipt of the new element I did those things in reverse order and it worked great.
Parts Used:
-
Marshall from Prosser, WA
-
Difficulty Level:Really Easy
-
Total Repair Time:Less than 15 mins
-
Tools:Nutdriver
0 of 1 people
found this instruction helpful.
Was this instruction helpful to you?
Thank you for voting!
10-yr old Baking Element gave out
This repair was idiot-proof. Removed 2 screws, unplugged the old part, plugged in the new one, and replaced the 2 screws.
Literally a 2 minute repair!!
Literally a 2 minute repair!!
Parts Used:
-
Timothy from Boise, ID
-
Difficulty Level:Really Easy
-
Total Repair Time:Less than 15 mins
-
Tools:Nutdriver
0 of 1 people
found this instruction helpful.
Was this instruction helpful to you?
Thank you for voting!
Element no longer heated
Piece of cake. 2 screws and a flashlight. I needed needle nose pliers to insert the "plugs" into the "sockets."
Parts Used:
-
Karen from Gladstone, OR
-
Difficulty Level:Really Easy
-
Total Repair Time:Less than 15 mins
-
Tools:Pliers, Socket set
0 of 1 people
found this instruction helpful.
Was this instruction helpful to you?
Thank you for voting!
Oven would not heat up
Took out the hexagon screws, used pliers to pull the connecting ends apart, slid in the new element in to the connecting slots, reattached to screws, turned on the oven to see if it would heat up and it did. It was really easy. I had waited for a week to get the part from my local Sears parts house. You sent it out and I had it in 3 days. They still don't have the part. Thanks so much.
Parts Used:
-
John from Wetumpka, AL
-
Difficulty Level:Really Easy
-
Total Repair Time:Less than 15 mins
-
Tools:Pliers, Socket set
0 of 1 people
found this instruction helpful.
Was this instruction helpful to you?
Thank you for voting!
wasn't heating anymore
orderd a replacement part. recieved it two days later then that evening installed it. there was a video online to show how to replace it. very useful if your not a do it yourselfer.
Parts Used:
-
nelson from milan, IN
-
Difficulty Level:Really Easy
-
Total Repair Time:Less than 15 mins
-
Tools:Nutdriver
0 of 1 people
found this instruction helpful.
Was this instruction helpful to you?
Thank you for voting!
bake element in oven burned out
Using a wrench, removed old element and simply installed new one - took less than 10 minutes and the oven was working again! Best part was how quickly the item reached us - ordered it on a Wednesday afternoon and had it by Friday afternoon, with no expedited shipping - Great Service!
Parts Used:
-
Amy from Etna, CA
-
Difficulty Level:Easy
-
Total Repair Time:Less than 15 mins
-
Tools:Wrench set
0 of 1 people
found this instruction helpful.
Was this instruction helpful to you?
Thank you for voting!
Bake element burns out heating up easter dinner
Uplugged the oven and undid the back contact cover, removed the nuts inside the oven and slid out the element. Pushed the new element into place and secured it. Attached the contacts and replaced the cover. Plugged it in and got cookin'.
Parts Used:
-
joseph from mastic, NY
-
Difficulty Level:Really Easy
-
Total Repair Time:Less than 15 mins
0 of 1 people
found this instruction helpful.
Was this instruction helpful to you?
Thank you for voting!