




















90138 Litton Range - Instructions
Keep searches simple. Use keywords, e.g. "leaking", "pump", "broken" or "fit".
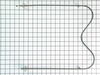
Heating element for baking not warming up
In removing the old element I discovered that one wire had completely separated from the connection to the element. I fished out the wire, clipped off the old, burnt out connector, crimped and reattached a new connector and connected to the new element. This was a very easy job. The hardest part was determining which switch at the electrical panel corresponded to the oven.
Parts Used:
-
Robert from Norristown, PA
-
Difficulty Level:Really Easy
-
Total Repair Time:15 - 30 mins
-
Tools:Screw drivers
Was this instruction helpful to you?
Thank you for voting!
Oven wouldn't heat
-
Mary J from Lapeer, MI
-
Difficulty Level:Really Easy
-
Total Repair Time:15 - 30 mins
Was this instruction helpful to you?
Thank you for voting!
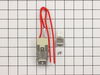
Not heating
Was easy cut the wires of as told to do wire nut the ends together and put back together and tested and worked great. Done
Parts Used:
-
Darwin from wisconsin rapids, WI
-
Difficulty Level:Really Easy
-
Total Repair Time:15 - 30 mins
-
Tools:Pliers, Screw drivers
Was this instruction helpful to you?
Thank you for voting!
I had a power serge and it burned the Plug at the termial block and melted a few wire.
After we got the part in the mail my husband put it on and shortened the wires and put new plugs on the ends of the wires and we had to get a new plug put it on and it was fixed.
Parts Used:

-
Robin from Vanderbilt, PA
-
Difficulty Level:Really Easy
-
Total Repair Time:15 - 30 mins
-
Tools:Socket set
Was this instruction helpful to you?
Thank you for voting!
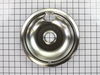
Drip bowls tarnished.
Remove heating element coils. & old drip pans. Install the new drip pans and reinsert the heating elements and insure all elements were level. For aesthetic reasons I replaced all the drip pans - 2 x 8" & 2 x 6".
Parts Used:
-
Jennifer from Albion, NE
-
Difficulty Level:Really Easy
-
Total Repair Time:15 - 30 mins
Was this instruction helpful to you?
Thank you for voting!
burners would not come on without moving them around
took old screw out of stove top that held them in and cut the two wires off close to the burner stripped the wires and used the screw caps to put each line together it doesn't matter which line goes where and screwed it back on with the old screw and tried the two burners and they both worked job done ps it took longer for me to type this but i am slow at typing
Parts Used:
-
Ronald E. from Marissa, IL
-
Difficulty Level:Really Easy
-
Total Repair Time:15 - 30 mins
-
Tools:Screw drivers
Was this instruction helpful to you?
Thank you for voting!
Leveling legs were broken during the summer
The range in my classroom had the leveling legs broke off by the summer staff. I ordered two new leveling legs and the night custodian replaced them in about 45 minutes and them leveled the stove. Parts were just as stated and easy to order.
Parts Used:

-
Jayne from Willimantic, CT
-
Difficulty Level:A Bit Difficult
-
Total Repair Time:30 - 60 mins
-
Tools:Pliers, Screw drivers, Wrench set
Was this instruction helpful to you?
Thank you for voting!
Electric surface burner would only turn very hot
Well, I had to search a bit deeper in the internet to find out that the problem was not with the surface burner (which did look a bit burned out anyway) but rather with the surface burner switch (Part Number: PS336885) which must have ben damaged by the heat of the closest burner. If this problem would have been better documented (or if I would have searched more carefully) I would have saved over $40 with parts (Surface Burner Receptacle Kit) that I didn't quite need. Repairing the switch was very easy, thanks also to the available video , even though the stove used on this video (front panel) didn't quite match mine (top-back panel).
Parts Used:
-
Vittorio from Wakefield, MA
-
Difficulty Level:Easy
-
Total Repair Time:15 - 30 mins
-
Tools:Screw drivers
Was this instruction helpful to you?
Thank you for voting!
burner not operating or intermittently
Shut off power at breaker box. Removed top burner unit. Removed old receptacle (Mounting screw was rusty so I drilld out the old one.) Cut wires from old unit. Stripped wires back on old unit. Attached old and new wire with ceramic wire nut. Attached new unit. Reinserted top unit. Reconnected power and "voila". Wife was smiling again.
Parts Used:
-
Elroy from Atwater, MN
-
Difficulty Level:Easy
-
Total Repair Time:15 - 30 mins
-
Tools:Nutdriver
Was this instruction helpful to you?
Thank you for voting!