




















804655850A Frigidaire Dishwasher - Instructions
Keep searches simple. Use keywords, e.g. "leaking", "pump", "broken" or "fit".
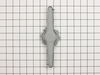
Top spray arm was broken
I unscrewed the housing for the spray arm and screwed in the new housing and spray are part. It took less than a minute and works perfectly.
Parts Used:
-
Guy from Louisville, CO
-
Difficulty Level:Really Easy
-
Total Repair Time:Less than 15 mins
2 of 2 people
found this instruction helpful.
Was this instruction helpful to you?
Thank you for voting!
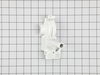
Broken part that holds bottom spray arm on.
This was great! Removed 3 screws, took out old broken part, set in new part and screwed tight! 1 2 3 and done. Very Fast shipping less than 24 hrs.. WIFE IS HAPPY. Ted W.
Parts Used:
-
Theo. J. from Green Bay, WI
-
Difficulty Level:Really Easy
-
Total Repair Time:Less than 15 mins
-
Tools:Screw drivers
2 of 2 people
found this instruction helpful.
Was this instruction helpful to you?
Thank you for voting!
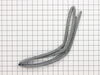
Gasket leak
First I pulled out the old gasket and replaced with the new one. The new one is too long on purpose but only had to be trimmed a little for a perfect fit. Very easy and now no leaks.
Parts Used:
-
William from Sacramento, CA
-
Difficulty Level:Really Easy
-
Total Repair Time:Less than 15 mins
3 of 5 people
found this instruction helpful.
Was this instruction helpful to you?
Thank you for voting!
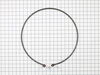
Heating Element was corroded.
It took me about 30 minutes to do the repair - took my time and could’ve done it much faster.
Parts Used:
-
Christopher from EVERETT, WA
-
Difficulty Level:Really Easy
-
Total Repair Time:30 - 60 mins
-
Tools:Nutdriver, Screw drivers, Wrench (Adjustable)
2 of 2 people
found this instruction helpful.
Was this instruction helpful to you?
Thank you for voting!
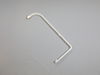
Leaking
Had to shut electricity off and turn water off and disconnect them both. Take the screws out from underneath the counter. Slide out the unit disconnect the filler tube in the back disconnect the hose and replace and repeat the process to put it back together.
Parts Used:
-
Thomas from W HEMPSTEAD, NY
-
Difficulty Level:Really Easy
-
Total Repair Time:30 - 60 mins
-
Tools:Screw drivers, Wrench (Adjustable)
2 of 2 people
found this instruction helpful.
Was this instruction helpful to you?
Thank you for voting!
Dishwasher leaking water on my hardwood floor
I recently bought a vacation home in New Hampshire, and had a very detailed home inspection performed. The dishwasher unit was checked out to be in fine shape. Before moving in, I had all the hardwood floors refinished, including the kitchen, and everything looked great. After moving in and using the dishwasher twice, it developed a major leak coming from the bottom of the unit. "Here goes more money that I don't have, to hire an appliance repairman to fix this leak!" I decided to take the bottom kick panel off the dishwasher to see where the leak was coming from. It was coming from the the connection of the heater element at the bottom of the dishwasher. I found a brass nut had been cracked and wouldn't stay tight any more. I ordered the replacement nut from Partselect, RECEIVED IT THE NEXT DAY!!!!! using regular ground shipping, and installed the new nut using a socket set, and tested the unit. No more leaks!! Partselect saved me at least $150.00 on a service call for a $3.50 part. I'm not the handiest guy around, but even this was easy!
I also scored big points with the wife on my handyman repair! Thanks Partselect!
Greg
I also scored big points with the wife on my handyman repair! Thanks Partselect!
Greg
Parts Used:

-
Gregory from Attleboro, MA
-
Difficulty Level:Really Easy
-
Total Repair Time:15 - 30 mins
-
Tools:Socket set
2 of 2 people
found this instruction helpful.
Was this instruction helpful to you?
Thank you for voting!
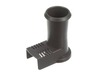
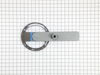
PARTS ORDER TOOK TOO LONG TO ARRIVE
The repair was not the problem. The problem was getting the parts I ordered. When the parts finally shipped I had to wait for them because they just sat in a FedEx shipping warehouse for about a week delaying the repair.
Parts Used:
-
LUKE from MARIETTA, GA
-
Difficulty Level:A Bit Difficult
-
Total Repair Time:30 - 60 mins
-
Tools:Screw drivers
3 of 5 people
found this instruction helpful.
Was this instruction helpful to you?
Thank you for voting!
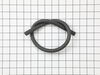
Dishwasher hose had hole in it. It was 23 years old.
After getting a totally incorrect length of hose from partselect.com . Went to local hardware store and bought hose for $3.00 vs $20.99 + $10 shipping!
Partselect sent replacement hose of 24 1/4” vs the original hose of 27”. Good luck getting any response from them once they have your money!
Partselect sent replacement hose of 24 1/4” vs the original hose of 27”. Good luck getting any response from them once they have your money!
Parts Used:
-
Shelley from LACONA, NY
-
Difficulty Level:Very Difficult
-
Total Repair Time:More than 2 hours
2 of 2 people
found this instruction helpful.
Was this instruction helpful to you?
Thank you for voting!
Wouldn't fix it
The part wasn't correct and I have to pay postage back which is nearly as much as the part so it's stupid for me to spend more money on a part that want work I want order from your store again.
Parts Used:
-
Carolyn from STILWELL, OK
-
Difficulty Level:Very Difficult
-
Total Repair Time:More than 2 hours
2 of 2 people
found this instruction helpful.
Was this instruction helpful to you?
Thank you for voting!
Plastic had melted on the screw
Eventually broke off old heating element to get it out
Parts Used:
-
Eugene from DE KALB JCT, NY
-
Difficulty Level:Difficult
-
Total Repair Time:1- 2 hours
-
Tools:Socket set, Wrench (Adjustable)
2 of 2 people
found this instruction helpful.
Was this instruction helpful to you?
Thank you for voting!
original part was damaged and dishes weren't clean
Removed 3 screws, swapped parts - done. Wonderful feeling and saved a service call. Works great.
Parts Used:
-
ELIZABETH from ROANOKE, VA
-
Difficulty Level:Really Easy
-
Total Repair Time:Less than 15 mins
-
Tools:Screw drivers
2 of 3 people
found this instruction helpful.
Was this instruction helpful to you?
Thank you for voting!
Bottom Spray Arm Did not Turn
The bottom spray arm would not turn or fall off the stem assembly, so the dishes would not come clean like usual. The spray arm connects to the stem assembly via two plastic prongs that secure the spray arm. I removed the spray arm from the socket (no tool required) and observed the prongs had worn completely away. I grabbed the power screw driver and removed the assembly (3 screws). I placed the new assembly in place, secured the screws, and attached the spray arm. Finished.
Parts Used:
-
david from hull, MA
-
Difficulty Level:Really Easy
-
Total Repair Time:Less than 15 mins
-
Tools:Screw drivers
2 of 3 people
found this instruction helpful.
Was this instruction helpful to you?
Thank you for voting!
needed wheels for the roller part of dishwasher
Just snapped the wheels on and attached the bracket to the existing part.
Parts Used:

-
Jeanette from Fort Lauderdale, FL
-
Difficulty Level:Really Easy
-
Total Repair Time:Less than 15 mins
2 of 3 people
found this instruction helpful.
Was this instruction helpful to you?
Thank you for voting!
Water leak

-
MICHAEL from FT LAUDERDALE, FL
-
Difficulty Level:Very Easy
-
Total Repair Time:Less than 15 mins
-
Tools:Screw drivers
2 of 3 people
found this instruction helpful.
Was this instruction helpful to you?
Thank you for voting!
A piece of the upper rack began to rust out
Used the screwdriver to pry the upper rack left side tine up and out. Slipped the new one into place and pressed hard to seat the tine. this process took all of about 20 seconds to do.
Parts Used:

-
Carl from EAST ISLIP, NY
-
Difficulty Level:Very Easy
-
Total Repair Time:Less than 15 mins
-
Tools:Screw drivers
2 of 3 people
found this instruction helpful.
Was this instruction helpful to you?
Thank you for voting!