




















7WRS22FEBF00 Whirlpool Refrigerator - Instructions
Keep searches simple. Use keywords, e.g. "leaking", "pump", "broken" or "fit".
Old one leaks on one side
Simply cut the water tube on both sides of connector and push in the new one.
Parts Used:

-
Orlando from Bayonne, NJ
-
Difficulty Level:Very Easy
-
Total Repair Time:Less than 15 mins
4 of 5 people
found this instruction helpful.
Was this instruction helpful to you?
Thank you for voting!
LED Light was out in freezer
Unplugged the old one and put in new one. So simple I didn’t need my husband’s help
Parts Used:
-
Victoria from SCARBOROUGH, ME
-
Difficulty Level:Very Easy
-
Total Repair Time:Less than 15 mins
5 of 8 people
found this instruction helpful.
Was this instruction helpful to you?
Thank you for voting!
old filter was overdue for replacement
ordered new filter, removed old filter from fridge, and installed new one
Parts Used:
-
gene from COTTONDALE, FL
-
Difficulty Level:Very Easy
-
Total Repair Time:Less than 15 mins
4 of 5 people
found this instruction helpful.
Was this instruction helpful to you?
Thank you for voting!
needed another shelf
-
Carol from JUPITER, FL
-
Difficulty Level:Very Easy
-
Total Repair Time:Less than 15 mins
4 of 5 people
found this instruction helpful.
Was this instruction helpful to you?
Thank you for voting!
Lights not working some times
-
Harry from COLUMBIA STA, OH
-
Difficulty Level:A Bit Difficult
-
Total Repair Time:30 - 60 mins
-
Tools:Nutdriver, Screw drivers
4 of 5 people
found this instruction helpful.
Was this instruction helpful to you?
Thank you for voting!
Top half of freezer & fridge were not cooling. Freezer fan had been making unusually loud noises.
Piece of cake. It took me longer to remove the food from the freezer, remove shelves and back panel than to do the repair. I heard the fan making some noises so I replaced both the fan and defrost thermostat. I used the instructions submitted by a another customer. My 20+ year old fridge is like new now.
Parts Used:

-
rich from PEMBROKE PNES, FL
-
Difficulty Level:Really Easy
-
Total Repair Time:30 - 60 mins
-
Tools:Nutdriver
3 of 3 people
found this instruction helpful.
Was this instruction helpful to you?
Thank you for voting!
Ice maker leaking
Unplugged freezer turned off water removed 3 nut screws Unplugged old ice maker installed new ice maker
Parts Used:

-
Clifford from WASHINGTON, DC
-
Difficulty Level:Really Easy
-
Total Repair Time:30 - 60 mins
-
Tools:Nutdriver
3 of 3 people
found this instruction helpful.
Was this instruction helpful to you?
Thank you for voting!
Freezer work perfectly, Refrigerator Stopped getting cold, water line froze, there was ice Forming around the condenser in the bottom of the refrigerator behind the drawers
Freezer worked great, refrigerator stopped getting cold and lots of ice formed around the condenser on the bottom of the refrigerator.
First I had a serious ice issue, ice build up around the bottom of the refrigerator and all through the cold air vents, condenser and cooling fan. I unplugged of the fridg and let defrost over night. I also took all the cold air vents out and cleaned them.
Then I followed the switch install video very simple switch install. Now the Refrigerator works Great nice and cold.
First I had a serious ice issue, ice build up around the bottom of the refrigerator and all through the cold air vents, condenser and cooling fan. I unplugged of the fridg and let defrost over night. I also took all the cold air vents out and cleaned them.
Then I followed the switch install video very simple switch install. Now the Refrigerator works Great nice and cold.
Parts Used:
-
Richard from STATEN ISLAND, NY
-
Difficulty Level:Easy
-
Total Repair Time:1- 2 hours
-
Tools:Nutdriver, Screw drivers
3 of 3 people
found this instruction helpful.
Was this instruction helpful to you?
Thank you for voting!
Freezer was icing up and leaking. Refrigerator side would not keep cold.
We emptied out both sides, refrigerator and freezer, and followed the instructions in your video. We turned it off and disconnected the power. We took off the freezer door first. It made it much easier to get the shelves out and reach way back into the freezer. We removed the light and cover, then the ice auger motor. The back panel was easy to lift and remove. The wire assembly was a little hard to understand at first, but when we figured it out it was easy to remove and replace the bimetal defrost thermostat. We did check the video when we had the wire harness out, to make sure we got it right. We reassembled the freezer's inside parts and reattached the door. Before we turned the power back on, we scrubbed down the entire refrigerator. When we turned the power back on, the refrigerator and freezer were operating quietly - no sparks or explosions or shorting out - hooray! And the problems were solved.
The most important resource is your video. It looked like something we could do, and then ordered the parts. Our repair took a long time because we checked the video so many times. Thank you so much for the great information and the excellent parts. We could not have done it without you.
The most important resource is your video. It looked like something we could do, and then ordered the parts. Our repair took a long time because we checked the video so many times. Thank you so much for the great information and the excellent parts. We could not have done it without you.
Parts Used:
-
Camille from Glen Ellyn, IL
-
Difficulty Level:Easy
-
Total Repair Time:More than 2 hours
-
Tools:Nutdriver, Pliers, Screw drivers
3 of 3 people
found this instruction helpful.
Was this instruction helpful to you?
Thank you for voting!
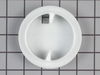
Auger would not turn properly
I took out the ice bin and in the back where the auger meets the ice bin I had to replace the small plastic piece to hold the auger in place when using the automatic ice maker. It was an easy fix.
Parts Used:
-
Tanya from Lakebay, WA
-
Difficulty Level:Easy
-
Total Repair Time:Less than 15 mins
6 of 12 people
found this instruction helpful.
Was this instruction helpful to you?
Thank you for voting!
Replaced cracked slide out glass shelf with new one
Simply slid out damaged shelf and slid in new one
Parts Used:
-
Michael from ROYSE CITY, TX
-
Difficulty Level:Very Easy
-
Total Repair Time:Less than 15 mins
3 of 3 people
found this instruction helpful.
Was this instruction helpful to you?
Thank you for voting!
ice container bin cracked and had a hole in it.
Took it out of the box. Emptied the ice out of the broken bin. Slid the new one in and all done.
Parts Used:
-
Joseph from MESQUITE, NV
-
Difficulty Level:Very Easy
-
Total Repair Time:Less than 15 mins
5 of 9 people
found this instruction helpful.
Was this instruction helpful to you?
Thank you for voting!
Bin right mounting rail worn, requiring a new bin.
From the Expanded view on the website, I chose the bin -I thought. The expanded view picture is too small and I got the shelf instead. -But a phone call got everything back on track.
Repair involved a knife to open the box!
Repair involved a knife to open the box!
Parts Used:
-
Roy from BEAUMONT, TX
-
Difficulty Level:Really Easy
-
Total Repair Time:Less than 15 mins
3 of 3 people
found this instruction helpful.
Was this instruction helpful to you?
Thank you for voting!
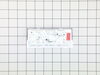
Used a flat head screwdriver to pop the old light out.
Plugged the new one in and snapped it into place. Only other need is a lantern or someone to shine a flashlight over your shoulder since the old light is, presumably, out.
Parts Used:
-
Linda from MURFREESBORO, TN
-
Difficulty Level:Really Easy
-
Total Repair Time:Less than 15 mins
-
Tools:Screw drivers
4 of 6 people
found this instruction helpful.
Was this instruction helpful to you?
Thank you for voting!
Drum broken; ice wouldn't dispense
1. Pull out drawer. 2. Remove screws to release the auger. 3. Unscrew the end of the auger. 4. Pull parts off. 5. Replace drum. 6. Replace parts in the correct order. 7. Twist end of auger back on. 8. Replace unit onto drawer and install mounting screws. 9. Place drawer in freezer. 10. Test ice dispenser. 11. Watch kitten run to refrigerator and beg for ice cube. 12. See smiles on family members faces.
Parts Used:

-
Brenda from Downs, IL
-
Difficulty Level:Really Easy
-
Total Repair Time:Less than 15 mins
-
Tools:Nutdriver
3 of 3 people
found this instruction helpful.
Was this instruction helpful to you?
Thank you for voting!