




















7WRS22FDBF00 Whirlpool Refrigerator - Instructions
Keep searches simple. Use keywords, e.g. "leaking", "pump", "broken" or "fit".
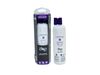
Filter indicator light red
Found the filter door in toe kick under freezer door. Opening the door ejected the old filter. Direction indicator arrows were found on inside of filter door, rotation of filter to match arrows important. Pushed new filter in to stop, closing door completed insertion of new filter.
Parts Used:
-
Scott from ONEIDA, NY
-
Difficulty Level:Easy
-
Total Repair Time:Less than 15 mins
6 of 9 people
found this instruction helpful.
Was this instruction helpful to you?
Thank you for voting!
the floating baffle broke
took the auger off and baffle replaced the baffle put every thing back together installed back to the freezer tried it out it dont work have to tear into the the motor which works the auger to see if anything else is broke.
Parts Used:

-
Darlene from Glasgow, KY
-
Difficulty Level:A Bit Difficult
-
Total Repair Time:1- 2 hours
-
Tools:Screw drivers
8 of 15 people
found this instruction helpful.
Was this instruction helpful to you?
Thank you for voting!
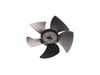
Wife used vacuum cleaner and busted blade off fan
Instructions were great five minutes to remove and replace fan....Thank You............ saved big money
Parts Used:
-
Robert from GOSHEN, IN
-
Difficulty Level:Really Easy
-
Total Repair Time:Less than 15 mins
-
Tools:Screw drivers
4 of 4 people
found this instruction helpful.
Was this instruction helpful to you?
Thank you for voting!
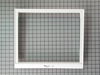
broker cover to crisper
the piece fit perfectly and delivery was within a couple days. very satisfied.
Parts Used:
-
dean from los angeles, CA
-
Difficulty Level:Really Easy
-
Total Repair Time:Less than 15 mins
5 of 7 people
found this instruction helpful.
Was this instruction helpful to you?
Thank you for voting!
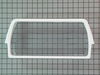
Replaced cracked door bin
Easy, peasey. I popped the old one out and put the new one in. Less than 30 seconds.
Parts Used:
-
Gabriele from HERNDON, VA
-
Difficulty Level:Very Easy
-
Total Repair Time:Less than 15 mins
5 of 7 people
found this instruction helpful.
Was this instruction helpful to you?
Thank you for voting!
Ice would not dispense from the door
Removed ice bucket and discovered the auger drum was broken.
After I received the new part, I removed the front screws of the ice bucket, removed the clip that held the auger and other parts together, and then slide each part off the auger until I got to the broken drum.
Assembly was in reverse except you must pay attention where all the spacers and ice crusher bars go back into the original position. This was the most difficult step.
Works great now, crushed and cubed ice dispenses thru the door like new.
After I received the new part, I removed the front screws of the ice bucket, removed the clip that held the auger and other parts together, and then slide each part off the auger until I got to the broken drum.
Assembly was in reverse except you must pay attention where all the spacers and ice crusher bars go back into the original position. This was the most difficult step.
Works great now, crushed and cubed ice dispenses thru the door like new.
Parts Used:

-
Jeffrey from Jacksonville, FL
-
Difficulty Level:A Bit Difficult
-
Total Repair Time:30 - 60 mins
-
Tools:Pliers, Screw drivers
4 of 4 people
found this instruction helpful.
Was this instruction helpful to you?
Thank you for voting!
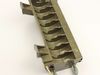
Ice maker not making ice.
Removed old ice maker by removing 3 screws, unplugged wiring harness. Replaced with new ice maker, placed three screws back to secure the ice maker, plugged wire harness back, and product is working well at this time.
Parts Used:
-
Sonny from WHITESTOWN, IN
-
Difficulty Level:Really Easy
-
Total Repair Time:Less than 15 mins
-
Tools:Screw drivers, Socket set
4 of 4 people
found this instruction helpful.
Was this instruction helpful to you?
Thank you for voting!
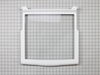
broken shelf
easy -- removed broken shelves and replaced with new ones
Parts Used:
-
Allan from LAVONIA, GA
-
Difficulty Level:Really Easy
-
Total Repair Time:15 - 30 mins
4 of 4 people
found this instruction helpful.
Was this instruction helpful to you?
Thank you for voting!
Refrigerator door not self closing
Emptied door of food jars etc. Used socked on top plate. Removed door and placed on a flat surface. Used socket to take out cam on the bottom of the door. Replaced worn cam. Replaced nylon sleeve on the top of the refrigerator door with needle nose pliers. Placed door in the bootom slot with the new cam in place. Placed top plate in the new nylon sleeve on the door. Replaced screws with socket wrench.
Parts Used:


-
Ron from ALEXANDRIA, VA
-
Difficulty Level:Really Easy
-
Total Repair Time:15 - 30 mins
-
Tools:Pliers, Socket set
4 of 4 people
found this instruction helpful.
Was this instruction helpful to you?
Thank you for voting!
fridge stopped cooling then the freezer
Searched my issue on the internet then chose part select to see if bi-metal thermostat was available and it was so I ordered part which was under $30.00 incl. shipping. I then went to You Tube to watch how to replace the part but most importantly to find out where it was located and degree of difficulty. Replacement was rather simple and it fixed our 22 year old fridge. I must add that when I looked up the part it also told you what percent of the time that particular item actually fixed the problem based on others experience. I thought that was neat info. as I felt better about ordering something that may or may not fix my problem. Thank you,
Parts Used:

-
Joseph from DELTONA, FL
-
Difficulty Level:Really Easy
-
Total Repair Time:30 - 60 mins
-
Tools:Nutdriver, Screw drivers
4 of 4 people
found this instruction helpful.
Was this instruction helpful to you?
Thank you for voting!
LED Light was out in freezer
Unplugged the old one and put in new one. So simple I didn’t need my husband’s help
Parts Used:
-
Victoria from SCARBOROUGH, ME
-
Difficulty Level:Very Easy
-
Total Repair Time:Less than 15 mins
5 of 8 people
found this instruction helpful.
Was this instruction helpful to you?
Thank you for voting!
Lights not working some times
-
Harry from COLUMBIA STA, OH
-
Difficulty Level:A Bit Difficult
-
Total Repair Time:30 - 60 mins
-
Tools:Nutdriver, Screw drivers
4 of 5 people
found this instruction helpful.
Was this instruction helpful to you?
Thank you for voting!
Ice would not come out of the despensor
Pulled out the ice bin and dumpted ice in the sink. Use 1/4 inch nut driver to take out all 1/2 inch screws. Be careful to watch how door spring and holder goes. Pull assembly apart and remove alger. Plastic nut on end of alger has reverse threads, remove it and then remove broken alger drum. Replace with new drum and reassemble in reverse order.
Parts Used:
-
Ken from Cedar CVity, UT
-
Difficulty Level:Really Easy
-
Total Repair Time:15 - 30 mins
-
Tools:Nutdriver, Pliers
4 of 5 people
found this instruction helpful.
Was this instruction helpful to you?
Thank you for voting!
Old one leaks on one side
Simply cut the water tube on both sides of connector and push in the new one.
Parts Used:

-
Orlando from Bayonne, NJ
-
Difficulty Level:Very Easy
-
Total Repair Time:Less than 15 mins
4 of 5 people
found this instruction helpful.
Was this instruction helpful to you?
Thank you for voting!
needed another shelf
-
Carol from JUPITER, FL
-
Difficulty Level:Very Easy
-
Total Repair Time:Less than 15 mins
4 of 5 people
found this instruction helpful.
Was this instruction helpful to you?
Thank you for voting!