




















79094001400 Kenmore Range - Instructions
Keep searches simple. Use keywords, e.g. "leaking", "pump", "broken" or "fit".
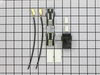
Original terminal degraded and faulty
Turn off power, remove heat coil assembly and drip pan. Unscrew the terminal assembly from the range top. Cut back 3 inches on each terminal wire and strip insulation 3/8 inch. Terminal assembly should be with the short side of the black block (from the side securement hubs) facing toward the coil stems. Slide the shrink wrap onto each wire and Twist each old with each new wire using the wire nuts and slide the shrink wrap Over each. Using a hair dryer, heat gun, or open flame carefully shrink the wrap. Secure the terminal back in place on the range.
Parts Used:
-
Robert from PRAIRIEVILLE, LA
-
Difficulty Level:Easy
-
Total Repair Time:15 - 30 mins
-
Tools:Screw drivers
2 of 2 people
found this instruction helpful.
Was this instruction helpful to you?
Thank you for voting!
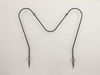
bake element burned out
Unscrewed screws in back of oven holding element. Slipped old element off of wire. No need to cut wires has the kind of ends (spade ends I think they are called) that just is pushed on to element. Attached new element. slid wires back into wall of wire rescrewed to oven wall. Very easy just be sure wires don't get pulled back into back wall of oven. Don't know what you would do then.
Parts Used:
-
Kenneth from Wantage, NJ
-
Difficulty Level:Really Easy
-
Total Repair Time:15 - 30 mins
-
Tools:Screw drivers
2 of 2 people
found this instruction helpful.
Was this instruction helpful to you?
Thank you for voting!
bake element burnt out.
removed screws,unplugged terminal leads,installed new one,back in business.
Parts Used:
-
james from WOOTON, KY
-
Difficulty Level:Really Easy
-
Total Repair Time:15 - 30 mins
-
Tools:Screw drivers
2 of 2 people
found this instruction helpful.
Was this instruction helpful to you?
Thank you for voting!
Bottom oven element non-functional
Shut off power - throw breaker. Oven access easier with door removed - requires removal of two Phillips head screws. Remove two screws holding element in place using 1/4" socket. Pull element & wires out and pull slide in connectors out (had to hold the wire end with needle nose pliers}. Installed element by reversing the removal procedures. Also good time to clean oven.
Parts Used:
-
Louis from GAINESVILLE, FL
-
Difficulty Level:Really Easy
-
Total Repair Time:15 - 30 mins
-
Tools:Nutdriver, Screw drivers
2 of 2 people
found this instruction helpful.
Was this instruction helpful to you?
Thank you for voting!
the burner stop working
-
Anthony J from HAMMONTON, NJ
-
Difficulty Level:Really Easy
-
Total Repair Time:15 - 30 mins
-
Tools:Screw drivers
2 of 2 people
found this instruction helpful.
Was this instruction helpful to you?
Thank you for voting!
Stove was dropped and had broken, bent frame and adjuster feet
New ones fit perfectly. Take a minute to bend the frame straight. Then and I used oversize screws on the replacement parts as the drop had stripped out the screw holes of the frame.
Parts Used:

-
Paul from PORT ORANGE, FL
-
Difficulty Level:Really Easy
-
Total Repair Time:15 - 30 mins
-
Tools:Screw drivers
2 of 2 people
found this instruction helpful.
Was this instruction helpful to you?
Thank you for voting!
Burner rings did not fit.
The replacement rings were so easy to install, and the little clip to hold them in place is really smart. Made my old range look really nice again. I thought the cost for the four rings was a bit high but they were well worth it. Thank You
Parts Used:


-
JOANNE from IMPERIAL, PA
-
Difficulty Level:Very Easy
-
Total Repair Time:Less than 15 mins
2 of 2 people
found this instruction helpful.
Was this instruction helpful to you?
Thank you for voting!
Burner not controlable
Removed rear panal, removed screws from of switch. Unplued wires and installed new switch and put back together. Very easy.
Parts Used:

-
Royce from KEENE, TX
-
Difficulty Level:Very Easy
-
Total Repair Time:Less than 15 mins
-
Tools:Screw drivers
2 of 2 people
found this instruction helpful.
Was this instruction helpful to you?
Thank you for voting!
Heating element went out
Simply...2 hex head screws removed. Unplug old element...plug in new element...place 2 screws back into place...test
Parts Used:
-
ROBERT from MAINEVILLE, OH
-
Difficulty Level:Very Easy
-
Total Repair Time:Less than 15 mins
-
Tools:Nutdriver
3 of 5 people
found this instruction helpful.
Was this instruction helpful to you?
Thank you for voting!
Oven element burnt out.
Remove 2 screws. Pull element out. Slide 2 wires off. Just do in reverse it's done.
Parts Used:
-
Dave from LOUDONVILLE, OH
-
Difficulty Level:Very Easy
-
Total Repair Time:Less than 15 mins
-
Tools:Nutdriver
3 of 5 people
found this instruction helpful.
Was this instruction helpful to you?
Thank you for voting!
Bake element burned out
This is an easy repair, as described in several other replies. One important addition to what has already been described. Very important to turn off the breaker or unplug the range. One terminal of the range is connected to a hot wire and the range housing is grounded. You may not manage to electrocute yourself, but you could cause and arc that damages the housing or connector. Turn off the power. Beyond that, simple. Unscrew two 1/4" screws with a nut driver, slide the element out and disconnect the wire connectors. Reverse procedure to install the new element and turn the power back on. Preheat briefly to burn off any odor. Very easy repair.
Parts Used:
-
Mark from LAUREL, MD
-
Difficulty Level:Very Easy
-
Total Repair Time:Less than 15 mins
-
Tools:Nutdriver
2 of 2 people
found this instruction helpful.
Was this instruction helpful to you?
Thank you for voting!
broke
-
Richard from COFFEYVILLE, KS
-
Difficulty Level:Very Easy
-
Total Repair Time:Less than 15 mins
-
Tools:Socket set
2 of 2 people
found this instruction helpful.
Was this instruction helpful to you?
Thank you for voting!
Bad element
-
david from PERRY, ME
-
Difficulty Level:Very Easy
-
Total Repair Time:Less than 15 mins
-
Tools:Screw drivers
2 of 2 people
found this instruction helpful.
Was this instruction helpful to you?
Thank you for voting!
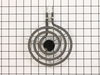
Heating element for a frigidaire stove top broke
Got the shipment. Took it out of the package. Set it into the stove top. Tested to see if it worked, It did. Turned it off and took my dog for a walk.
Great company. Makes it easy for me order.
Great company. Makes it easy for me order.
Parts Used:
-
Rebecca from ASHEVILLE, NC
-
Difficulty Level:Very Easy
-
Total Repair Time:Less than 15 mins
2 of 2 people
found this instruction helpful.
Was this instruction helpful to you?
Thank you for voting!
Bake element (bottom of oven) burnt through and snapped in two
Unplug the oven, remove oven racks, unscrew 2 screws at the base of oven bake element, pull the terminals off the wire bases, plug terminals back in, put screws back in place, plug in oven and test that it works...
Parts Used:
-
Amber from CARLISLE, PA
-
Difficulty Level:Very Easy
-
Total Repair Time:Less than 15 mins
-
Tools:Screw drivers
2 of 2 people
found this instruction helpful.
Was this instruction helpful to you?
Thank you for voting!