




















79091313013 Kenmore Range - Instructions
Keep searches simple. Use keywords, e.g. "leaking", "pump", "broken" or "fit".
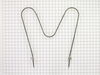
The baking element had busted in two
My husband unscrewed the existing element and installed the new element in less than 15 minutes. I also have to say I ordered this part on Monday and it was delivered to my door the following day, something I did not expect so that was a pleasant surprise for us.
Parts Used:
-
Margaret from O'Fallon, IL
-
Difficulty Level:Really Easy
-
Total Repair Time:Less than 15 mins
-
Tools:Screw drivers
Was this instruction helpful to you?
Thank you for voting!
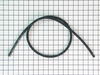
55 yr old wall oven had burnt out seal
Very easy--just had to drill new holes for the clips because the are already pre set in the rubber gasket
Parts Used:
-
Diane from Natrona Heights, PA
-
Difficulty Level:Really Easy
-
Total Repair Time:Less than 15 mins
Was this instruction helpful to you?
Thank you for voting!
Burner would stay on high when switch was on simmer
Disconnected power first. Removed 4 screws on the back of the range, pulled the knob off of the switch, removed 2 small screws on the switch(on the front , under the knob) pulled off the 4 wires with spade connections on the switch. Put wires on the new switch, put in 2 screws on new switch, pushed knob on switch, replaced back cover and tested the new switch. Works great. Took less than 10 mins.
Parts Used:

-
Dennis from Corpus Christi, TX
-
Difficulty Level:Really Easy
-
Total Repair Time:Less than 15 mins
-
Tools:Screw drivers
Was this instruction helpful to you?
Thank you for voting!
bake element died and light bulb
Uh...connected element AMD screwed imot exactly complicated.n light bulb
Parts Used:

-
jennifer from portsmouth, RI
-
Difficulty Level:Really Easy
-
Total Repair Time:Less than 15 mins
-
Tools:Pliers
Was this instruction helpful to you?
Thank you for voting!
front left burner was on HI no matter what the dail setting was
pull back panel, 2 screws & one wire at a time.....And don't forget to KILL POWER!!!!super easy works great now and the wife loves it.
Parts Used:
-
Eric from Mosier, OR
-
Difficulty Level:Really Easy
-
Total Repair Time:Less than 15 mins
-
Tools:Nutdriver, Screw drivers
Was this instruction helpful to you?
Thank you for voting!
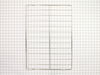
old oven racks were nasty!
We recently purchased condo and WhiteWestinghouse range needed some love. the old racks were not in very good shape so we ordered new.
Parts Used:
-
Richard from Fort Wayne, IN
-
Difficulty Level:Really Easy
-
Total Repair Time:Less than 15 mins
Was this instruction helpful to you?
Thank you for voting!
Just had to replace the racks in the stove.
Did just want to comment on the customer service. It was great. The easiest to order that I have ever dealt with. Received prompt attention to the order and processing the same. JUST GREAT> Thanks
Parts Used:
-
charles from El Paso, TX
-
Difficulty Level:Really Easy
-
Total Repair Time:Less than 15 mins
Was this instruction helpful to you?
Thank you for voting!
Burners on high all the time.
-
Randy from Van, TX
-
Difficulty Level:Really Easy
-
Total Repair Time:Less than 15 mins
-
Tools:Pliers, Screw drivers
Was this instruction helpful to you?
Thank you for voting!
Old rusty worn out oven racks
-
June from Mt. Vernon, AL
-
Difficulty Level:Really Easy
-
Total Repair Time:Less than 15 mins
Was this instruction helpful to you?
Thank you for voting!
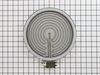
Element burned out in 15 months
Very simple, just removed three screws and pulled the top out and turned over and then removed the two screws holding the support bar. Removed and installed the element.Surprised to see that the element burned out in such a short time.
Parts Used:
-
James from Basking Ridge, NJ
-
Difficulty Level:Really Easy
-
Total Repair Time:Less than 15 mins
-
Tools:Screw drivers
Was this instruction helpful to you?
Thank you for voting!
burner switch burned out
Unplugged the main cord to the socket in behind range. Took back panel off. Unscrewed switch from its position on face of range. Switch is not a look alike switch to original, so had to pay attention to the labeling on both switches as to their identity. Removed one line at a time from old switch and placed on new switch. Rechecked positions of the wires and made sure there was no binding of the wire positions when installed. Mounted switch to same position previous switch was removed. Reinstalled back panel, plugged in range and tested switch. Very easy repair as long as you can see the labeling on back of switches. I used a light having a strap that is positioned on my head for best lighting possible for one person repair.
Parts Used:
-
Tom from Warfordsburg, PA
-
Difficulty Level:Easy
-
Total Repair Time:Less than 15 mins
-
Tools:Screw drivers, Socket set
Was this instruction helpful to you?
Thank you for voting!
burner switches had only two settings off and high
After making sure it was the switches themselves not the burners that were the problem, it was easy locating the exact parts I needed on PartSelect and the shipment arrived in a timely manner. I had to replace two out of four switches. Using a screwdriver, I detached the display pannel and removed the faulty switches. Then I disconnected the old wires and attached them to the new switches, one at a time. Closed everything up and the "new" range works great!
Parts Used:
-
Margarita from Palmyra, VA
-
Difficulty Level:Easy
-
Total Repair Time:Less than 15 mins
-
Tools:Pliers, Screw drivers
Was this instruction helpful to you?
Thank you for voting!
Infiniti switch needed to be changed.
Quit after getting shocked. New part had different configuration. Hard to see marking for pull and plug from old switch to new switch. New switch had different configuration. After all that and making sure switch worked, got shocked as stove was pushed back to wall. Some other issues with wiring has a shorting out problem. Maybe time to call a pro or get rid of the stove and get the gas stove we have been longing for. Be sure to match points on pulling and plugging as the configuration may be different.
Parts Used:
-
Ralph from Peoria, IL
-
Difficulty Level:A Bit Difficult
-
Total Repair Time:Less than 15 mins
-
Tools:Screw drivers
Was this instruction helpful to you?
Thank you for voting!
RF burner only had High Heat.
Unplug the range, pull the knob off the front. Remove the screws from the cover plate behind the switch and remove the cover plate. Carefully pull one wire at a time off of the old switch noting the markings: "L1," "L2," "H1," etc., as the wire position may be different on the new switch. Put each wire onto the new switch as they are removed from the old one. Let the new switch hang from the wires while removing the 2 Phillips head screws from the front of the old switch and remove the switch. Hold the new one in place, start both screws, & then tighten them. Push the knob on the new switch. Plug the range in and try it. If everything works, install the rear panel and screws. I think that it took me longer to type this than it did to actually do the job.
Parts Used:
-
Garner from Sykesville, PA
-
Difficulty Level:Easy
-
Total Repair Time:Less than 15 mins
-
Tools:Nutdriver, Screw drivers
Was this instruction helpful to you?
Thank you for voting!
Switch was Sparking
So simple....removed back panel, removed knob from front of range and removed 2 screws holding the knob in. Used needle nose pliers to pull wires off existing switch, placed wires in identical spots on new switch. Put switch post through front of range and put the 2 screws back in and the knob on. Finished and ready to go in less than 10 minutes. No more sparking....
Parts Used:
-
Susan from Hillsboro, OR
-
Difficulty Level:Really Easy
-
Total Repair Time:Less than 15 mins
-
Tools:Pliers, Screw drivers
Was this instruction helpful to you?
Thank you for voting!