




















79090921400 Kenmore Range - Instructions
Keep searches simple. Use keywords, e.g. "leaking", "pump", "broken" or "fit".
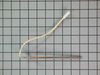
Temperature not correct.
Pull out stove. Unplug power. Remove four screws on each corner and loosen one screw in the middle. Remove back panel. Locate and unplug sensor connector. Remove one screw from sensor plate. Turn the sensor 45 degrees and pull sensor out from the rear. Connector received had the incorrect plug and terminals so it was necessaary to splice the connector from the one removed to the one received. Cut and splice wires as necessary. Install sensor, install back panel, plug in electrical power, push stove back into position. I used a temperature gauge to check temperature after stove was in position. In my case the temperature had to be adjusted which is a keyboard function on this unit.
Parts Used:
-
David C from Huntington Beach, CA
-
Difficulty Level:Really Easy
-
Total Repair Time:15 - 30 mins
-
Tools:Nutdriver, Pliers
Was this instruction helpful to you?
Thank you for voting!
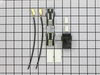
Replace terminal block and burner unit.
-
James from Williamsville, VT
-
Difficulty Level:Really Easy
-
Total Repair Time:15 - 30 mins
-
Tools:Screw drivers
Was this instruction helpful to you?
Thank you for voting!
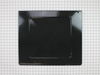
I had placed aluminum foil on bottom and it adhered to the surface.
I removed two screws and lifted out the ruined bottom. I set the new bottom in, but could not get the screws lined up so left them out. The bottom is heavy enough, it is not going anywhere. I am very grateful the part was available.
Parts Used:
-
Marilyn from Logansport, IN
-
Difficulty Level:Really Easy
-
Total Repair Time:15 - 30 mins
-
Tools:Pliers, Screw drivers
Was this instruction helpful to you?
Thank you for voting!
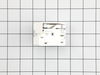
shorted out small element burner switch
First, I disconnected the electrical power by pulling apart the plug behind the range. Next, I removed the screws holding the service plate on back of the top panel.I removed the switch knob by gently pulling it from the stem. Underneath I found 2 screws holding the switch in the panel. I removed these with a phillips screwdriver.I was able to pull the entire switch out to the rear leaving all wires attached.The new switch looked different from the original and the wires were configured differently but the wires were clearly marked. By removing one at a time and placing it on the new switch to the corresponding marking,it was a simple matter to wire the switch.I reinstalled the switch in the panel,put back in the screws to hold the switch, slid the knob back on the stem, reinstalled the rear panel,and plugged the power cord back in.The switch worked perfectly.
Parts Used:
-
Alvie from Walnut Cove, NC
-
Difficulty Level:Easy
-
Total Repair Time:15 - 30 mins
-
Tools:Nutdriver, Pliers, Screw drivers
Was this instruction helpful to you?
Thank you for voting!
Oven turning off ater Pre- Heating
Talked to someone who knows , DX'd the potential problem,looked for the part on your very user friendly website and your DX was exactly what my oven was doing, when the Thermo-Sensor arrived, I unplugged the oven, removed the metal back, took out the faulty Sensor, replaced it very easy then realized the plug was different, so called a friend who knows how to Solder and 2 hrs, later, my oven was repaired and I began baking an Apple pie to repay a friends kindness The pie was perfectly baked , my friend was happy and so am I ,the baker, just before the holidays Thank you Parts Select for helpful DX and speedy delivery - seems you saved Christmas for me.
Parts Used:
-
Catherine from Bowie, AZ
-
Difficulty Level:A Bit Difficult
-
Total Repair Time:More than 2 hours
-
Tools:Nutdriver
Was this instruction helpful to you?
Thank you for voting!
Electric Range Element's Not Heating
Reviewed the online repair video a few times then got started. Although only two were bad, I replaced all four terminal blocks. I removed the range top instead of using the built in kick stands. this left me much more room to work and I was able to clean the top of the range really well before getting started. Wires for the back terminals where short and a little difficult to use after cutting off the old terminal blocks. The terminal block mounting option for my style range included with the repair kit would not allow me to utilize the screw for the third wire on the left rear burner. I used a drill to carefully widen the hole in the mount to make the original screw fit as there are no screws included with the kit. This added the extra time to complete the repair. Over all the repair was simple to complete but having to modify the terminal block mount was dissapointing considering the web site selected parts for my specific model number. Still a bargain compared to what a service call or new purchase costs. I will be reparing my ranges from now on.
Parts Used:
-
Robert from Waldorf, MD
-
Difficulty Level:Easy
-
Total Repair Time:1- 2 hours
-
Tools:Screw drivers
Was this instruction helpful to you?
Thank you for voting!
Oven door would not close properly
re-moving the old hinges and replacing them with new was quite easy, the repair instructions provided were quite precise and thorough. This can be done with one person but having another hand is handy since the oven door is quite heavy. the part was shipped the same day I ordered it and arrived within 2 days. I am quite happy with the service and would use you again. Thanks for the promptness of your service. Kevin
Parts Used:
-
Kevin from Littleton, CO
-
Difficulty Level:Easy
-
Total Repair Time:30 - 60 mins
-
Tools:Screw drivers, Wrench set
Was this instruction helpful to you?
Thank you for voting!
broil element burn out
take back planel off, take wires off old element and intsall new element hookup wires, put back planel ..under one hour job
Parts Used:
-
christopher from big pine key, FL
-
Difficulty Level:Easy
-
Total Repair Time:30 - 60 mins
-
Tools:Pliers, Screw drivers, Socket set
Was this instruction helpful to you?
Thank you for voting!