




















79090104200 Kenmore Range - Instructions
Keep searches simple. Use keywords, e.g. "leaking", "pump", "broken" or "fit".
Error Code F1
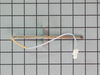
I usually try the cheapest part to replace when I come to a fork In the road but I wasn't home at the time and my other half called in the "expert". He said it was the clock timer and it would be $450 to replace it. She sent him away and I bought one online for $200 and put it in only to find out that it didn't solve the problem. Did some reading and found out that it could be the sensor. Put an ohm meter on it and found that to be the problem. Left the new clock timer in it anyway so now we're good for another 100,000 cookies or 1000 pizzas, which ever comes first
Parts Used:
-
Jon from Little Silver, NJ
-
Difficulty Level:Easy
-
Total Repair Time:Less than 15 mins
-
Tools:Screw drivers
6 of 7 people
found this instruction helpful.
Was this instruction helpful to you?
Thank you for voting!
broken lens over oven light
Your service was OUTSTANDING...Ordered one afternoon, and before lunch time the next day, the delivery man rang my door bell...Thanks a bunch for you excellent service.....
Parts Used:
-
Leslie from Warsaw, VA
-
Difficulty Level:Really Easy
-
Total Repair Time:Less than 15 mins
11 of 22 people
found this instruction helpful.
Was this instruction helpful to you?
Thank you for voting!
Door light switch was stuck
Pulled out stove, took side panel off on switch side of oven, unplugged old switch, pulled the old switch out the front of the oven, put in new switch and plugged it in. Then put oven back together and pushed it back into space. (Make sure to turn oven off at breaker box before you make repair) you could easily get shocked if you don’t.
Parts Used:
-
mike from Sandpoint, ID
-
Difficulty Level:Easy
-
Total Repair Time:30 - 60 mins
-
Tools:Screw drivers
5 of 5 people
found this instruction helpful.
Was this instruction helpful to you?
Thank you for voting!
Oven would overheat and not control properly
Simply took oven out of wall, removed back plate, unplugged old sensor, went in the front and unscrewed old sensor, put in new sensor, went in back and plugged in new sensor, put on back plate, push oven in wall. Turn on power
Parts Used:
-
Mason from WESTVILLE, OK
-
Difficulty Level:Really Easy
-
Total Repair Time:Less than 15 mins
-
Tools:Screw drivers
5 of 5 people
found this instruction helpful.
Was this instruction helpful to you?
Thank you for voting!
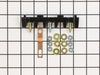
The elements were not heating up
It was really easy just unplugged it took off the back cover changed the part out put back cover on plugged it in and the elements were working great!
Parts Used:
-
Tanya from KALISPELL, MT
-
Difficulty Level:Really Easy
-
Total Repair Time:15 - 30 mins
-
Tools:Screw drivers
6 of 8 people
found this instruction helpful.
Was this instruction helpful to you?
Thank you for voting!
When oven was set at 400, actual temp would run about 285.
1 Turned off the oven breaker.
2. Removed the oven racks.
3. With a Phillips screwdriver, removed the mounting screws holding the temperature sensor and unplugged it.
4. New sensor plug did not match 20 year old connector. Had to cut and solder splice the connectors.
5. Installed the new sensor and now oven holds temperature steady.
Easy order, quick delivery and easy installation, happy wife.
2. Removed the oven racks.
3. With a Phillips screwdriver, removed the mounting screws holding the temperature sensor and unplugged it.
4. New sensor plug did not match 20 year old connector. Had to cut and solder splice the connectors.
5. Installed the new sensor and now oven holds temperature steady.
Easy order, quick delivery and easy installation, happy wife.
Parts Used:
-
James from MOBILE, AL
-
Difficulty Level:Really Easy
-
Total Repair Time:30 - 60 mins
-
Tools:Screw drivers
7 of 12 people
found this instruction helpful.
Was this instruction helpful to you?
Thank you for voting!
Refrigerator Light bulb went out
I replaced the bulb using my hands to twist the bulb in the socket located at the top of the refrigerator.
Parts Used:

-
ANGELA from MEBANE, NC
-
Difficulty Level:Very Easy
-
Total Repair Time:Less than 15 mins
7 of 12 people
found this instruction helpful.
Was this instruction helpful to you?
Thank you for voting!
While removing burned out light bulb, the glass cover fell to the floor of the oven and broke!!
Husband very ill in bed. It's up to me!! Got a new bulb at HomeDepot and figured out how to get that wire 'thing' back in and the new glass cover installed. I DID IT!! WOW! My husband has always done these jobs around the house.......but now it's up to me.......and I'm not so dumb after all! I DID IT!! Now everyone who comes in the house.....I show them what I DID!! :-)
Parts Used:
-
Phyllis from GAINESVILLE, GA
-
Difficulty Level:Easy
-
Total Repair Time:Less than 15 mins
5 of 7 people
found this instruction helpful.
Was this instruction helpful to you?
Thank you for voting!
Couldn't find replacement trays locally. Part Select was very helpful and prompt in shipping.
Just placed the chrome bowl trays in place and was good to go. They look very nice.
Parts Used:

-
Rosemary from St. Albans, ME
-
Difficulty Level:Really Easy
-
Total Repair Time:Less than 15 mins
5 of 7 people
found this instruction helpful.
Was this instruction helpful to you?
Thank you for voting!
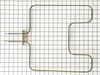
The element had broken in half in our 24” Tappan range.
We removed the backplate from our range unhooked the element Lug connection .Then we unscrewed the 2 screws in the oven holding the old element removing it screwing the new element into the oven wall. We then hooked the rear connections to the lugs and replaced the back plate.
Parts Used:
-
Lorraine from NORTH MANKATO, MN
-
Difficulty Level:Really Easy
-
Total Repair Time:30 - 60 mins
-
Tools:Screw drivers
4 of 4 people
found this instruction helpful.
Was this instruction helpful to you?
Thank you for voting!
Coroded drip pans
Removed heating elements and replaced drip pans. And by the way, this is the only 'pans' I could find to fit. Thanks.
Parts Used:

-
Lori from Old Town, FL
-
Difficulty Level:Really Easy
-
Total Repair Time:Less than 15 mins
4 of 5 people
found this instruction helpful.
Was this instruction helpful to you?
Thank you for voting!
Drip bowels needed to be replaced
I just took the old ones out and replaced them with the new ones. It took less than 5 minutes.
Parts Used:
-
Francine from OTEGO, NY
-
Difficulty Level:Very Easy
-
Total Repair Time:Less than 15 mins
3 of 3 people
found this instruction helpful.
Was this instruction helpful to you?
Thank you for voting!
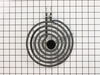
Cooktop burner was wore out from age
Just pulled the old cook top burner out and put the new one in .it took about 1 1/2 minutes
Parts Used:
-
John from HAYDEN, AL
-
Difficulty Level:Very Easy
-
Total Repair Time:Less than 15 mins
3 of 3 people
found this instruction helpful.
Was this instruction helpful to you?
Thank you for voting!
Repaired Oven Range Light Bulb
The bulb has a plastic clear cover. That cover can just be carefully removed using a screwdriver. It's held in by a metal bracket. After you remove the cover. You'll just need to replace the bulb and then re-install the cover and bracket.
Parts Used:
-
Alan from SAN MATEO, CA
-
Difficulty Level:Very Easy
-
Total Repair Time:Less than 15 mins
-
Tools:Screw drivers
3 of 3 people
found this instruction helpful.
Was this instruction helpful to you?
Thank you for voting!
Oven would not heat after running self clean
Googled the problem and found Oven Temperature Sensor and Main Terminal Block to be the most likely problems. Turned out to be neither. No parts were needed. Oven has a thermal overload switch on the rear upper left. Thermal overload needed re-set. To do so you have to remove the oven, remove the back and press the red button on thermal overload. Biggest challenge was figuring out how to remove the oven. Even with the installation manual it was not easy to fgure out. The instructions are misleading. You need a special tool. I used two hacksaw blades as a substitute, and slid them in to release the clips. Once you figure out how to get the oven out the rest is simple.
Parts Used:
-
Michael from Owasso, OK
-
Difficulty Level:A Bit Difficult
-
Total Repair Time:30 - 60 mins
-
Tools:Screw drivers
3 of 3 people
found this instruction helpful.
Was this instruction helpful to you?
Thank you for voting!