




















79046781901 Kenmore Range - Instructions
Keep searches simple. Use keywords, e.g. "leaking", "pump", "broken" or "fit".
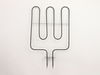
top electric burner not working
2 screws disconnected old one and pulled out the new one in put in opposite way. The representative was so helpful, part came fast. thank you
Parts Used:
-
Frank from CHESTERTOWN, NY
-
Difficulty Level:Very Easy
-
Total Repair Time:Less than 15 mins
-
Tools:Pliers, Screw drivers
3 of 3 people
found this instruction helpful.
Was this instruction helpful to you?
Thank you for voting!
Lens cover for the oven light
-
Larry from COZAD, NE
-
Difficulty Level:Really Easy
-
Total Repair Time:30 - 60 mins
3 of 4 people
found this instruction helpful.
Was this instruction helpful to you?
Thank you for voting!
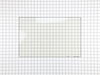
Change on e of the inside glass
removed the screws holding the front part of the door and from there worked my way, untill the third glass.
It took a couple hours, my first time,. Overall easy,
It took a couple hours, my first time,. Overall easy,
Parts Used:
-
Ronald from Ozone Park, NY
-
Difficulty Level:Easy
-
Total Repair Time:1- 2 hours
-
Tools:Screw drivers
4 of 7 people
found this instruction helpful.
Was this instruction helpful to you?
Thank you for voting!
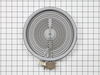
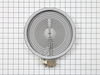
The out side ring of the element was working. The middle portion was dead.
I watch you tube of how to repair to gain my confidence and attempted the project. It was fairly easy. I took photos of wires so I wouldn’t make any mistakes. Boom ! Finished and works like a charm!!
Parts Used:
-
John from Novi, MI
-
Difficulty Level:Really Easy
-
Total Repair Time:30 - 60 mins
-
Tools:Pliers, Screw drivers, Socket set
2 of 2 people
found this instruction helpful.
Was this instruction helpful to you?
Thank you for voting!
The part I ordered has 5 connections and the part to be replaced has 7 connections. I had to ask a friend who is expert in electrical wiring to help.
My friend used a tester to determine where each wire was supposed to connect to. I'm not sure what he did with the extra connections.
Bottom line is this part should work but you need an expert to do it for you because it's, like I said, not exactly like the one to be replaced.
Bottom line is this part should work but you need an expert to do it for you because it's, like I said, not exactly like the one to be replaced.
Parts Used:
-
Phin from HARRISBURG, PA
-
Difficulty Level:Difficult
-
Total Repair Time:1- 2 hours
-
Tools:Pliers, Screw drivers
2 of 2 people
found this instruction helpful.
Was this instruction helpful to you?
Thank you for voting!
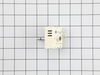
Dual burner would only work on high and only the large burner worked
Replaced the dual infinite switch behind the panel. The wires were easily matched, even though the switch looked a little different. Works perfectly now.
Parts Used:
-
Misty from CUNNINGHAM, TN
-
Difficulty Level:Very Easy
-
Total Repair Time:Less than 15 mins
2 of 2 people
found this instruction helpful.
Was this instruction helpful to you?
Thank you for voting!
sensor should pull into oven enough to easily unsnap and snap but didn't pull out
on the back side of the wall oven the sensor wire was ziptied tight. we had to totally pull oven out of its wall space, remove back panel, unhook zip tie, feed through sensor hole around insulation, connect and then replace back and return and relevel the oven. I have
Parts Used:
-
Mary from EDGAR, WI
-
Difficulty Level:A Bit Difficult
-
Total Repair Time:30 - 60 mins
-
Tools:Screw drivers
3 of 5 people
found this instruction helpful.
Was this instruction helpful to you?
Thank you for voting!
Element burned out
The original instructions were to replace burner and plug wires back in the same plug they came from.
The problem is that the plug order had changed between parts.
Use a pencil to highligt the plug numbers on both new and old plugset, to fint the new plug positions. And need to reorient one of the burners to allow existing wires to reach.
The problem is that the plug order had changed between parts.
Use a pencil to highligt the plug numbers on both new and old plugset, to fint the new plug positions. And need to reorient one of the burners to allow existing wires to reach.
Parts Used:
-
Jeff from BELLEVUE, WA
-
Difficulty Level:Difficult
-
Total Repair Time:More than 2 hours
-
Tools:Pliers, Screw drivers
2 of 3 people
found this instruction helpful.
Was this instruction helpful to you?
Thank you for voting!
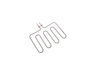
Bake element burnt out
-
glyndon from BOWLING GREEN, KY
-
Difficulty Level:Really Easy
-
Total Repair Time:30 - 60 mins
1 person
found this instruction helpful.
Was this instruction helpful to you?
Thank you for voting!
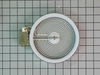
Element would not heat up
Removed 2 screws located underneath the front lip of the range top. Lifted range top and supported. Removed the 2 screws at either end of the support bracket. This bracket holds the elements in position. Be careful not to let the elements fall out when removing. The elements are now free to replace. Swap out the old with the new and be sure to reconnect the wires to the correct terminals on the new element. I did 1 wire at a time so as to not make a mistake at reconnecting the wires. Then replace the support bracket with the 2 screws and lower the range top in place and put back the 2 screws that hold the range top in position. VOILA!! Success. It works. The wife is now happy again:)
Parts Used:
-
Everett from Colchester, CT
-
Difficulty Level:Really Easy
-
Total Repair Time:15 - 30 mins
-
Tools:Nutdriver, Screw drivers
1 person
found this instruction helpful.
Was this instruction helpful to you?
Thank you for voting!
light bilb went out

-
Denise from Landover, MD
-
Difficulty Level:Really Easy
-
Total Repair Time:Less than 15 mins
2 of 6 people
found this instruction helpful.
Was this instruction helpful to you?
Thank you for voting!
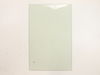
Inner window on my Frigidaire electric stove oven cracked
On this website, I found an instruction manual for this stove. There were 2 pages about how to change the glass on the oven door, including diagrams. I'd also checked a generic youtube video on changing inner glass on oven doors too, although the hinges in the youtube demo weren't exactly like those in mine. I printed out the instructions, checked the oven door to make sure the hinges looked like those in the diagrams, set aside a couple of hours on a free day with no other distractions, and did the job. I just kept removing screws from the inside oven door, peeling back the layers of the onion, until I got to the innermost glass, which was cracked. Put the new glass in, put it back together. On youtube the guy said it would take 20 minutes. It took me about an hour. Saved a ton of money by doing it myself.
Parts Used:
-
Jonathan M. from Sierra Madre, CA
-
Difficulty Level:Easy
-
Total Repair Time:1- 2 hours
-
Tools:Pliers, Screw drivers, Wrench (Adjustable)
1 of 3 people
found this instruction helpful.
Was this instruction helpful to you?
Thank you for voting!
Lens cover for oven light broke.
Really a no brainer, but I do have to say that PartSelect customer service is excellent. My part was located and on it's way within a day and arrived a couple of days later.
Parts Used:
-
Amy from Corona, CA
-
Difficulty Level:Really Easy
-
Total Repair Time:Less than 15 mins
0 of 1 people
found this instruction helpful.
Was this instruction helpful to you?
Thank you for voting!
Broken globe in oven and burnt out light bulb
-
Sharon from Foley, AL
-
Difficulty Level:Really Easy
-
Total Repair Time:Less than 15 mins
0 of 5 people
found this instruction helpful.
Was this instruction helpful to you?
Thank you for voting!
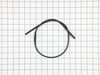
Gasket between knobs and cooktop dried out
Lay gasket across opening after you have cleaned out the crumbs and old gasket. with your left hand spread the opening and gently push the new gasket in, make sure the edges go down and under the cooktop and the panel where the knobs sit. It should be smooth and slant towards the cooktop.
Parts Used:
-
Bonnie from Hendersonville, TN
-
Difficulty Level:Really Easy
-
Total Repair Time:Less than 15 mins
Was this instruction helpful to you?
Thank you for voting!