




















79046769901 Kenmore Range - Instructions
Keep searches simple. Use keywords, e.g. "leaking", "pump", "broken" or "fit".
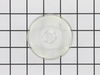
While removing burned out light bulb, the glass cover fell to the floor of the oven and broke!!
Husband very ill in bed. It's up to me!! Got a new bulb at HomeDepot and figured out how to get that wire 'thing' back in and the new glass cover installed. I DID IT!! WOW! My husband has always done these jobs around the house.......but now it's up to me.......and I'm not so dumb after all! I DID IT!! Now everyone who comes in the house.....I show them what I DID!! :-)
Parts Used:
-
Phyllis from GAINESVILLE, GA
-
Difficulty Level:Easy
-
Total Repair Time:Less than 15 mins
5 of 7 people
found this instruction helpful.
Was this instruction helpful to you?
Thank you for voting!
Both oven bake and broil elements lost power suddenly at the same time.
Installation of the temparature sensor, one of the technician recommended parts took no time, just two screws and a snap off/snap on part. It did not fix the problem. I then replaced the main control panel, which requires more work, but didn't solce the ussue either. I then replaced the thermal fuse, which wasn't mentioned by tech support, and required much more disassebly of the top panels of the stove, with still no fix to the problem. I am waiting to replace the thermostat heat sensor unit, the only other part in the circuit controlling power supply, requiring removal of the stove top again,
Parts Used:
-
Alexander from DELMAR, NY
-
Difficulty Level:Really Easy
-
Total Repair Time:30 - 60 mins
8 of 17 people
found this instruction helpful.
Was this instruction helpful to you?
Thank you for voting!
Repaired Oven Range Light Bulb
The bulb has a plastic clear cover. That cover can just be carefully removed using a screwdriver. It's held in by a metal bracket. After you remove the cover. You'll just need to replace the bulb and then re-install the cover and bracket.
Parts Used:

-
Alan from SAN MATEO, CA
-
Difficulty Level:Very Easy
-
Total Repair Time:Less than 15 mins
-
Tools:Screw drivers
3 of 3 people
found this instruction helpful.
Was this instruction helpful to you?
Thank you for voting!
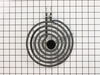
Cooktop burner was wore out from age
Just pulled the old cook top burner out and put the new one in .it took about 1 1/2 minutes
Parts Used:
-
John from HAYDEN, AL
-
Difficulty Level:Very Easy
-
Total Repair Time:Less than 15 mins
3 of 3 people
found this instruction helpful.
Was this instruction helpful to you?
Thank you for voting!
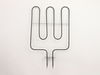
top electric burner not working
2 screws disconnected old one and pulled out the new one in put in opposite way. The representative was so helpful, part came fast. thank you
Parts Used:
-
Frank from CHESTERTOWN, NY
-
Difficulty Level:Very Easy
-
Total Repair Time:Less than 15 mins
-
Tools:Pliers, Screw drivers
3 of 3 people
found this instruction helpful.
Was this instruction helpful to you?
Thank you for voting!
Heating element burned out
All you do it unplug the old one and plug in the new one.
Parts Used:
-
Pat from GREELEY, CO
-
Difficulty Level:Very Easy
-
Total Repair Time:Less than 15 mins
3 of 4 people
found this instruction helpful.
Was this instruction helpful to you?
Thank you for voting!
Lens cover for the oven light
-
Larry from COZAD, NE
-
Difficulty Level:Really Easy
-
Total Repair Time:30 - 60 mins
3 of 4 people
found this instruction helpful.
Was this instruction helpful to you?
Thank you for voting!
Change on e of the inside glass
removed the screws holding the front part of the door and from there worked my way, untill the third glass.
It took a couple hours, my first time,. Overall easy,
It took a couple hours, my first time,. Overall easy,
Parts Used:
-
Ronald from Ozone Park, NY
-
Difficulty Level:Easy
-
Total Repair Time:1- 2 hours
-
Tools:Screw drivers
4 of 7 people
found this instruction helpful.
Was this instruction helpful to you?
Thank you for voting!
sensor should pull into oven enough to easily unsnap and snap but didn't pull out
on the back side of the wall oven the sensor wire was ziptied tight. we had to totally pull oven out of its wall space, remove back panel, unhook zip tie, feed through sensor hole around insulation, connect and then replace back and return and relevel the oven. I have
Parts Used:
-
Mary from EDGAR, WI
-
Difficulty Level:A Bit Difficult
-
Total Repair Time:30 - 60 mins
-
Tools:Screw drivers
3 of 5 people
found this instruction helpful.
Was this instruction helpful to you?
Thank you for voting!
Original Element physically broke
There is an installation video , but it was so easy, and if you clean your drip pans from those inevitable spills you can do this. I have zero mechanical abilities and I did. The website makes it easy to find your part, and the original literature you got with your appliance will direct you where to find the Model # and serial # on your Frigidaire Range. Order your part on line, get it in the mail and insert the Element yourself.Very happy with my transaction.
Parts Used:
-
Beverly from WEATOGUE, CT
-
Difficulty Level:Very Easy
-
Total Repair Time:Less than 15 mins
2 of 2 people
found this instruction helpful.
Was this instruction helpful to you?
Thank you for voting!
8" stove top element would not warm up.
It was simple.............the range-top tilts up so I proped it with a stick of wood, pulled out the old burner and plugged in the new one (when I saw how inexpensive the new element was I orderd two to replace the other 8" because it didn't look long for this world either). The whole operation took less than 10 min. no tools or batteries required!!!!!!!!!.........no-mus-no -fus.
Your prices were the lowest I found on-line, keep up the great work!!!!!!!!!
Your prices were the lowest I found on-line, keep up the great work!!!!!!!!!
Parts Used:
-
Margaret from Spencer, OH
-
Difficulty Level:Really Easy
-
Total Repair Time:Less than 15 mins
2 of 3 people
found this instruction helpful.
Was this instruction helpful to you?
Thank you for voting!
Heavy jam boiler caused elements to sag
-
Danny L from CHELAN, WA
-
Difficulty Level:Really Easy
-
Total Repair Time:Less than 15 mins
2 of 3 people
found this instruction helpful.
Was this instruction helpful to you?
Thank you for voting!
Cracked display
Peel off old ( might have to use a putty blade to get it started] then put on the new overlay.
Parts Used:
-
Dennis from LAVACA, AR
-
Difficulty Level:Really Easy
-
Total Repair Time:Less than 15 mins
-
Tools:Pliers
1 person
found this instruction helpful.
Was this instruction helpful to you?
Thank you for voting!
burner was damaged
-
Thomas from Elizabeth City, NC
-
Difficulty Level:Really Easy
-
Total Repair Time:Less than 15 mins
1 person
found this instruction helpful.
Was this instruction helpful to you?
Thank you for voting!
dead burner
I unplugged the dead burner and plugged in the new burner. Very easy. No tools needed.
Parts Used:
-
Jan from Storm Lake, IA
-
Difficulty Level:Really Easy
-
Total Repair Time:Less than 15 mins
3 of 7 people
found this instruction helpful.
Was this instruction helpful to you?
Thank you for voting!