




















79046584503 Kenmore Range - Instructions
Keep searches simple. Use keywords, e.g. "leaking", "pump", "broken" or "fit".
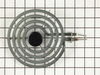
An aluminum saucepan had overheated and melted onto the element.
Unplugged the element and the melted on pot. Plugged in the new element. I thought I might need a whole new cooktop but a new element was very easy to find online.
Parts Used:
-
Alice from Batesville, AR
-
Difficulty Level:Really Easy
-
Total Repair Time:Less than 15 mins
1 of 2 people
found this instruction helpful.
Was this instruction helpful to you?
Thank you for voting!
light bilb went out

-
Denise from Landover, MD
-
Difficulty Level:Really Easy
-
Total Repair Time:Less than 15 mins
2 of 6 people
found this instruction helpful.
Was this instruction helpful to you?
Thank you for voting!
Old cooktop burner element died.
First I unplugged the element that wasn't working and switched it with one that was to confirm that it was the burner element, and not the cooktop wiring, that was the problem. Once that was confirmed, I ordered a new element from partselect.com. Upon arrival of the new element several days later, I plugged it into the empty plug on the cooktop and voila, we're cooking on all 4 again.
Parts Used:
-
Lawrence from Plainview, NY
-
Difficulty Level:Really Easy
-
Total Repair Time:Less than 15 mins
1 of 3 people
found this instruction helpful.
Was this instruction helpful to you?
Thank you for voting!
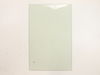
Inner window on my Frigidaire electric stove oven cracked
On this website, I found an instruction manual for this stove. There were 2 pages about how to change the glass on the oven door, including diagrams. I'd also checked a generic youtube video on changing inner glass on oven doors too, although the hinges in the youtube demo weren't exactly like those in mine. I printed out the instructions, checked the oven door to make sure the hinges looked like those in the diagrams, set aside a couple of hours on a free day with no other distractions, and did the job. I just kept removing screws from the inside oven door, peeling back the layers of the onion, until I got to the innermost glass, which was cracked. Put the new glass in, put it back together. On youtube the guy said it would take 20 minutes. It took me about an hour. Saved a ton of money by doing it myself.
Parts Used:
-
Jonathan M. from Sierra Madre, CA
-
Difficulty Level:Easy
-
Total Repair Time:1- 2 hours
-
Tools:Pliers, Screw drivers, Wrench (Adjustable)
1 of 3 people
found this instruction helpful.
Was this instruction helpful to you?
Thank you for voting!
No burner
I just plugged it into the receptacle on the stovetop and turned the thing on, and it worked! I'd been without the 4th burner for quite some time. Nice to have it back!
Parts Used:
-
Janet from North Vernon, IN
-
Difficulty Level:Really Easy
-
Total Repair Time:Less than 15 mins
0 of 1 people
found this instruction helpful.
Was this instruction helpful to you?
Thank you for voting!
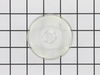
Lens cover for oven light broke.
Really a no brainer, but I do have to say that PartSelect customer service is excellent. My part was located and on it's way within a day and arrived a couple of days later.
Parts Used:
-
Amy from Corona, CA
-
Difficulty Level:Really Easy
-
Total Repair Time:Less than 15 mins
0 of 1 people
found this instruction helpful.
Was this instruction helpful to you?
Thank you for voting!
Broken globe in oven and burnt out light bulb
-
Sharon from Foley, AL
-
Difficulty Level:Really Easy
-
Total Repair Time:Less than 15 mins
0 of 5 people
found this instruction helpful.
Was this instruction helpful to you?
Thank you for voting!
heating element didn't work
I did the repair in less then 5 minutes. I took out old element and put in new one and turned it on and I had heat. Works great Thanks the part came in 2 days what a wonderful suprise that was.
Parts Used:
-
Judith from Sidney, NY
-
Difficulty Level:Really Easy
-
Total Repair Time:Less than 15 mins
Was this instruction helpful to you?
Thank you for voting!
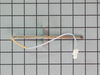
Improper temperature when baking.
Moved the stove away from the wall, unhooked the electric cord and the gas pipe. In the oven, undid the two screws holding the probe. Removed two screws and removed the electrical cover panel from the stove back, disconnected the quick connect to the probe and pulled the probe from the oven. Reversding the proceedures, put the new probe into the oven, hooked up the quick connect and replaced the electrical panel cover. From the front, reinstalled the probe with the two screws, reconnected the gas and the power cord and put the stove back into position. It works just fine now!
Parts Used:
-
Lorenza from Rowlesburg, WV
-
Difficulty Level:Really Easy
-
Total Repair Time:15 - 30 mins
-
Tools:Screw drivers
Was this instruction helpful to you?
Thank you for voting!
Improper oven heating.
1. Moved stove from against the wall. 2. Unplugged the power supply. 3. Removed the electrical pannel cover. 4. Disconnected the quick connect probe plug. 5. Opened the oven and removed the probe. 6. Installed the new probe. 7. Connected the quick connect plug. 8. Reattached the electrical panel cover. 9. Plugged in the electrical supply. 10. Moved the stove back into its original position. ****Note**** THIS IS THE SECOND TIME I REPLACED THE PROBE. THE FIRST REPLACEMENT LASTED ONLY 5 MONTHS!!!!
Parts Used:
-
Lorenza from Rowlesburg, WV
-
Difficulty Level:Really Easy
-
Total Repair Time:15 - 30 mins
-
Tools:Screw drivers
Was this instruction helpful to you?
Thank you for voting!
Oven was not heating up to the set temperature. Stopped around 180-200F.
Removed 2 screws holding old temperature sensor inside the oven and gently pulled out the wire till the connector came through the hole. Disconnected old probe and attached new one. Fished the wire back in the hole and replaced the two screws. Then followed the operating instructions for calibrating the oven. Ended up setting it +5 degrees. So far, works great.
Parts Used:
-
Robert from Glasgow, MT
-
Difficulty Level:Really Easy
-
Total Repair Time:Less than 15 mins
-
Tools:Screw drivers
Was this instruction helpful to you?
Thank you for voting!
Oven would not reach temperature
Husband made install in very short time. Nice to have them back in operation.
Parts Used:
-
Sandra from Magnolia, TX
-
Difficulty Level:Really Easy
-
Total Repair Time:15 - 30 mins
-
Tools:Screw drivers
Was this instruction helpful to you?
Thank you for voting!
really bad ugly streaks inside of glass
open door,throw the door latches at the hinges and remove door. Take the out of the outer panel so you can separate the glasses. remove clip that hold the outer glass in place. I ordered a replacement glass as I never thought that it would come clean it looked so bad, but it cleaned up like new so I now have a spare glass for my oven door. Just reverse the way you take it apart to put it back together.
Parts Used:
-
John from Hemet, CA
-
Difficulty Level:Really Easy
-
Total Repair Time:15 - 30 mins
-
Tools:Screw drivers
Was this instruction helpful to you?
Thank you for voting!
broiler element burned out
-
Richard from Oro Valley, AZ
-
Difficulty Level:Really Easy
-
Total Repair Time:15 - 30 mins
-
Tools:Pliers, Screw drivers
Was this instruction helpful to you?
Thank you for voting!
Cracked inside glass
I actually watched Youtube while I was changing it. This video was not actually the same make up of my oven, even though the I typed in the model number. I manage to figure it any with the steps anyway. It was harder then I expected but not horrible. I think I did pretty well for a women. Patti
Parts Used:
-
patti from Greer, SC
-
Difficulty Level:A Bit Difficult
-
Total Repair Time:1- 2 hours
-
Tools:Screw drivers
Was this instruction helpful to you?
Thank you for voting!