




















79041019803 Kenmore Wall Oven - Instructions
Keep searches simple. Use keywords, e.g. "leaking", "pump", "broken" or "fit".
sensor should pull into oven enough to easily unsnap and snap but didn't pull out
on the back side of the wall oven the sensor wire was ziptied tight. we had to totally pull oven out of its wall space, remove back panel, unhook zip tie, feed through sensor hole around insulation, connect and then replace back and return and relevel the oven. I have
Parts Used:
-
Mary from EDGAR, WI
-
Difficulty Level:A Bit Difficult
-
Total Repair Time:30 - 60 mins
-
Tools:Screw drivers
3 of 5 people
found this instruction helpful.
Was this instruction helpful to you?
Thank you for voting!
wrong part
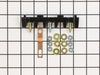
my original part arrived and it did not fit. When I called to explain the problem I was told it was the wrong part. The big problem is... Frigidaire calls the receptacle a terminal block kit as well as a terminal block kit which is a totally different part. I tried to explain that to several different folks I spoke to at your company as well as Frigidaire but I'm not sure if I got that point across. Take a look at part # 530 393 5058 and part # 530 440 9888 and you will see that they both mention terminal block kit. Hopefully the part I am getting from Frigidaire is an OEM part and will fit.
Parts Used:
-
Barbara from WICKENBURG, AZ
-
Difficulty Level:Very Difficult
-
Total Repair Time:30 - 60 mins
2 of 4 people
found this instruction helpful.
Was this instruction helpful to you?
Thank you for voting!
light bilb went out

-
Denise from Landover, MD
-
Difficulty Level:Really Easy
-
Total Repair Time:Less than 15 mins
2 of 6 people
found this instruction helpful.
Was this instruction helpful to you?
Thank you for voting!
No Power to the Oven
Watching the video showed an easy, unscrew and screw back on process while connecting the wires back. It was really that simple. Once it was complete (not even 10mins), plugged it back in, and its been working great since.
Parts Used:
-
Tony from Hartford, CT
-
Difficulty Level:Really Easy
-
Total Repair Time:Less than 15 mins
-
Tools:Screw drivers
1 of 3 people
found this instruction helpful.
Was this instruction helpful to you?
Thank you for voting!
Lens cover for oven light broke.
Really a no brainer, but I do have to say that PartSelect customer service is excellent. My part was located and on it's way within a day and arrived a couple of days later.
Parts Used:
-
Amy from Corona, CA
-
Difficulty Level:Really Easy
-
Total Repair Time:Less than 15 mins
0 of 1 people
found this instruction helpful.
Was this instruction helpful to you?
Thank you for voting!
Control will not work - only clock blinks
Took 3 panels off to get to the electric block. Replaced electrical block and put it back together. Still no change.
Parts Used:
-
Sue from Lampasas, TX
-
Difficulty Level:Really Easy
-
Total Repair Time:15 - 30 mins
-
Tools:Nutdriver, Pliers, Screw drivers
0 of 4 people
found this instruction helpful.
Was this instruction helpful to you?
Thank you for voting!
Broken globe in oven and burnt out light bulb
-
Sharon from Foley, AL
-
Difficulty Level:Really Easy
-
Total Repair Time:Less than 15 mins
0 of 5 people
found this instruction helpful.
Was this instruction helpful to you?
Thank you for voting!
Gasket between knobs and cooktop dried out
Lay gasket across opening after you have cleaned out the crumbs and old gasket. with your left hand spread the opening and gently push the new gasket in, make sure the edges go down and under the cooktop and the panel where the knobs sit. It should be smooth and slant towards the cooktop.
Parts Used:

-
Bonnie from Hendersonville, TN
-
Difficulty Level:Really Easy
-
Total Repair Time:Less than 15 mins
Was this instruction helpful to you?
Thank you for voting!
Glass assembly was broken
Removed the old mounting bracket.(the new bracket is part of the glass ass). Removed oven door to access the mounting screws.Positioned the new assembly.The only screws holding the top of the assembly also hold the oven door handle.Care must be taken NOT to overtighten.(this caused original breakage).Suggest using "Loctite".
Parts Used:

-
john from Blue Springs, MO
-
Difficulty Level:Easy
-
Total Repair Time:15 - 30 mins
-
Tools:Screw drivers
Was this instruction helpful to you?
Thank you for voting!