




















7745A77 Norge Dryer - Instructions
Keep searches simple. Use keywords, e.g. "leaking", "pump", "broken" or "fit".
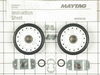
Worn wheels, lot of noise
Had to disassemble most of the dryer including pulling dryer drum in order to get to drum support rollers. Not a real difficult repair, just time consumming because of amount of parts needing to be removed inorder to get to rollers.
Parts Used:
-
Jonathan from Meridian, ID
-
Difficulty Level:A Bit Difficult
-
Total Repair Time:1- 2 hours
-
Tools:Nutdriver, Pliers, Screw drivers, Wrench (Adjustable), Wrench set
3 of 4 people
found this instruction helpful.
Was this instruction helpful to you?
Thank you for voting!
Dryer stopped tumbling
Learned as I went along, from various YouTube videos.
I lucked out opening the top of the dryer in that I didn't break anything when I popped the top up, since I didn't know to use a putty knife to depress inward the retaining clips.
Found the belt lying on top of the drum, and when I lifted it, it easily came free since it was broken.
Watched the YouTube from PartSelect, finally, and Steve made it seem so easy. Unplugged it, turned off the gas, too.
Front two screws unscrewed no problem. Front panel lifted away, no problem. Tons of lint in the front housing, so I decided to clean away as much lint as possible since this was the best opportunity, and I also vacuumed lint out of the sheet metal exhaust all the way to the outdoors exit port. Then I had to get that sheet metal pipe back in place, perfectly, and that was a little tricky
The roller kit was a bargain compared to separate parts I thought I'd need (one roller only) so I replaced both rollers and their posts, spacer, and washers.
Another vender video recommended high temp lithium grease to lube the new posts, but I just used "plumbers grease" that I happened to find lying around the house.
The most difficult part of the whole process was pre-fitting the new screws into the plates of the new posts because you are self-threading the screws and I didn't have a nut driver. (I was trying to do it using two wrenches, one to hold the plate, the other to turn the screw. The torque required is so high that you'll start to round the hex edges of the screws and ruin them. So, I went out and bought a 5/16" socket for $2.49, and self threaded the screws by holding the plates with a wrench, and using my power drill with the 5/16" socket.
This is where you risk ruining everything because as soon as the screw has self-threaded the plate, the resistance drops to near-zero, and the drill zooms the screw down hard onto the plate. I found, afterward, one ribbon of thread lying on the work area, which means I stripped one of the threads by one winding. (I'm not too worried, but it did make me wonder if I had screwed up. Keep the old screws to use as replacements for the new ones if you encounter the same problem where you inadvertently strip a screw too far.)
Then, the plates go back into the dryer, and the left side plate has a much larger gap, because you have to remove/replace it through the rear wall slot by turning it in-situ; the right one just falls down into your waiting hand, and is replaced by raising it up from behind its slot.
Finally, you come to the belt replacement, and just follow the way Steve showed in the YouTube. However, I tried and tried, but it was difficult for me since I'm left handed and you do it with the right hand. I was finally able to get it by getting the belt around the metal drive, first, and then bringing the white wheel over and working it into position by pulling the belt forward to clear the white wheel being positioned to receive the belt's tension.
This is a very doable dryer repair, it will save you hundreds of dollars, you'll do a better job than a repairman (since you vacuum all the lint out too), and its a great story to tell your friends.
Learning how to do it, actually doing the repair, and then double checking that I got everything "right," I'd guess that I put in 8 hours of my time.
It was fun… but keep your cool since there will be a little aggravation, and maybe a trip to the hardware store to get tools you don't own.
I lucked out opening the top of the dryer in that I didn't break anything when I popped the top up, since I didn't know to use a putty knife to depress inward the retaining clips.
Found the belt lying on top of the drum, and when I lifted it, it easily came free since it was broken.
Watched the YouTube from PartSelect, finally, and Steve made it seem so easy. Unplugged it, turned off the gas, too.
Front two screws unscrewed no problem. Front panel lifted away, no problem. Tons of lint in the front housing, so I decided to clean away as much lint as possible since this was the best opportunity, and I also vacuumed lint out of the sheet metal exhaust all the way to the outdoors exit port. Then I had to get that sheet metal pipe back in place, perfectly, and that was a little tricky
The roller kit was a bargain compared to separate parts I thought I'd need (one roller only) so I replaced both rollers and their posts, spacer, and washers.
Another vender video recommended high temp lithium grease to lube the new posts, but I just used "plumbers grease" that I happened to find lying around the house.
The most difficult part of the whole process was pre-fitting the new screws into the plates of the new posts because you are self-threading the screws and I didn't have a nut driver. (I was trying to do it using two wrenches, one to hold the plate, the other to turn the screw. The torque required is so high that you'll start to round the hex edges of the screws and ruin them. So, I went out and bought a 5/16" socket for $2.49, and self threaded the screws by holding the plates with a wrench, and using my power drill with the 5/16" socket.
This is where you risk ruining everything because as soon as the screw has self-threaded the plate, the resistance drops to near-zero, and the drill zooms the screw down hard onto the plate. I found, afterward, one ribbon of thread lying on the work area, which means I stripped one of the threads by one winding. (I'm not too worried, but it did make me wonder if I had screwed up. Keep the old screws to use as replacements for the new ones if you encounter the same problem where you inadvertently strip a screw too far.)
Then, the plates go back into the dryer, and the left side plate has a much larger gap, because you have to remove/replace it through the rear wall slot by turning it in-situ; the right one just falls down into your waiting hand, and is replaced by raising it up from behind its slot.
Finally, you come to the belt replacement, and just follow the way Steve showed in the YouTube. However, I tried and tried, but it was difficult for me since I'm left handed and you do it with the right hand. I was finally able to get it by getting the belt around the metal drive, first, and then bringing the white wheel over and working it into position by pulling the belt forward to clear the white wheel being positioned to receive the belt's tension.
This is a very doable dryer repair, it will save you hundreds of dollars, you'll do a better job than a repairman (since you vacuum all the lint out too), and its a great story to tell your friends.
Learning how to do it, actually doing the repair, and then double checking that I got everything "right," I'd guess that I put in 8 hours of my time.
It was fun… but keep your cool since there will be a little aggravation, and maybe a trip to the hardware store to get tools you don't own.
Parts Used:

-
Robert C. from GLEN RIDGE, NJ
-
Difficulty Level:A Bit Difficult
-
Total Repair Time:More than 2 hours
-
Tools:Nutdriver, Pliers, Screw drivers, Wrench (Adjustable)
3 of 4 people
found this instruction helpful.
Was this instruction helpful to you?
Thank you for voting!
Squealing
1.Removed retaining clips,washers,spacer,and cylinder rollers
2.Removed and replaced support assembly
3.Installed spacer
4.Installed cylinder roller assembly
5.Installed washers and retaining clips
This is my second time ordering parts from PartSelect and I am amazed how fast I recieve my orders, which minimizes the downtime of an appliance that's frequently used.
2.Removed and replaced support assembly
3.Installed spacer
4.Installed cylinder roller assembly
5.Installed washers and retaining clips
This is my second time ordering parts from PartSelect and I am amazed how fast I recieve my orders, which minimizes the downtime of an appliance that's frequently used.
Parts Used:
-
Allen from Dyer, IN
-
Difficulty Level:Easy
-
Total Repair Time:15 - 30 mins
-
Tools:Nutdriver, Screw drivers
2 of 2 people
found this instruction helpful.
Was this instruction helpful to you?
Thank you for voting!
belt broke
watched your video on 'how to' and did it like man showed..no problem
Parts Used:
-
Helen from WEST MONROE, LA
-
Difficulty Level:Really Easy
-
Total Repair Time:15 - 30 mins
-
Tools:Screw drivers, Socket set
2 of 2 people
found this instruction helpful.
Was this instruction helpful to you?
Thank you for voting!
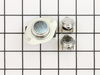
Dryer had no power. Internal light was out too.
I followed the "How to" video on your web site. Most importantly, I cleaned the entire filter area which probably caused the problem as your instructions recommended. I will do that annually going forward. I would recommend your service to anyone.
Parts Used:
-
Lou from Weymouth, MA
-
Difficulty Level:Easy
-
Total Repair Time:15 - 30 mins
-
Tools:Nutdriver, Screw drivers
2 of 2 people
found this instruction helpful.
Was this instruction helpful to you?
Thank you for voting!
dryer stopped running, no power
-
larry from OLNEY, TX
-
Difficulty Level:Easy
-
Total Repair Time:30 - 60 mins
-
Tools:Nutdriver, Pliers
2 of 2 people
found this instruction helpful.
Was this instruction helpful to you?
Thank you for voting!
THERMOSTAT needed to be replaced, dryer works but no heat
Open the top of the dryer, thermostat can be plainly seen. this one was obviously fried, made it easy to determine cause of problem. remove old thermostat, pins pull off posts, using socket take off nuts (hang on to the nuts), put the new on. Fixed.
Parts Used:

-
Connie from TROY, OH
-
Difficulty Level:Really Easy
-
Total Repair Time:30 - 60 mins
-
Tools:Screw drivers, Socket set
2 of 2 people
found this instruction helpful.
Was this instruction helpful to you?
Thank you for voting!
The belt needed replaced
Once we realized we needed to take the FRONT off the dryer, not the back all went well. It was an easy fix and the part fix perfectly. Instead of $60 or more for a repairman, we spent less than $20 fixing the dryer.
Parts Used:
-
Judith from Guys Mills, PA
-
Difficulty Level:Easy
-
Total Repair Time:30 - 60 mins
-
Tools:Screw drivers, Socket set
3 of 5 people
found this instruction helpful.
Was this instruction helpful to you?
Thank you for voting!
Replacing the dryer drum drive belt
Very difficult for one person, trying to get the belt engaged into the motor pulley and the idler pulley at the same time. Trying to overcome the tension of the heavy spring on the idler was the main problem, while coping with the small working space with the drum in place. Solved all the problems by removing the drum (for the 3rd time) and making a piece of wood to wedge in against the outside wall of the machine to hold back the spring loaded idler. Then slipped the drum back in place and gently slid the belt around the drum. Then reached in under the drum and slipped the wood piece out while making sure the belt remained on the pulleys. If I had the wood idea at the start, it would have been about a half hour job. Good luck, and don't pinch your fingers.
Parts Used:
-
walt from LK HAVASU CTY, AZ
-
Difficulty Level:A Bit Difficult
-
Total Repair Time:More than 2 hours
-
Tools:Nutdriver, Pliers, Screw drivers
2 of 2 people
found this instruction helpful.
Was this instruction helpful to you?
Thank you for voting!
Noise And Vibration While Drying
After reading everyone else's comments I started by pulling out the dryer, unplugging the power and exhaust. Next moved the dryer to an area where I had room to lay it on the back. Then using a flat blade screw driver, I popped the top attached tape to the top so I could lean back the top without having to hold it. Removed the two screws from the front panel and removed the door safety shut off before removed the front panel. Then I layed the dryer on its back. Then reached under the drum, pushed the belt tensioner toward the motor puller to release the tension on the belt. Then slid the belt to the base. Pulled the drum up and out of the cabinet. Next I cleaned all the lint and crud out of the dryer components. To remove the clips that hold the rollers in place, I use 2 small flat blade screw drivers. These are inserted at the back side of the horse show shaped clip between the shaft and the clip. When the two screw drivers are rotated like turning a screw they slide the clip out. Next I used a socket wrench with a #8 metric socket(I didn't have the sae size) and removed the screws holding the drum roller brackets. I simply reversed the procedure to install the new rollers. Since the dryer was on its back, when I put the drum back in, its own weight slipped it in place. Then pulled the belt around the drum and between the motor pulley and the belt tensioner. Holding the belt with one hand, I used the other hand to pushed the belt tensioner in and positioned the belt. Then I stood the unit back upright and put the front cover on, replaced the door safety switch, removing the tape holding the lid and then cloed the lid. Of course I put the dryer back in place, leveled it, and it now runs like brand new. My thanks to every one else who gave me hints that saved be about $450!
Parts Used:
-
Peter from Garland, TX
-
Difficulty Level:A Bit Difficult
-
Total Repair Time:1- 2 hours
-
Tools:Nutdriver, Pliers, Screw drivers, Socket set
2 of 2 people
found this instruction helpful.
Was this instruction helpful to you?
Thank you for voting!
Dryer just stopped working all together
first I went online and took a look at the schematic and realized that two items can shut the complete unit down and would be easy to check. First I checked the door switch with a multimeter then the high limit non-resettable thermostat. The contacts on the thermostat were open which told me it was bad. Went online to www.partselect.com and found the part really easily. came in when they said it would and it was a perfect match to the original (part numbers on the side and eveything). Make sure you correct the problem that caused the unit to overheat in the first place. IN my case the dryer air passages were full of lint. After a good cleaning put it all back together and it worked better than it has in years.
Parts Used:
-
Jamye from Suffolk, VA
-
Difficulty Level:Really Easy
-
Total Repair Time:1- 2 hours
-
Tools:Nutdriver, Screw drivers
2 of 2 people
found this instruction helpful.
Was this instruction helpful to you?
Thank you for voting!
Thermal shut off shut off.
Replaced the thermal shut off and the thermistor located on the heating element bracket.
Easy to diagnose and to replace- not totally accessable but not that bad either. Cleaned out lint obstruction causing the problem.
Easy to diagnose and to replace- not totally accessable but not that bad either. Cleaned out lint obstruction causing the problem.
Parts Used:
-
mark from santa clara, CA
-
Difficulty Level:Easy
-
Total Repair Time:1- 2 hours
-
Tools:Screw drivers, Wrench (Adjustable)
4 of 8 people
found this instruction helpful.
Was this instruction helpful to you?
Thank you for voting!
Dryer stopped working
1- cleared all the ducts. (They were clogged and this is what caused the fuse to open)
2- Replaced the fuse from the kit
3- The dryer stopped working again after 1/2 hour -the fuse blew-up again
4- Altough the stat (the other part included in the kit) checked OK with the multimeter, it was actually defective and did not regulate the temp.
5- changed both parts included in the kit, the dryer worked normally again.
2- Replaced the fuse from the kit
3- The dryer stopped working again after 1/2 hour -the fuse blew-up again
4- Altough the stat (the other part included in the kit) checked OK with the multimeter, it was actually defective and did not regulate the temp.
5- changed both parts included in the kit, the dryer worked normally again.
Parts Used:

-
Belaid from Acton, MA
-
Difficulty Level:Easy
-
Total Repair Time:30 - 60 mins
-
Tools:Screw drivers, Socket set
4 of 8 people
found this instruction helpful.
Was this instruction helpful to you?
Thank you for voting!
Dryer smelled like something was burning, then would not turn on.
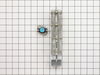
This is the second time that this has happened with my dryer. The first time I replaced the thermostat and fuse, and it worked for a few years. This time I replaced the element and thermostat at first. Still nothing, then got the fuse; and walla just like new. Of course I lost a screw somewhere down at the bottom of the dryer, so there is only one holding the thermostat in place. Also I took off the front and cleaned out the lint traps; both times it was loaded with crap. Probably why it stopped in the first place.
Parts Used:
-
Preston from Lynchburg, VA
-
Difficulty Level:Easy
-
Total Repair Time:30 - 60 mins
-
Tools:Socket set
4 of 8 people
found this instruction helpful.
Was this instruction helpful to you?
Thank you for voting!
dryer stopped running, hot smell, would not restart
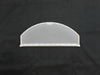
I first made sure there was power to dryer. It was ok so I unpluged the dryer from the socket and afer researching on line I was sure it was the thermal fuse. I check continuity on the fuse and it did not have continuity. So I installed a new fuse and high temp thermostat (they come together)
Just lift top of dryer up and back. In the left rear corner is the heating element. On top of the element is the thermostat. On the right side is the fuse it is a round disc with two white wires attached. The thermostat and heating element need to be removed to install fuse (one screw each and lift out of the way ) . Need to check for blocked lint or like I had the white plastic hose had a kink and need replaced with metal lint hose.
Just lift top of dryer up and back. In the left rear corner is the heating element. On top of the element is the thermostat. On the right side is the fuse it is a round disc with two white wires attached. The thermostat and heating element need to be removed to install fuse (one screw each and lift out of the way ) . Need to check for blocked lint or like I had the white plastic hose had a kink and need replaced with metal lint hose.
Parts Used:
-
Jill from Hadley, PA
-
Difficulty Level:A Bit Difficult
-
Total Repair Time:30 - 60 mins
-
Tools:Screw drivers, Socket set
2 of 2 people
found this instruction helpful.
Was this instruction helpful to you?
Thank you for voting!