




















7002A Norge Dryer - Instructions
Keep searches simple. Use keywords, e.g. "leaking", "pump", "broken" or "fit".
The belt needed replaced
Once we realized we needed to take the FRONT off the dryer, not the back all went well. It was an easy fix and the part fix perfectly. Instead of $60 or more for a repairman, we spent less than $20 fixing the dryer.
Parts Used:

-
Judith from Guys Mills, PA
-
Difficulty Level:Easy
-
Total Repair Time:30 - 60 mins
-
Tools:Screw drivers, Socket set
3 of 5 people
found this instruction helpful.
Was this instruction helpful to you?
Thank you for voting!
Dryer smelled like something was burning, then would not turn on.
This is the second time that this has happened with my dryer. The first time I replaced the thermostat and fuse, and it worked for a few years. This time I replaced the element and thermostat at first. Still nothing, then got the fuse; and walla just like new. Of course I lost a screw somewhere down at the bottom of the dryer, so there is only one holding the thermostat in place. Also I took off the front and cleaned out the lint traps; both times it was loaded with crap. Probably why it stopped in the first place.
Parts Used:

-
Preston from Lynchburg, VA
-
Difficulty Level:Easy
-
Total Repair Time:30 - 60 mins
-
Tools:Socket set
4 of 8 people
found this instruction helpful.
Was this instruction helpful to you?
Thank you for voting!
THERMOSTAT needed to be replaced, dryer works but no heat
Open the top of the dryer, thermostat can be plainly seen. this one was obviously fried, made it easy to determine cause of problem. remove old thermostat, pins pull off posts, using socket take off nuts (hang on to the nuts), put the new on. Fixed.
Parts Used:

-
Connie from TROY, OH
-
Difficulty Level:Really Easy
-
Total Repair Time:30 - 60 mins
-
Tools:Screw drivers, Socket set
2 of 2 people
found this instruction helpful.
Was this instruction helpful to you?
Thank you for voting!
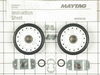
Metal To Metal Contact And Rubbing Noise
Took the front of dryer apart removed belt and drum replaced my parts and reassembled.
Parts Used:


-
Mark from East Tawas, MI
-
Difficulty Level:Easy
-
Total Repair Time:1- 2 hours
-
Tools:Nutdriver, Pliers, Screw drivers
12 of 32 people
found this instruction helpful.
Was this instruction helpful to you?
Thank you for voting!
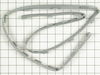
Dryer door seal broken
It was easy. Just removed the old seal and plugged the new one in place. Took less than 3 minutes
Parts Used:
-
Leo from Belle Chasse, LA
-
Difficulty Level:Really Easy
-
Total Repair Time:Less than 15 mins
3 of 5 people
found this instruction helpful.
Was this instruction helpful to you?
Thank you for voting!
belt broke
watched your video on 'how to' and did it like man showed..no problem
Parts Used:
-
Helen from WEST MONROE, LA
-
Difficulty Level:Really Easy
-
Total Repair Time:15 - 30 mins
-
Tools:Screw drivers, Socket set
2 of 2 people
found this instruction helpful.
Was this instruction helpful to you?
Thank you for voting!
Squealing
1.Removed retaining clips,washers,spacer,and cylinder rollers
2.Removed and replaced support assembly
3.Installed spacer
4.Installed cylinder roller assembly
5.Installed washers and retaining clips
This is my second time ordering parts from PartSelect and I am amazed how fast I recieve my orders, which minimizes the downtime of an appliance that's frequently used.
2.Removed and replaced support assembly
3.Installed spacer
4.Installed cylinder roller assembly
5.Installed washers and retaining clips
This is my second time ordering parts from PartSelect and I am amazed how fast I recieve my orders, which minimizes the downtime of an appliance that's frequently used.
Parts Used:
-
Allen from Dyer, IN
-
Difficulty Level:Easy
-
Total Repair Time:15 - 30 mins
-
Tools:Nutdriver, Screw drivers
2 of 2 people
found this instruction helpful.
Was this instruction helpful to you?
Thank you for voting!
Wish it would have told us that when the front was removed the dryer drum falls.
Had a problem holding drum in place and putting front back on. Got it together and drum wouldn't turn. Had to tear it a part again and belt had turned.
Parts Used:
-
Judy from MONTPELIER, OH
-
Difficulty Level:Really Easy
-
Total Repair Time:More than 2 hours
-
Tools:Nutdriver, Screw drivers
2 of 2 people
found this instruction helpful.
Was this instruction helpful to you?
Thank you for voting!
The lint filter was broken in half
I ordered this part to replace broken lint filter. Shipping estimate was 3-5 working days. I had the part 2 days after I ordered it!! I was very surprised and extremely pleased. If I need anymore appliance parts, I know exactly where to go!
Parts Used:

-
JANETTE from MIDDLESBORO, KY
-
Difficulty Level:Really Easy
-
Total Repair Time:Less than 15 mins
2 of 3 people
found this instruction helpful.
Was this instruction helpful to you?
Thank you for voting!
noise, shaking, from foreign object in the blower, from operating without the lint filter
Lint filter replacement is routine maintenance. operating without a filter causes problems, a dryer sheet was sucked thru the opening and into the blower wheel, causing a lot of noise, and shaking because of the unbalance. I popped the top of the machine up, removed two screw holding the front in place, removed the front, gaining access to blower.
Removed the offending sheet, straighted the bent fin, and put everything back together again. Installeed the new filter, now it runs smooth, and quiet. mission accomplished.
Removed the offending sheet, straighted the bent fin, and put everything back together again. Installeed the new filter, now it runs smooth, and quiet. mission accomplished.
Parts Used:
-
Charles from Gettysburg, PA
-
Difficulty Level:Really Easy
-
Total Repair Time:Less than 15 mins
-
Tools:Nutdriver, Screw drivers
2 of 3 people
found this instruction helpful.
Was this instruction helpful to you?
Thank you for voting!
replace door closer
Removed power and front panel, removed broken latch, pushed in new latch and replaced the front panel and power. Done
Parts Used:

-
Erwin from Somersworth, NH
-
Difficulty Level:Really Easy
-
Total Repair Time:Less than 15 mins
-
Tools:Screw drivers, Socket set, Wrench set
2 of 3 people
found this instruction helpful.
Was this instruction helpful to you?
Thank you for voting!
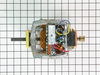
Motor making rattling noise
Released lid clips, two screws removed to remove the front. Took tension off of the belt by removing it from roller, then lifting tension spring from base. Removed drum to gain full access to motor. Lubricated rollers, vacuumed all areas to remove lint. Replaced motor and belt. Re-installed drum and re-attached tension spring, dryer face, and top. Works fantastic. Hard part was getting spring released and reattached due to location.
Parts Used:
-
Richard from Ames, IA
-
Difficulty Level:Easy
-
Total Repair Time:1- 2 hours
-
Tools:Nutdriver, Pliers, Screw drivers
3 of 6 people
found this instruction helpful.
Was this instruction helpful to you?
Thank you for voting!
Dead Dryer
Vacuum out the dryer vent & trap of all the tenant's sleeping bag stuffing, intall the new lint trap and Voila! It works again.
Parts Used:
-
evelyn from Brooklyn, NY
-
Difficulty Level:Really Easy
-
Total Repair Time:30 - 60 mins
2 of 3 people
found this instruction helpful.
Was this instruction helpful to you?
Thank you for voting!
Loud squeek coming from dryer when running
I took apart the dryer by unscrewing the top and the front, front comes off by just undoing the two top screws on the inside. I figured it was something to do with the rollers since the noise was ciclycal. The hardest part was to put the drive belt back on. It helps to have a second person for about 5 minutes.
Parts Used:
-
Tomasz from Hamtramck, MI
-
Difficulty Level:A Bit Difficult
-
Total Repair Time:1- 2 hours
-
Tools:Screw drivers, Socket set
2 of 3 people
found this instruction helpful.
Was this instruction helpful to you?
Thank you for voting!
Had to align tabs on the seal, which are differently spaced, with the holes in the dryer door.
-
Thomas from Dennisville, NJ
-
Difficulty Level:A Bit Difficult
-
Total Repair Time:15 - 30 mins
3 of 6 people
found this instruction helpful.
Was this instruction helpful to you?
Thank you for voting!