




















66575004103 Kenmore Range - Instructions
Keep searches simple. Use keywords, e.g. "leaking", "pump", "broken" or "fit".
The old panel becamed worped & the finish was distressed.
Took the old one out and replaced it with the new one, fits perfect.
Parts Used:


-
Mike from Chicago, IL
-
Difficulty Level:Really Easy
-
Total Repair Time:Less than 15 mins
-
Tools:Screw drivers
Was this instruction helpful to you?
Thank you for voting!
The old glide broke
Its was very easy, I unscrewed the old part and screwed on the new one and put the drawer back in place and it works perfect.
Parts Used:

-
Dave from Tampa, FL
-
Difficulty Level:Really Easy
-
Total Repair Time:Less than 15 mins
-
Tools:Screw drivers
Was this instruction helpful to you?
Thank you for voting!
When I originally purchased my stove, there was a large paper describing stove features. It was glued on and when I removed it, it left glue which I could not remove. I s hould have returned stove, but I didn't.
So, after several years of it bothering me, I decided to replace the oven panel. I ordered it one day and it arrived the very next day. It was an easy job to replace. Just remove two screws in back and replace the panel. While I was at it I also replaced the racks. Now I have a brand new oven,thanks to PartsSelect!
Parts Used:

-
Doris from Brookline, MA
-
Difficulty Level:Really Easy
-
Total Repair Time:Less than 15 mins
-
Tools:Screw drivers
Was this instruction helpful to you?
Thank you for voting!
E-2 F-3 codes..Oven inop w/trying to bake.Beeps @ start attempt.
Contrary to instructions(go thru front of oven) I had to pull out the range, remove two (2) screws from back chassis. At this point you pull out the connector, snap in new, reverse proceedure. Very simple. Hardest part is cleaning up debris generated by moving range.
Parts Used:
-
Dave from Titusville, FL
-
Difficulty Level:Really Easy
-
Total Repair Time:15 - 30 mins
-
Tools:Screw drivers
Was this instruction helpful to you?
Thank you for voting!
Oven would not ignite.
Removed the old burner and instlled the new one. It works great and I am a hero!
Parts Used:
-
David from Johnsburg, IL
-
Difficulty Level:Easy
-
Total Repair Time:15 - 30 mins
-
Tools:Screw drivers
Was this instruction helpful to you?
Thank you for voting!
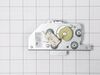
Could not get self cleaning oven to engage
Removed back of stove, 8 screws, removed original latch assembly and installed new assembly. One thing that can cause you difficulty is that the rod that connects the assembly to the front latch on the door can disconnect and has to be reconnected.[Problem]
Parts Used:
-
Charles from Fairfield Bay, AR
-
Difficulty Level:Really Easy
-
Total Repair Time:15 - 30 mins
-
Tools:Screw drivers
Was this instruction helpful to you?
Thank you for voting!
Oven Self Clean Would Not Function
Take off the back panel of stove and unplugged timer motor and switch on door latch assembly,removed two screws that hold assembly and slide rod off. I put 110 volt plug to timer motor and it did not move, that is how I diagnosed problem. Ordered new assembly (cannot buy just timer motor)put new door latch assembly on and worked fine. Of course unplug stove before you start !
Parts Used:
-
dennis from tonganoxie, KS
-
Difficulty Level:Really Easy
-
Total Repair Time:15 - 30 mins
-
Tools:Screw drivers
Was this instruction helpful to you?
Thank you for voting!
Light bulb failure
Received the part the day after ordering. Appreciated the quick service and repair took less than a minute.
Parts Used:

-
Grant from Alexandria, VA
-
Difficulty Level:Really Easy
-
Total Repair Time:Less than 15 mins
Was this instruction helpful to you?
Thank you for voting!