




















66561682102 Kenmore Microwave - Instructions
Keep searches simple. Use keywords, e.g. "leaking", "pump", "broken" or "fit".
Low power - Slow to heat
Replace Magnetron and then I the inverter unit after I discovered the unit still did not heat properly. Inverter had capacitor that was cracked and I found a diode that was flashing over the printed circuit board.
Parts Used:
-
Thomas from Winona Lake, IN
-
Difficulty Level:Really Easy
-
Total Repair Time:1- 2 hours
-
Tools:Screw drivers
13 of 45 people
found this instruction helpful.
Was this instruction helpful to you?
Thank you for voting!
The microwave door would not stay latched, so it wouldn't come on.
The repair was easy, I just took off a few screws and found the broken latch spring. The real story is how easy it was to find the replacement spring from Partselect! I couldn't believe they had it, and even better yet, I ordered it one afternoon, and it came the next day with normal shipping! Unbelievable! Then I just popped it in and replaced the covers I had removed and it was working again!
Parts Used:
-
George from Maceo, KY
-
Difficulty Level:Really Easy
-
Total Repair Time:Less than 15 mins
-
Tools:Pliers, Screw drivers
2 of 12 people
found this instruction helpful.
Was this instruction helpful to you?
Thank you for voting!
light bulbs nedd to repace it.

-
Jorge from Bay Point, CA
-
Difficulty Level:Really Easy
-
Total Repair Time:Less than 15 mins
-
Tools:Screw drivers
45 of 196 people
found this instruction helpful.
Was this instruction helpful to you?
Thank you for voting!
Broken plate
Took the replacement plate out of the box and put it in the microwave in seconds. I never realized how much of a difference having the correct microwave plate would make. It's great to have it back.
Parts Used:

-
JASON from ABSECON, NJ
-
Difficulty Level:Really Easy
-
Total Repair Time:Less than 15 mins
Was this instruction helpful to you?
Thank you for voting!
Light Burned Out
Followed the instruction booklet that came with the microwave. Very easy.
Parts Used:
-
Patti from Coarsegold, CA
-
Difficulty Level:Really Easy
-
Total Repair Time:Less than 15 mins
-
Tools:Screw drivers
Was this instruction helpful to you?
Thank you for voting!
left something in microwave too long and burned parts

-
Norman from Angier, NC
-
Difficulty Level:Really Easy
-
Total Repair Time:Less than 15 mins
Was this instruction helpful to you?
Thank you for voting!
Microwave turntable stopped rotating.
1. Unplug the power cord from the wall socket. 2. Remove the 10 screws holding the bottom cabinet cover in place. The bottom cabinet cover will swing down allowing acces to the inside ofe the microwave. 3. Remove the connector from the turntable motor. 4. Use a T15 Torx driver to remove the 2 Torx screws holding the motor in place. 5. Remove the motor. 6. Reverse the process using the new motor.
Parts Used:
-
Larrt from Minooka, IL
-
Difficulty Level:Easy
-
Total Repair Time:15 - 30 mins
-
Tools:Screw drivers
Was this instruction helpful to you?
Thank you for voting!
surface light on microwave wasnt' working
took the light assembly off and replaced the bulb and put the assembly together and fitted back in the space and finished the assembly.
Parts Used:
-
Dotty from Hillsboro, WI
-
Difficulty Level:A Bit Difficult
-
Total Repair Time:15 - 30 mins
-
Tools:Screw drivers
Was this instruction helpful to you?
Thank you for voting!
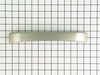
broken handle
first, unscrew two screwed nails from side of door. second, it came off from door body. third, i used a knife to detatch a little bit of sponge part near nail part. fourth, unscrew a nail and use new handle with nails back. Last put it back detatched door to main body with two screwed nails back.
Parts Used:
-
Jungyeon from Chapel Hill, NC
-
Difficulty Level:Really Easy
-
Total Repair Time:15 - 30 mins
-
Tools:Screw drivers
Was this instruction helpful to you?
Thank you for voting!
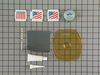
Microwave was making a grinding sound
Problem was easily diagnosed using the internet as a resource, problem was a bad stirrer motor. Hardest part of the repair was the removal of the microwave. Once off the wall, you remove the outer cover and a molded plastic casing directly underneath the outer cover at the top of hte microwave to expose the stirrer motor. Removed two screws and two wires and the old motor is out. Did exactly the opposite to install the new motor. The kit I recvd included among other things the motor, a new inside cover, plastic rivets and even silicone to seal the inside cover. I am sure I saved a couple hundred dollars by doing myself.
Parts Used:
-
William from Huntington Beach, CA
-
Difficulty Level:Easy
-
Total Repair Time:1- 2 hours
-
Tools:Pliers, Screw drivers
Was this instruction helpful to you?
Thank you for voting!
Door would not shut

-
joshua from las vegas, NV
-
Difficulty Level:A Bit Difficult
-
Total Repair Time:30 - 60 mins
-
Tools:Nutdriver, Screw drivers, Socket set, Wrench set
Was this instruction helpful to you?
Thank you for voting!
Replacement
-
George from Statham, GA
-
Difficulty Level:Really Easy
-
Total Repair Time:Less than 15 mins
Was this instruction helpful to you?
Thank you for voting!
The glass tray in the microwave got chipped while i was washing it and started to crack.
-
Amber from Loretto, PA
-
Difficulty Level:Really Easy
-
Total Repair Time:Less than 15 mins
Was this instruction helpful to you?
Thank you for voting!
rotating glass dish assembly making stange noise
The lady in the Nova Scotia call center should get all the credit for being able to identify the part I needed from only the very limited information I was able to give her. Employee of the month for her. She also had such a great can do attitude. Lawence Baier
Parts Used:
-
Lawrence from Excelsior, MN
-
Difficulty Level:Really Easy
-
Total Repair Time:Less than 15 mins
Was this instruction helpful to you?
Thank you for voting!
Broke a 15 year old glass cooking tray
Ordered the item on a Monday at 12pm and it arrived the next day. Amazing!
Parts Used:
-
Stephanie from La Jolla, CA
-
Difficulty Level:Really Easy
-
Total Repair Time:Less than 15 mins
Was this instruction helpful to you?
Thank you for voting!