




















66517159K217 Kenmore Dishwasher - Instructions
Keep searches simple. Use keywords, e.g. "leaking", "pump", "broken" or "fit".
Portable Dishwasher was leaking around connection to faucet.
Purchased and installed new faucet attachment. It arrived quickly and very easy to attach. Thank you !
Parts Used:

-
Mike from CASTLETON, NY
-
Difficulty Level:Very Easy
-
Total Repair Time:Less than 15 mins
3 of 4 people
found this instruction helpful.
Was this instruction helpful to you?
Thank you for voting!
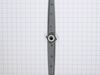
Middle spray arm would not turn
I broke it accidentally while trying to get it off and it would either not spin or fall off. I simply removed it out of the box and put it on. 2 turns to the right and I was done!
Parts Used:
-
Johanna from JOHNSON CITY, TN
-
Difficulty Level:Very Easy
-
Total Repair Time:Less than 15 mins
3 of 4 people
found this instruction helpful.
Was this instruction helpful to you?
Thank you for voting!
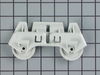
Tenant took parts with her after lease,
Just click in, you can basically do it with your eyes closed
Parts Used:

-
Roeland from MEDINA, WA
-
Difficulty Level:Very Easy
-
Total Repair Time:Less than 15 mins
3 of 5 people
found this instruction helpful.
Was this instruction helpful to you?
Thank you for voting!
top of spray arm separated from bottom causing not to hold pressure and spin
Pulled up old spray arm and snapped new on in place. Took less than a minute and no tools. Dishwasher is like new again.
Parts Used:

-
Ginger from DONIPHAN, NE
-
Difficulty Level:Very Easy
-
Total Repair Time:Less than 15 mins
3 of 5 people
found this instruction helpful.
Was this instruction helpful to you?
Thank you for voting!
No problem

-
Daniel from LAVALE, MD
-
Difficulty Level:Very Easy
-
Total Repair Time:Less than 15 mins
-
Tools:Screw drivers
2 of 2 people
found this instruction helpful.
Was this instruction helpful to you?
Thank you for voting!
Front Track stop missing
Snap new track stop into place. Took a few minutes to figure out top/bottom and inside/outside, but no issues
Parts Used:
-
Tim from GLADSTONE, MO
-
Difficulty Level:Very Easy
-
Total Repair Time:Less than 15 mins
2 of 2 people
found this instruction helpful.
Was this instruction helpful to you?
Thank you for voting!
Top rail stop clip broke
Very easy to remove the broken one and just clip in the new one.
Parts Used:
-
Ken from PEMBROKE PNES, FL
-
Difficulty Level:Very Easy
-
Total Repair Time:Less than 15 mins
-
Tools:Screw drivers
3 of 5 people
found this instruction helpful.
Was this instruction helpful to you?
Thank you for voting!
Model number issue
When we ordered the part the first time, we pulled the model number from the documentation instead of the machine. We got the wrong part the first time. The people at Parts Select were very knowledgeable and helpful when we called. After we pulled the model number from the machine, they sent the perfect part that popped in with no problems.
Parts Used:

-
Mary Ann from AUSTIN, TX
-
Difficulty Level:A Bit Difficult
-
Total Repair Time:Less than 15 mins
2 of 2 people
found this instruction helpful.
Was this instruction helpful to you?
Thank you for voting!
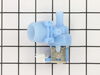
Dishwasher wasn’t getting water.
I located the water inlet valve underneath. After moving the dishwasher out from the cabinet, I tilted it . Then I disconnected the black hose with the pliers . Using the adjustable wrench I unscrewed the water feed to the valve . I then unscrewed the valve from the frame and disconnected the wire plug by unlocking and slipping it away from the valve. To install I did all this in reverse.
Parts Used:
-
Kevin from MILLBURY, MA
-
Difficulty Level:Easy
-
Total Repair Time:Less than 15 mins
-
Tools:Pliers, Screw drivers, Wrench (Adjustable)
2 of 2 people
found this instruction helpful.
Was this instruction helpful to you?
Thank you for voting!
Poor to no cleaning lower basket
lower wash arm cracked by spinning into items hanging out of bottom of basket. part twists and snaps right in. glue did not fix.
Parts Used:
-
jeffrey from HOUSTON, TX
-
Difficulty Level:Really Easy
-
Total Repair Time:Less than 15 mins
2 of 2 people
found this instruction helpful.
Was this instruction helpful to you?
Thank you for voting!
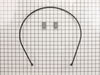
Dishwasher would not start & green "Clean" light was flashing
After reading customer notes regarding the same problem I was having I ordered A new Heater Element & a High Limit Thermostat. I also ordered a Heating Element Nut and Rubber Washer in case I needed them. It took me quite some time to remove the dishwasher from under my counter. Once the unit was out and prepared to service it actually took only a few minutes to install the new Heater Element. I did't need the washer or extra Nut. I also decided to try the unit without replacing the thermostat. I cleared the diagnostics by pressing the "HEATED DRY, "NORMAL", "HEATED DRY", "NORMAL" buttons. After the controller reset the dishwasher was ready to run.
Parts Used:
-
DAVID from MILWAUKEE, WI
-
Difficulty Level:A Bit Difficult
-
Total Repair Time:30 - 60 mins
-
Tools:Screw drivers, Wrench (Adjustable)
2 of 2 people
found this instruction helpful.
Was this instruction helpful to you?
Thank you for voting!
Door is designed to stay in place when opened. Door should hold partial or fully open.
Unscrewed brackets from underneath counter that hold dishwasher in place. Pulled dishwasher out of cabinet to access door hinges (approximately 8 to 12 inches). Released springs from door hinge (not necessary to remove spring from hole in dishwasher frame). Did not have to remove old sleeve because they tear and fall off. Slipped sleeve over door hinge to groove where they sit on hinge. Note: pulling hinge away from dishwasher a little. helps to complete installation.
Reinstall spring over hinge and check that door will stay a partial open. Slide dishwasher back in place and install screws from bracket to underside of counter.
My dishwasher only had two screws under counter to hold in place. Some installations have screws at sides also.
Reinstall spring over hinge and check that door will stay a partial open. Slide dishwasher back in place and install screws from bracket to underside of counter.
My dishwasher only had two screws under counter to hold in place. Some installations have screws at sides also.
Parts Used:

-
Michael from Southbury, CT
-
Difficulty Level:Easy
-
Total Repair Time:15 - 30 mins
-
Tools:Screw drivers
2 of 2 people
found this instruction helpful.
Was this instruction helpful to you?
Thank you for voting!
element not working
laid dishwasher on its side and unscrewed element. returned unit upright & replaced element. reversed process and reinstalled unit under cabinet
Parts Used:
-
Michael from Springhill, FL
-
Difficulty Level:Easy
-
Total Repair Time:30 - 60 mins
-
Tools:Pliers
2 of 2 people
found this instruction helpful.
Was this instruction helpful to you?
Thank you for voting!
Element was no longer working. Dishes were not drying.
Watched a video and seen how easy it was to repair. Just disconnect the power, water and return drain. two bolts and replace element . The difficult part was removing and replacing the dishwasher...piece of cake.
Parts Used:
-
David from DEVINE, TX
-
Difficulty Level:Easy
-
Total Repair Time:30 - 60 mins
-
Tools:Pliers, Wrench (Adjustable)
2 of 2 people
found this instruction helpful.
Was this instruction helpful to you?
Thank you for voting!
would not shut off.
easy the sensor was on the right side, and easy to get to, I turn off the power, turned off the water, and pulled it out, the first thing I saw was the yellow wires and plug. took about 5 minutes, to replace it.
Parts Used:
-
Melvin from SACRAMENTO, KY
-
Difficulty Level:Really Easy
-
Total Repair Time:30 - 60 mins
2 of 2 people
found this instruction helpful.
Was this instruction helpful to you?
Thank you for voting!