




















66512773K314 Kenmore Dishwasher - Instructions
Keep searches simple. Use keywords, e.g. "leaking", "pump", "broken" or "fit".
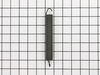
Door spring broke-Door falls down
Remove the mounting screws that hold the dishwasher under the counter top. Remove dust cover plates at the bottom of the machine. The machine will have to be pulled out, so turn off the water to the machine. Usually under the kitchen sink. Disconnect water supply and push it out of the way so the dishwasher can be pulled out. Pull machine out enough so you have access to the door cables and springs. The door will have to be in the closed(up) position to do the repair. Usually only one side is broken. Start with the broken side and copy the working side when installing new parts. Then repair the working side. To get the working side apart just pull on the spring and disconnect it from the cable. Do the reverse to reinstall.
Parts Used:
-
Peter from JERICHO, NY
-
Difficulty Level:Easy
-
Total Repair Time:15 - 30 mins
-
Tools:Screw drivers, Socket set, Wrench (Adjustable)
6 of 8 people
found this instruction helpful.
Was this instruction helpful to you?
Thank you for voting!
Broken Mounting bracket

-
Roy from HIGGINSVILLE, MO
-
Difficulty Level:Really Easy
-
Total Repair Time:15 - 30 mins
-
Tools:Screw drivers
8 of 14 people
found this instruction helpful.
Was this instruction helpful to you?
Thank you for voting!
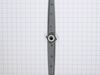
replace middle spray arm and water srayer
remove 2 locks on metal roller guides. remove top basket. turn upside down on counter.remove spray arm by pryng one side in and lift out then push other side down and the out. install same as removal. line spray arm and turn clockwise til you hear a click.install basket and install locking plugs.
Parts Used:
-
robert from INDIANOLA, IA
-
Difficulty Level:Really Easy
-
Total Repair Time:15 - 30 mins
-
Tools:Screw drivers
6 of 8 people
found this instruction helpful.
Was this instruction helpful to you?
Thank you for voting!
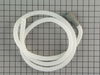
Drain hose broken.
Removed the old hose, after loosing metal looking rings. Installed new hose ad finally tight firmly the looking rings, using wrench and socket.
Parts Used:
-
Giorgio from Savannah, GA
-
Difficulty Level:Easy
-
Total Repair Time:15 - 30 mins
-
Tools:Screw drivers, Socket set, Wrench set
8 of 14 people
found this instruction helpful.
Was this instruction helpful to you?
Thank you for voting!
One of the old stops broke

-
Dwight from KENT, WA
-
Difficulty Level:Very Easy
-
Total Repair Time:Less than 15 mins
6 of 8 people
found this instruction helpful.
Was this instruction helpful to you?
Thank you for voting!
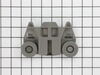
A wheel on one of the bottom rollers was falling off
I give you a 5-Star customer review.
When the button holding one of the rollers in place fell off, I was lost, didn't know what to do. Then I found you online and called, there was virtually no waiting time on hold, and a very helpful representative quickly found the correct part and ordered it for me. It arrived in only 2 days! Removing the old roller assembly with a screwdriver was a easy, it took 2 seconds. Snapping the new one into place was more difficult -- it took me about 5 minutes to figure out how to do it, and an instruction diagram would have been helpful, but that was a minor inconvenience.
I cannot thank you enough. Excellent service! Definitely 5-Stars!
When the button holding one of the rollers in place fell off, I was lost, didn't know what to do. Then I found you online and called, there was virtually no waiting time on hold, and a very helpful representative quickly found the correct part and ordered it for me. It arrived in only 2 days! Removing the old roller assembly with a screwdriver was a easy, it took 2 seconds. Snapping the new one into place was more difficult -- it took me about 5 minutes to figure out how to do it, and an instruction diagram would have been helpful, but that was a minor inconvenience.
I cannot thank you enough. Excellent service! Definitely 5-Stars!
Parts Used:
-
Joel from NEW YORK, NY
-
Difficulty Level:Really Easy
-
Total Repair Time:Less than 15 mins
-
Tools:Screw drivers
5 of 5 people
found this instruction helpful.
Was this instruction helpful to you?
Thank you for voting!
New filter
Ordering the part was very easy. It shipped fast and delivered over 3 days. It fit perfectly
Parts Used:
-
John from SAINT CHARLES, MO
-
Difficulty Level:Very Easy
-
Total Repair Time:Less than 15 mins
6 of 8 people
found this instruction helpful.
Was this instruction helpful to you?
Thank you for voting!
Tines had rusted off.
Removed old tine rows and replaced with the new parts. No tools were needed. Each was replaced one at a time so the old ones could serve as a model for how the new ones were inserted and attached. Not much more complicated than changing a light bulb. Parts appear to be good original equipment quality but quite pricy for these very simple pieces.
Parts Used:
-
Frank from RED WING, MN
-
Difficulty Level:Really Easy
-
Total Repair Time:Less than 15 mins
5 of 5 people
found this instruction helpful.
Was this instruction helpful to you?
Thank you for voting!
Leaking around door
Pulled off old seal found center of new seal and pushed new seal into channel that old seal came out of starting at top middle underneath the latch
Parts Used:
-
Dean from CHAPEL HILL, TN
-
Difficulty Level:Very Easy
-
Total Repair Time:Less than 15 mins
5 of 6 people
found this instruction helpful.
Was this instruction helpful to you?
Thank you for voting!
Rollers broke off top rack assembly
Replacement parts from factory installed using u tube support video
Also replaced stop ends for top rack by removing old clip in to push down and lined up to secure in slots at end of rack, notice new plastic parts are installed by pushing hardware into slots downward until they clip into place
Also replaced stop ends for top rack by removing old clip in to push down and lined up to secure in slots at end of rack, notice new plastic parts are installed by pushing hardware into slots downward until they clip into place
Parts Used:
-
Mark from WESTERVILLE, OH
-
Difficulty Level:Really Easy
-
Total Repair Time:Less than 15 mins
-
Tools:Screw drivers
5 of 6 people
found this instruction helpful.
Was this instruction helpful to you?
Thank you for voting!
water leak during wash cycle
-
Jim from NAUGATUCK, CT
-
Difficulty Level:Very Easy
-
Total Repair Time:Less than 15 mins
5 of 6 people
found this instruction helpful.
Was this instruction helpful to you?
Thank you for voting!
water fill overflows at times
thought it could be due to the overfill control switch,so ordered one and replaced one in the washer. However, it did not solve the problem. Having a repair company coming to look at the dishwasher. Tipped the washer on its back and switch was readily accessable. Only had to open plastic covering over the switch, disconnect the wires and install new switch and reconnect the wires.
Parts Used:

-
Dennis from AUBURNDALE, WI
-
Difficulty Level:Really Easy
-
Total Repair Time:15 - 30 mins
7 of 12 people
found this instruction helpful.
Was this instruction helpful to you?
Thank you for voting!
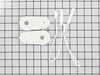
Factory crimped end of link cord pulled out of plastic fastner that hooks on door.
Removed 2 screws that fasten dishwasher to underside of countertop. Pulled dishwasher out from under the countertop for access to sides. Hooked link on door, threaded cord around 2 wheels, hooked spring to back of dishwasher, stretched spring and hooked to eye on end of link cord. I found it very difficult to hook spring to link then try and stretch spring to hole at back of dishwasher. Easier to pull spring and link towards each other and connect. Note: This link was actually different from the original. The plastic end that connects to the door actually hits the first wheel when door is closed but it doesn't seem to prevent the door from locking properly (old design was better). However, I shaved this plastic end to provide better clearance.
Parts Used:
-
Scott from Miami, FL
-
Difficulty Level:Easy
-
Total Repair Time:15 - 30 mins
-
Tools:Screw drivers
6 of 9 people
found this instruction helpful.
Was this instruction helpful to you?
Thank you for voting!
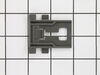
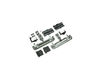
upper rack support broke
parts were an exact fix to my problem the on line video was perfect repair was done in under 30 min
thanks
keith
bluffdale, utah
thanks
keith
bluffdale, utah
Parts Used:
-
keith from BLUFFDALE, UT
-
Difficulty Level:Really Easy
-
Total Repair Time:15 - 30 mins
-
Tools:Pliers, Screw drivers
6 of 9 people
found this instruction helpful.
Was this instruction helpful to you?
Thank you for voting!
Upper rack side roller was broken and the middle Spray Arm wobbed and would strike the plates on lower rack and then would not turn.
After watching the repair videos, the repair looked simple enough so I called to order the parts. The lady that answered was very knowledgeable and advised me that I would need to order a manifold also. When the parts arrived I compared the parts I received to the parts to be replaced on the dishwasher. The parts did not look like mine. Having faith I proceed to disassemble my dishwasher. This was the longest part of the repair because mine did not look like the videos I had watched. I figured it out and within 15-20 minutes I was finished. I also wasted time looking for the right size Torx diver to place a couple of screws. Had I looked closely at a black screw that was still in the parts bag I would have seen that it was not a screw - It was a Phillips #2 to Torx driver and could have just used a Phillips screw driver. Yes, I laughed at myself. Dishwasher works great.
Parts Used:
-
MAXWELL from Dickinson, TX
-
Difficulty Level:Really Easy
-
Total Repair Time:15 - 30 mins
-
Tools:Screw drivers
6 of 9 people
found this instruction helpful.
Was this instruction helpful to you?
Thank you for voting!