




















66495272502 Kenmore Range - Instructions
Keep searches simple. Use keywords, e.g. "leaking", "pump", "broken" or "fit".
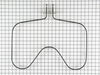
baking element non operational
removed two screws to faceplate at rear of oven. Disconntected contact wires, installed bake element reconnected contact wires, attached faceplate turned on oven holy hell it works just saved some money on service call thanks!!!
Parts Used:
-
GARY from JACKSON, WY
-
Difficulty Level:Really Easy
-
Total Repair Time:Less than 15 mins
-
Tools:Screw drivers
1 person
found this instruction helpful.
Was this instruction helpful to you?
Thank you for voting!
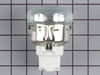
Worn/Bulb Socket
It was alittle difficult at 1st to remove the clips that held in the socket. But once out everything went smoothly.
Parts Used:
-
JOSEPH from COON RAPIDS, MN
-
Difficulty Level:Really Easy
-
Total Repair Time:Less than 15 mins
-
Tools:Screw drivers
2 of 4 people
found this instruction helpful.
Was this instruction helpful to you?
Thank you for voting!
bake element out
use needle nose pliers to disconnect the element from the power supply. After disconnecting it was easy to repair.
Parts Used:
-
Joyce from BALLWIN, MO
-
Difficulty Level:Really Easy
-
Total Repair Time:30 - 60 mins
1 person
found this instruction helpful.
Was this instruction helpful to you?
Thank you for voting!
range would not heat right
-
bobby from HERSCHER, IL
-
Difficulty Level:Really Easy
-
Total Repair Time:30 - 60 mins
-
Tools:Screw drivers
1 person
found this instruction helpful.
Was this instruction helpful to you?
Thank you for voting!
Bake element died
Followed instructions on urine that you provided. Instructions were great.
Only problem had was the screw was hard to get loose on one due to oven usage from previous people but I got it after a bit and then fairly simple from there. Unplugged and plugged new element in. Works although seems to run a bit hotter than before.
Only problem had was the screw was hard to get loose on one due to oven usage from previous people but I got it after a bit and then fairly simple from there. Unplugged and plugged new element in. Works although seems to run a bit hotter than before.
Parts Used:
-
Jill from LYNNWOOD, WA
-
Difficulty Level:Easy
-
Total Repair Time:30 - 60 mins
-
Tools:Screw drivers
1 person
found this instruction helpful.
Was this instruction helpful to you?
Thank you for voting!
electrical short from oven light.
I trouble shot and traced out to electrical short in face panel and found burnt wires. I've been a licensed electrician for years and it takes alot of comon sense to trouble shoot and find problem. I found schetch-matic of appliance and searched computor and found partselect.com and tried it. It wasnt no time and the part was at my door. Thank you partselect and i would use them again in the future. billy
Parts Used:
-
William H. from morehead city, NC
-
Difficulty Level:A Bit Difficult
-
Total Repair Time:1- 2 hours
-
Tools:Nutdriver, Pliers, Screw drivers
2 of 4 people
found this instruction helpful.
Was this instruction helpful to you?
Thank you for voting!
Replacing oven light and socket
The old part, including lightbulb and socket, had corroded into place, and the glass light cover was stuck to the socket. I used a dead blow hammer and a dowel just under the diameter of the hole to tap on the back side of the socket to loosen it and get it out. The metal tabs on the old socket were folded back to make it fit better (?), which made it harder to remove. Lots of muscling of the part to get it out. Easy to install new part once old one was out of the way. An experienced person would have removed the old part and installed the new in no time.
Parts Used:
-
Carol from BELLINGHAM, WA
-
Difficulty Level:A Bit Difficult
-
Total Repair Time:1- 2 hours
-
Tools:Pliers, Screw drivers, Wrench (Adjustable)
1 person
found this instruction helpful.
Was this instruction helpful to you?
Thank you for voting!
Oven temperature was 50 degrees off
Unplugged stove.
Pulled stove out.
Unscrewed screws and removed cover.
Removed & replaced sensor.
Reinstalled cover & screws.
Plugged in stove and pushed back in.
Only problem was when I pulled stove out, lid opened and disconnected the gas line to a burner.
Pulled stove out.
Unscrewed screws and removed cover.
Removed & replaced sensor.
Reinstalled cover & screws.
Plugged in stove and pushed back in.
Only problem was when I pulled stove out, lid opened and disconnected the gas line to a burner.
Parts Used:
-
Gregory from BRIDGEBORO, GA
-
Difficulty Level:A Bit Difficult
-
Total Repair Time:30 - 60 mins
-
Tools:Screw drivers
1 of 2 people
found this instruction helpful.
Was this instruction helpful to you?
Thank you for voting!
Glass Door Broken
Removed 3 screws holding the glass door bracket.
Placed glass into door holders, had another person hold glass while I replaced the removable bracket screws.
Placed glass into door holders, had another person hold glass while I replaced the removable bracket screws.
Parts Used:

-
Myron from Punta Gorda, FL
-
Difficulty Level:Easy
-
Total Repair Time:15 - 30 mins
-
Tools:Screw drivers
3 of 8 people
found this instruction helpful.
Was this instruction helpful to you?
Thank you for voting!
cleaner
just needed clearner for the top of my glass top, the operator was very helpful I received my clearniner in 7 days thank you
Parts Used:

-
Mary from Duarte, CA
-
Difficulty Level:Really Easy
-
Total Repair Time:Less than 15 mins
2 of 5 people
found this instruction helpful.
Was this instruction helpful to you?
Thank you for voting!
Light would not light
-
Frank from LEBANON, VA
-
Difficulty Level:Easy
-
Total Repair Time:15 - 30 mins
-
Tools:Pliers
1 of 2 people
found this instruction helpful.
Was this instruction helpful to you?
Thank you for voting!
oven light not working
replaced light socket but did not repair problem. must have burned the motherboard.
pleased with service from your company.
pleased with service from your company.
Parts Used:
-
Richard from Gaylord, MI
-
Difficulty Level:A Bit Difficult
-
Total Repair Time:30 - 60 mins
-
Tools:Nutdriver, Screw drivers
2 of 6 people
found this instruction helpful.
Was this instruction helpful to you?
Thank you for voting!
range handle fell off and screw got lost
It was worth the money for that little screw, since I didn't have to run all over trying to find the right one.
Parts Used:

-
Frances from palm beach gardens, FL
-
Difficulty Level:Really Easy
-
Total Repair Time:15 - 30 mins
-
Tools:Screw drivers
1 of 4 people
found this instruction helpful.
Was this instruction helpful to you?
Thank you for voting!
Inside Light would not work
Turned off CB for the oven,Remove the oven from the cabinet , remove the back of the oven, replaced the light Assembly. turned on CB for the oven, tested the light. and truned off the CB and replace the back and reinstalled the oven in the cabinet.
Parts Used:
-
Dan from Caddo Mills, TX
-
Difficulty Level:Really Easy
-
Total Repair Time:15 - 30 mins
-
Tools:Nutdriver
2 of 7 people
found this instruction helpful.
Was this instruction helpful to you?
Thank you for voting!
Trim piece on the botom of the oven was chipped in three places
I used the allen wrenches to block the hinges, removed the oven door and used the kitchen counter for a work station. I removed the trim piece at the bottom which released the side trim and oven glass front, and then reversed the procedure. It took more time to clean things than to do the exchange. My only issue is with Fed Ex who delived the first trim piece bent in the middle inside a crushed box. Part Select had another part sent the same day after I called them.
Parts Used:

-
Terry from Maple Valley, WA
-
Difficulty Level:Easy
-
Total Repair Time:30 - 60 mins
-
Tools:Screw drivers
0 of 1 people
found this instruction helpful.
Was this instruction helpful to you?
Thank you for voting!