




















66475274502 Kenmore Range - Instructions
Keep searches simple. Use keywords, e.g. "leaking", "pump", "broken" or "fit".
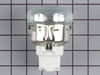
Inside Light would not work
Turned off CB for the oven,Remove the oven from the cabinet , remove the back of the oven, replaced the light Assembly. turned on CB for the oven, tested the light. and truned off the CB and replace the back and reinstalled the oven in the cabinet.
Parts Used:
-
Dan from Caddo Mills, TX
-
Difficulty Level:Really Easy
-
Total Repair Time:15 - 30 mins
-
Tools:Nutdriver
2 of 7 people
found this instruction helpful.
Was this instruction helpful to you?
Thank you for voting!
range handle fell off and screw got lost
It was worth the money for that little screw, since I didn't have to run all over trying to find the right one.
Parts Used:

-
Frances from palm beach gardens, FL
-
Difficulty Level:Really Easy
-
Total Repair Time:15 - 30 mins
-
Tools:Screw drivers
1 of 4 people
found this instruction helpful.
Was this instruction helpful to you?
Thank you for voting!
Trim piece on the botom of the oven was chipped in three places
I used the allen wrenches to block the hinges, removed the oven door and used the kitchen counter for a work station. I removed the trim piece at the bottom which released the side trim and oven glass front, and then reversed the procedure. It took more time to clean things than to do the exchange. My only issue is with Fed Ex who delived the first trim piece bent in the middle inside a crushed box. Part Select had another part sent the same day after I called them.
Parts Used:

-
Terry from Maple Valley, WA
-
Difficulty Level:Easy
-
Total Repair Time:30 - 60 mins
-
Tools:Screw drivers
0 of 1 people
found this instruction helpful.
Was this instruction helpful to you?
Thank you for voting!
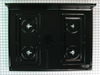
Install New Cooktop
We needed a repair man to do the job because we did not have the tool to remove the screws on the burner heads. Also the on line diagram was not accurate. It actually was much simpler than showed in the diagram. Had we done the job, we would have done a lot of dismantling. The repair man removed the old top in a flash and the whole job took about 40 minutes. He knew what he was doing. Detailed instructions should come with the part so the do-it-yourselfer could figure out how to do the job.
Parts Used:
-
Priscilla J from North Falmouth, MA
-
Difficulty Level:A Bit Difficult
-
Total Repair Time:30 - 60 mins
0 of 1 people
found this instruction helpful.
Was this instruction helpful to you?
Thank you for voting!
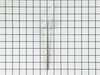
Oven gets too hot,if set at 350 it heats to 550. Changed the sensor and was not the problem.
Took off the screws on the back of the stove and took out the sensor, and put in the new one.
Parts Used:
-
Joanne from Negaunee, MI
-
Difficulty Level:Really Easy
-
Total Repair Time:Less than 15 mins
-
Tools:Screw drivers
0 of 2 people
found this instruction helpful.
Was this instruction helpful to you?
Thank you for voting!
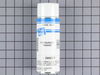
Both outside door handles turned very beige
Everything worked perfectly---thanks to the suggestion of your call center agent. She suggested that since the replacement door handles were no longer available, I should consider repainting them--it worked like a charm. Please tell her she was a life saver. We rent that house in Fl and my returning tenants had complained about the discoloring refer handles. Thank you
Parts Used:
-
Howard from Boynton Beach, FL
-
Difficulty Level:Easy
-
Total Repair Time:30 - 60 mins
-
Tools:Nutdriver
23 of 72 people
found this instruction helpful.
Was this instruction helpful to you?
Thank you for voting!
I broke the glass by hitting it with the edge of a broom
Clean off all broken glass and wipe down the debree,figure what side the glass goes then unscewed the base then the sides then add gorrilla glue on the edges to help set the glass in place had some hold it the screw th center bottom in first then got the sides in place with the bottom rack then screw it all back in to place making sure the side and top were in place right that was it.
Parts Used:

-
Bernice from Phoenix, AZ
-
Difficulty Level:A Bit Difficult
-
Total Repair Time:30 - 60 mins
-
Tools:Screw drivers
Was this instruction helpful to you?
Thank you for voting!
Broke front glass of oven while moving
Looks better than the old one wes and so easy to do. Thanks.
Parts Used:

-
melody from springhill, FL
-
Difficulty Level:Easy
-
Total Repair Time:15 - 30 mins
-
Tools:Screw drivers
Was this instruction helpful to you?
Thank you for voting!
Glass door front fell out during cleaning and shattered
Install bottom door trim first...Remove upper door handle and set new glass door front piece in place and re install upper door handle and tighten all screws...Looks great
Parts Used:

-
Dennis from Ft Myers, FL
-
Difficulty Level:Easy
-
Total Repair Time:15 - 30 mins
-
Tools:Screw drivers
Was this instruction helpful to you?
Thank you for voting!
broken outer range door glass
Using 4 strips of duct tape was useful,in holding the glass to the door.
Parts Used:
-
Thaddeus from Washington, DC
-
Difficulty Level:Difficult
-
Total Repair Time:15 - 30 mins
-
Tools:Screw drivers
Was this instruction helpful to you?
Thank you for voting!
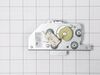
Could not get self cleaning oven to engage
Removed back of stove, 8 screws, removed original latch assembly and installed new assembly. One thing that can cause you difficulty is that the rod that connects the assembly to the front latch on the door can disconnect and has to be reconnected.[Problem]
Parts Used:
-
Charles from Fairfield Bay, AR
-
Difficulty Level:Really Easy
-
Total Repair Time:15 - 30 mins
-
Tools:Screw drivers
Was this instruction helpful to you?
Thank you for voting!
E-2 F-3 codes..Oven inop w/trying to bake.Beeps @ start attempt.
Contrary to instructions(go thru front of oven) I had to pull out the range, remove two (2) screws from back chassis. At this point you pull out the connector, snap in new, reverse proceedure. Very simple. Hardest part is cleaning up debris generated by moving range.
Parts Used:
-
Dave from Titusville, FL
-
Difficulty Level:Really Easy
-
Total Repair Time:15 - 30 mins
-
Tools:Screw drivers
Was this instruction helpful to you?
Thank you for voting!
Side trim broke
take the 2 screws that hold the handle on out...watch the glass front and the side trims because the handle holds them on. Take the glass out then remove the side trims. Replace the side trims holding the glass in place with 2 pieces of masking tape om each side then install the handle with the 2 screws and remove the masking tape.
Parts Used:

-
Paul from Adamsville, TN
-
Difficulty Level:Easy
-
Total Repair Time:15 - 30 mins
-
Tools:Screw drivers
Was this instruction helpful to you?
Thank you for voting!
Gas range would not go into self cleaning mode. When pushing the self clean button, would get three beeps!
The malfunction was narrowed down to the oven door motor lock, located at the upper left back of the unit. Removed two panels from the back of the unit, 8 screws. Then the motor, 2 screws, 4 wire connectors. Reversed the procedure for the installation, and solved the problem. About 30=35 minutes for the job. If your handy at all, it should not be a problem.
Parts Used:
-
Lee from Saint James, NY
-
Difficulty Level:Easy
-
Total Repair Time:15 - 30 mins
-
Tools:Pliers, Screw drivers
Was this instruction helpful to you?
Thank you for voting!
Oven has not heat
Open oven door and remove racks. Remove 2 screws at back of oven floor and remove bottom plate. Unscrew screws that hold flame defuser. Remove defuser. Remove screws that hold bake igniter and flame tube. Unplug wire to bake igniter. Remove screws to bake igniter. Replace old igniter with new igniter. Replace screws and wire to igniter. Replace flame defuser and put screws back. Put bottom plate back into oven. Replace 2 screws at back. Replace racks. close door and test by setting thermostat to some temperature and verify that oven works.
Parts Used:

-
Gregory from Arlington, VA
-
Difficulty Level:Really Easy
-
Total Repair Time:Less than 15 mins
-
Tools:Screw drivers
Was this instruction helpful to you?
Thank you for voting!