




















62960002601 Kenmore Range - Instructions
Keep searches simple. Use keywords, e.g. "leaking", "pump", "broken" or "fit".
LOWER OVEN HAD A CRACK IN THE ELEMENT
FOLLOWED INSTRUCTIONS AND READ THE HINTS FROM OTHER CONSUMERS. IT WAS VERY EASY.
Parts Used:

-
Celeste from SAINT LOUIS, MO
-
Difficulty Level:Really Easy
-
Total Repair Time:Less than 15 mins
-
Tools:Pliers, Screw drivers
1 person
found this instruction helpful.
Was this instruction helpful to you?
Thank you for voting!
replace lower element oven
once i got down and in the oven ( Im 74) that was the hard part all the rest was 10minutes and very easy ....... turnoff the breaker or unplug the unit
Parts Used:
-
Edward from NORTH PORT, FL
-
Difficulty Level:Really Easy
-
Total Repair Time:Less than 15 mins
-
Tools:Screw drivers
1 person
found this instruction helpful.
Was this instruction helpful to you?
Thank you for voting!
No heat from bottom element
First I disconnected the power! unscrewed the two screws holding element in place disconnected the wire clips from ends of element (be sure to hold them so they don't "retract" into the body of the oven) Connect the wire clips onto the new element and replace into original location and replace the screws. Turn power back on and start cooking again!
Parts Used:
-
Douglas from WILMINGTON, NC
-
Difficulty Level:Really Easy
-
Total Repair Time:Less than 15 mins
-
Tools:Screw drivers
1 person
found this instruction helpful.
Was this instruction helpful to you?
Thank you for voting!
Element Wouldn't Heat
I removed the two screws that hold the element in place, moved it out to expose connecting wires, then removed wires and put in new element.
Parts Used:
-
Lawrence from Lakeport, CA
-
Difficulty Level:Really Easy
-
Total Repair Time:Less than 15 mins
-
Tools:Screw drivers
1 person
found this instruction helpful.
Was this instruction helpful to you?
Thank you for voting!
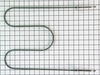
top broiler element burned out
I took the old one out and put the new one in. Even a woman could do it.
Parts Used:
-
James from Buzzards Bay, MA
-
Difficulty Level:Really Easy
-
Total Repair Time:Less than 15 mins
-
Tools:Screw drivers
2 of 4 people
found this instruction helpful.
Was this instruction helpful to you?
Thank you for voting!
My original back leg broke because the floor is uneven. Had to pull it out several times.
Put the back of stove on blocks of wood to get high enough to screw the new leg in.
Parts Used:

-
Phyllis from BROWNVILLE, NY
-
Difficulty Level:Really Easy
-
Total Repair Time:Less than 15 mins
-
Tools:Wrench (Adjustable)
1 person
found this instruction helpful.
Was this instruction helpful to you?
Thank you for voting!
Broil element. Tunes out while using it on Oven Cleaning cycle
Turned off circuit breaker. Unscrewed old element holders from inside broiler - 4 screws. Pulled old element out to expose slip on wire connection at end. R&R with the new one. Screwed assembly back in. Turned on CB and tested. Good to go.
Parts Used:
-
Christopher from FALLS CHURCH, VA
-
Difficulty Level:Really Easy
-
Total Repair Time:15 - 30 mins
-
Tools:Pliers, Screw drivers
1 person
found this instruction helpful.
Was this instruction helpful to you?
Thank you for voting!
"F3" error message and no oven heat
Unplugged the range, removed screws holding the old sensor. When I pulled it out, the wire connecting to the sensor was completely broken through,therefore I could not just pull the wire to get to the connector. Unscrewed one side of back panel to access the connector. Pushed the connector and wire of the new sensor through the hole ( and behind the insulation), disconnected the old sensor and connected the new one. Re screwed the new connector in place plus rescrewed the back panel. Plugged the range in and - Viola! Everything now works like a charm and I have my oven back. Easy-Peasy. Oh - I am an older female with very limited DYI experience. I just saved myself $650.00!
Parts Used:

-
Pat from PAYSON, AZ
-
Difficulty Level:Very Easy
-
Total Repair Time:15 - 30 mins
-
Tools:Screw drivers
1 person
found this instruction helpful.
Was this instruction helpful to you?
Thank you for voting!
Oven door was locked, couldn't set oven temps
Got a bent metal coathook to temporarily release the oven door, removed the screws from the old probe, inserted the new one, and hooked it up, using the one of the plug adapters provided. Problem solved! The oven door latch was now disengaged, the oven would now accept temperature inputs, and the rear cooling fan (which wouldn't shut off) now turned off. That's a lot of things working better for less than $50!
Parts Used:
-
William from Nashville, TN
-
Difficulty Level:Easy
-
Total Repair Time:15 - 30 mins
-
Tools:Screw drivers
1 person
found this instruction helpful.
Was this instruction helpful to you?
Thank you for voting!
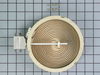
Coil shorted out.
Removed cooktop, wiring and coil. Marked where wires went on limiter
tabs. Ordered coil 1200 Watt, received a 1500 one. Sent back to PS with prepaid shipping label {great}. New one had a different limiter tab arrangement. The instructions included warned this but doesn't tell you where to put the wiring. Instructions say to remove the old limiter and put it on the new coil but this can not be physically be done plus who would want an old limiter on a new coil.
Found a YOU TUBE video on how to test and place wires on limiter switches which shows the number letter sequence on the ceramic part. Maybe PS will put that info in their instructions. Coil works great !!
tabs. Ordered coil 1200 Watt, received a 1500 one. Sent back to PS with prepaid shipping label {great}. New one had a different limiter tab arrangement. The instructions included warned this but doesn't tell you where to put the wiring. Instructions say to remove the old limiter and put it on the new coil but this can not be physically be done plus who would want an old limiter on a new coil.
Found a YOU TUBE video on how to test and place wires on limiter switches which shows the number letter sequence on the ceramic part. Maybe PS will put that info in their instructions. Coil works great !!
Parts Used:
-
James from HILTON, NY
-
Difficulty Level:A Bit Difficult
-
Total Repair Time:15 - 30 mins
-
Tools:Nutdriver, Pliers
1 person
found this instruction helpful.
Was this instruction helpful to you?
Thank you for voting!
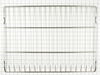
Original rack had melted plastic on it.
-
Linda from BURBANK, CA
-
Difficulty Level:Really Easy
-
Total Repair Time:Less than 15 mins
1 person
found this instruction helpful.
Was this instruction helpful to you?
Thank you for voting!
The heating element broke
-
Stephanie from PFLUGERVILLE, TX
-
Difficulty Level:Very Easy
-
Total Repair Time:Less than 15 mins
-
Tools:Screw drivers
1 person
found this instruction helpful.
Was this instruction helpful to you?
Thank you for voting!
Oven Racks were old
-
Sandra M from DISTRICT HTS, MD
-
Difficulty Level:Very Easy
-
Total Repair Time:Less than 15 mins
1 person
found this instruction helpful.
Was this instruction helpful to you?
Thank you for voting!
Lower element burnt out.
This was really easy. I took out the lower oven racks. Most important - Turned off the breaker to the stove. Unscrewed the element and popped it out. Put in the new one and screwed it back in. Turned on the breaker and I was ready to go.
Parts Used:
-
Cynthia from Ellicott City, MD
-
Difficulty Level:Really Easy
-
Total Repair Time:Less than 15 mins
-
Tools:Screw drivers
2 of 4 people
found this instruction helpful.
Was this instruction helpful to you?
Thank you for voting!
Burned out burnrr
Went well. Husband, who has some appliance repair experience, did repair in less than a hour. Replacement burner was not an exact duplicate of original but he was able to adjust for that.
Parts Used:
-
Rita from COOPERSBURG, PA
-
Difficulty Level:Easy
-
Total Repair Time:30 - 60 mins
-
Tools:Pliers, Screw drivers, Socket set, Wrench (Adjustable), Wrench set
1 person
found this instruction helpful.
Was this instruction helpful to you?
Thank you for voting!